High Quality Chainsaw Bars Husqvarna Toys Hockfire Saws

262XP Rebuild - Junk Pile Save

huskyboy

Sorta a husqvarna guy...
Local time
12:36 PM
User ID
1352
Joined
May 30, 2016
Messages
10,025
Reaction score
43,475
Location
Ct
Country flag
Wow that 266 runs good. Great sound. Had to post this video since were on the topic of old 2 series husky and who doesn’t like buckin’ billy ray? Good guy.
 
Last edited:

Daserlon

Pinnacle OPE Member
Local time
10:36 AM
User ID
1272
Joined
May 11, 2016
Messages
555
Reaction score
3,047
Location
Montana
Country flag
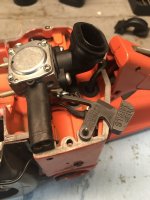
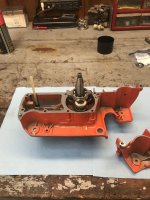
Look what showed up in the mail today. I have to get a bar and chain for it before I can cut anything. I need to find a nice chunk of wood to cut in because now I have 2 saws to tune in. This one and the 288 that Joe, Josh and Rattler did the cylinder for.0402181221.jpg0402181228.jpg
 

XP_Slinger

They’re Just Saws
Local time
12:36 PM
User ID
845
Joined
Feb 9, 2016
Messages
6,089
Reaction score
27,557
Location
Central NY
Country flag
Look what showed up in the mail today. I have to get a bar and chain for it before I can cut anything. I need to find a nice chunk of wood to cut in because now I have 2 saws to tune in. This one and the 288 that Joe, Josh and Rattler did the cylinder for.View attachment 118808View attachment 118810
Oh man can’t wait to hear the report on these 2 saws. Woop Woop !!!!
 

XP_Slinger

They’re Just Saws
Local time
12:36 PM
User ID
845
Joined
Feb 9, 2016
Messages
6,089
Reaction score
27,557
Location
Central NY
Country flag
My piston isn’t scheduled to arrive until early next week, dang it. In the mean time I’ll put together what I can.

Step 1: Crank bearings.

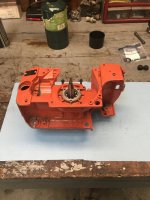
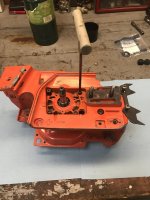
As per my normal routine I heat up the inner race a little with a propane torch and the bearings fall right on.

75F58752-AD66-4350-B00F-7F7EA4CB6691.jpeg D10131C5-84AD-48C0-8034-980935C5A4FC.jpeg
 

XP_Slinger

They’re Just Saws
Local time
12:36 PM
User ID
845
Joined
Feb 9, 2016
Messages
6,089
Reaction score
27,557
Location
Central NY
Country flag
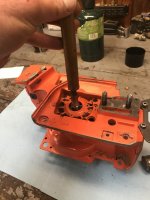
This time around I tried using my heat gun to heat the crank case, figured if it worked it would be a safer assembly technique. But, apparently my heat gun doesn’t blow hot enough because I was only able to seat the bearing half way in the case. I reverted to heating the case with the propane torch and she fell right in.

Gasket in place ready for the flywheel side of the case

D44E855B-EEB0-4B03-BECA-8776C14DA9E9.jpeg

Went together nice and smooth by hand. Looking good so far.

AEAB2A97-5D11-49F6-8152-321BDFC425E6.jpeg
 

XP_Slinger

They’re Just Saws
Local time
12:36 PM
User ID
845
Joined
Feb 9, 2016
Messages
6,089
Reaction score
27,557
Location
Central NY
Country flag
Time to tighten all the crank case bolts, I almost always forget to put the dog on at this point but I remembered this time...Win!

CF69505C-E4FF-43DB-8049-2B875ABA95B3.jpeg


As expected, the crank wasn’t spinning freely so I had to give it a couple knocks with a brass drift. Now it spins nice and silky smooth.

8606ADB3-CCA7-4691-A46F-DCA591D8916A.jpeg

Glad the fuel line grommet goes in easy with the cases together because I forgot to put it in place before assembling.

CC26B398-260B-4515-99D2-D1A34F2C2BB6.jpeg
 

XP_Slinger

They’re Just Saws
Local time
12:36 PM
User ID
845
Joined
Feb 9, 2016
Messages
6,089
Reaction score
27,557
Location
Central NY
Country flag
Now lets seal this sucker up.

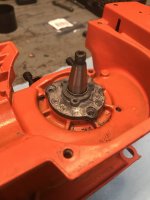
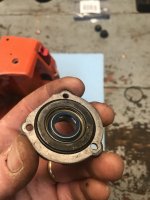
Once the O-ring and old seal is removed from the flywheel side retainer I put it in place to double check interference with the bearing. It’s sitting nice and flush so time to move on.

046B2B96-1069-4D97-A047-69807F70EBD8.jpeg

New seal and O-ring installed in retainer:

D7079F90-1EAD-4312-ACEF-E3B9F9A62366.jpeg

After oiling the bearing, retainer installed with 3 screws.

7BDE63BF-7A2F-42B4-876D-629077FF1F66.jpeg
 

XP_Slinger

They’re Just Saws
Local time
12:36 PM
User ID
845
Joined
Feb 9, 2016
Messages
6,089
Reaction score
27,557
Location
Central NY
Country flag
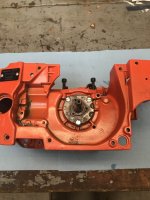
Next comes the much simpler clutch side seal. Simply drive it in so its about 1.5mm proud in the bore. If you drive it too deep the bearing will contact it which will likely ruin the seal in short order.

5C391E6E-511E-471F-B78C-2EE05AF82BE7.jpeg
 

XP_Slinger

They’re Just Saws
Local time
12:36 PM
User ID
845
Joined
Feb 9, 2016
Messages
6,089
Reaction score
27,557
Location
Central NY
Country flag
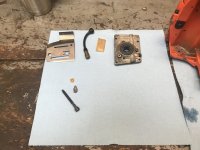
Moving on to the clutch side to install the oil pump and some other small stuff.

4014D575-8A8F-471A-B940-BB0AAABD71CE.jpeg

Make sure the output grommet is in place or the oil will never reach the bar.

19AEADC5-FFD7-479A-848A-95520ED11F28.jpeg

Don’t forget to install the oil pick up hose
78395C8F-ED3D-41BE-BB1F-D3F531DCB6FE.jpeg

Drop in the oil pump, tighten the screws, install the drive gear and it’s done. Also installed the chain slider, bar plate and new chain tensioner hardware. Of note, you may have noticed I didn’t reinstall the pump worm gear on the crank. That is because I upgraded the pump to the clutch driven version.

4FCBC6F0-3C59-4A77-ACA9-A30A0D599335.jpeg

Lastly I installed my incorrect 2 shoe clutch. The 262 uses a 3 shoe clutch but in a pinch the one I have will function. Will it slip? Maybe, but I’ll try it out and post results.

D013EE89-DBC3-472C-A510-6B8001745462.jpeg
 
Last edited:

XP_Slinger

They’re Just Saws
Local time
12:36 PM
User ID
845
Joined
Feb 9, 2016
Messages
6,089
Reaction score
27,557
Location
Central NY
Country flag
I put a new fuel line in the tank and only then did I realize that I forgot to get a fuel cap and new fuel filter...Doh!

0939B8D4-4C29-4FF6-8E26-680A740121CC.jpeg

Boneheaded forgetfulness aside, I went ahead and mounted the tank to the crank case.

73155C0F-C88F-4B76-8163-C6FE651ECAD3.jpeg
 
Last edited:

XP_Slinger

They’re Just Saws
Local time
12:36 PM
User ID
845
Joined
Feb 9, 2016
Messages
6,089
Reaction score
27,557
Location
Central NY
Country flag
Now onto the flywheel side.

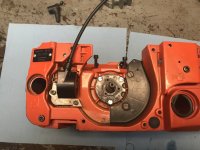
First I installed the air injection support and the coil.

9910EFD7-2E46-426A-978B-31A972F627FA.jpeg

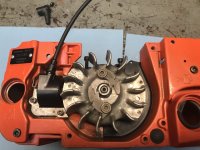
Then the flywheel

8B874357-87FA-4074-923B-BE90A78C7239.jpeg

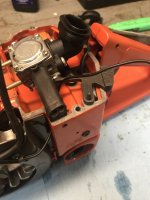
Remember how my kill wire was routed all wrong? Well, I mounted the carb and put all controls and grommets in place so I could determine proper routing in the carb box. The factory routing goes up and over the jet screw grommet, but since I’m making a new wire I’m going to route it underneath the grommet because I think it makes more sense. @drf256 pointed out that my routing was not factory, thanks Doc! Wouldn’t want those with less experience thinking up and over the grommet was wrong.

8F96E63D-7C5F-49A7-B906-42764ED92D2E.jpeg

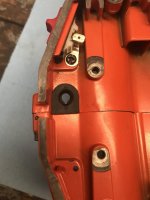
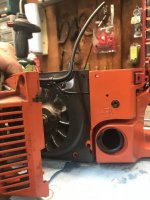
This notch in the starter housing is where the kill wire routes through.

59C3171A-CA0E-4BD0-8652-F4308060DA25.jpeg

New connector crimped on and shrink wrapped. Wire clears everything routed underneath the grommet.

C5314796-86C7-4C9A-86A1-4470F45E9E54.jpeg
 
Last edited:
Top