High Quality Chainsaw Bars Husqvarna Toys

Looking at my 1996 Stihl 036 top end

Wonkydonkey

Plastic member
Local time
10:17 AM
User ID
3189
Joined
May 14, 2017
Messages
4,609
Reaction score
18,458
Location
Sussex, UK.
Country flag
Today I decided to look at my 1996 stihl 036, I must have had it 5yrs and only changed exhaust because it was to restricted. It was a pea shooter type I will get the part number later
The oil pump had a leak so that got changed, I’m guessing because of the last owner using old engine oil. i also advanced the timing 20thou which made a difference.
However I’ve noticed it leaning out in the cut. So I retuned it. Then I noticed it was fat so I retuned it
Now it’s tuned to 13.5k and it starts to lean out again..
So I thought wtf,,, it’s time to take a look and try to get to the bottom of it and give it a clean.
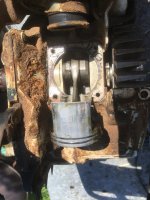
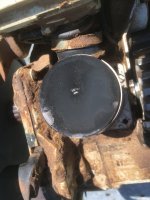
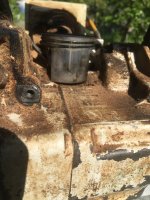
Pics to follow. I shall also look again at d0cs thread on the 034 036 thread. I may even add my cylinder pic if it’s different to his.
 

AKJonsereds

Super OPE Member
Local time
5:17 AM
User ID
1325
Joined
May 24, 2016
Messages
137
Reaction score
296
Location
Anchorage
Country flag
Interesting project. Will be watching your results. Have a 2095 doing the same thing. Pressure/vac test pass.... carb kit....new impulse hose.....new intake.... checked tank vent....still in the same place. Probably try another carb and fresh fuel hose....

Pretty annoying. I put her on the “self healing” shelf to deal with later....


Sent from my igloo
 

Wonkydonkey

Plastic member
Local time
10:17 AM
User ID
3189
Joined
May 14, 2017
Messages
4,609
Reaction score
18,458
Location
Sussex, UK.
Country flag
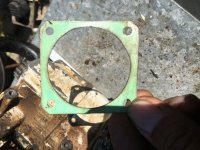
I took the squish before I took it apart, it was 24thou with all the carbon on the piston and the gasket in place. I wasn’t sure it even had one..

I just measured the gasket @ 16thou.
Looks like I will have to fashion somthing as a gasket once I clean the carbon off and get a squish

I know beer cans are different to coke cans, in thickness... so I guess I will have to wait, although, I may just try sanding the top of the cylinder to get a 20thou squish and no gasket.

let’s see how it works out
 

smokey7

Pinnacle OPE Member
Local time
5:17 AM
User ID
761
Joined
Feb 3, 2016
Messages
1,537
Reaction score
3,554
Location
Detroit
Country flag
I love the build threads we are seeing. I'm willing to bet you probably have some trash on the carb inlet screen. That's is likely what is causing your tune to lean out. Also I've had advanced timing cause issues on some some applications. In the nicest way possible I'm trying to say clean/blow the saw off as good as you can before you open up the cylinder\case. I cringe seeing that crap falling into the case.
 

Wonkydonkey

Plastic member
Local time
10:17 AM
User ID
3189
Joined
May 14, 2017
Messages
4,609
Reaction score
18,458
Location
Sussex, UK.
Country flag
Well yes some did fall into the case, but very little and it was in clumps. Once I got the piston off, I used a rag to stop anymore.
After the clean up of the case, I filled the case with 2stroke and flushed it twice.
The cylinder and piston got a long time in the ultrasonic bath. As did the carb.

while taking the carb off, I believe it had a very slight leak on the diaphragm and gasket carb body area. So maybe it was sucking a little bit of air. There was a little bit of crud on the gauze, Maybe the combination screwed the tuning. Anyhow a new carb kit has been fitted.

after the p&c clean up of all the carbon the squish was 16 thou without a gasket. I chose to scrape the slight manufacturing ridge/defect down with a chisel.
The squish Last time I checked was 19 thou.
While working on the cylinder I tickled a few orifices, I,m not that good at it, and thought to edge on the side of caution.. after all I don’t want to ruin a good cylinder.

I’ve still got new seals to put in. Which should be today. Then it’s Assembly time and I shall be taking some more pictures along the way.
 

Wonkydonkey

Plastic member
Local time
10:17 AM
User ID
3189
Joined
May 14, 2017
Messages
4,609
Reaction score
18,458
Location
Sussex, UK.
Country flag
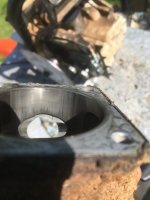
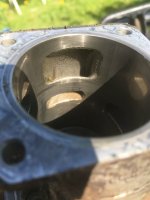
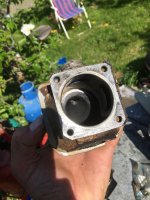
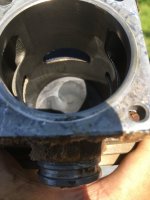
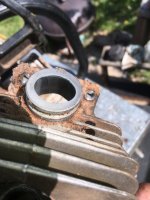
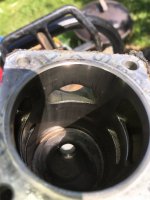
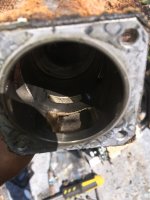
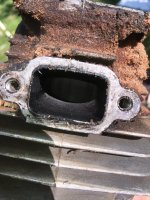
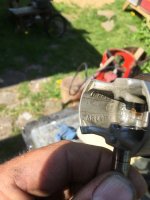
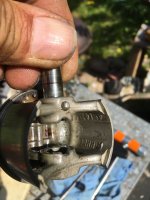
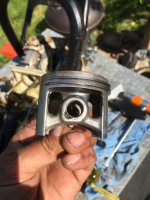
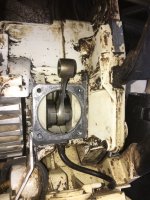
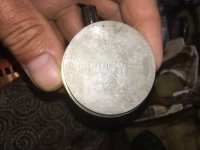
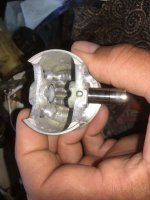
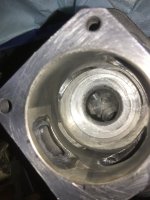
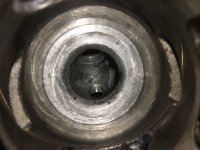
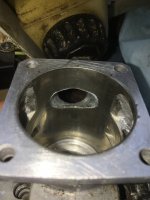
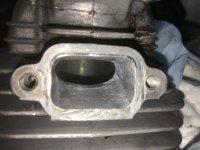
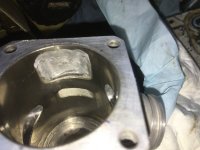
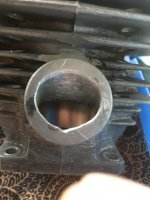
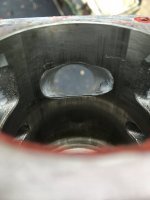
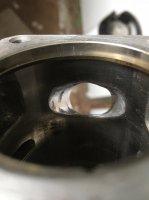
I decided not inlarge the intake all the way down to the lowest point. I went just a bit wider and a bit lower, I’m sure you can see from the pics.
E732F94E-6B81-479A-85CF-48A7EA5DFFB3.jpegA61ACC02-0CED-460A-8EE4-3DE39FAEB82E.jpeg21200063-9888-467C-ACD8-85307D069519.jpeg56D3C50C-BC1B-4EC9-A102-6DF556F7714A.jpeg
 

angusjones8

Well-Known OPE Member
Local time
5:17 AM
User ID
797
Joined
Feb 5, 2016
Messages
28
Reaction score
42
Location
Nsw
Country flag
I love the build threads we are seeing. I'm willing to bet you probably have some trash on the carb inlet screen. That's is likely what is causing your tune to lean out. Also I've had advanced timing cause issues on some some applications. In the nicest way possible I'm trying to say clean/blow the saw off as good as you can before you open up the cylinder\case. I cringe seeing that crap falling into the case.

I was going to say clean the saw before you pull it down too.


Sent from my iPhone using Tapatalk
 

Wonkydonkey

Plastic member
Local time
10:17 AM
User ID
3189
Joined
May 14, 2017
Messages
4,609
Reaction score
18,458
Location
Sussex, UK.
Country flag
Well the news is, it works.. I set the carb to std setting. I couldnt find my tacho.. but ran the saw anyway...it.sounded lean...and cut like a mfer...in 16” beech with the 18” bar.. 1st vid

I eventually found my tacho, it was a bit lean ... oops:rolleyes:
, the 2nd vid I played with the tune a bit, I think I settled 14k at the end..
 

drf256

Dr. Richard Cranium
GoldMember
Local time
5:17 AM
User ID
319
Joined
Dec 29, 2015
Messages
9,371
Reaction score
61,581
Location
Strong Island NY
Country flag
Saw looks good.

Sorry if I missed it, but did you sand that band at all? Can use sticky backed sandpaper and the piston.

Where did the squish wind up?

Sean, as you probably know already, you can’t use a tach to set tune in a saw that’s been modified in any way from factory specs. Once you play with it, it must be tuned by ear.

The 1125’s are very limited by their air filters. Try a metal mesh one if you can find.
 

Wonkydonkey

Plastic member
Local time
10:17 AM
User ID
3189
Joined
May 14, 2017
Messages
4,609
Reaction score
18,458
Location
Sussex, UK.
Country flag
@drf256 . I got a wood chisel and scraped enough out of the casting flash ridge at the top. as it was 16thou without the gaskets I got it to 19thou on one side and 20thou on the other.
I couldn’t find or fashion anything to sand it at the time..and didn’t fancy taking the rings off the piston.
do you think I should have given a light sanding.

Timing was advanced 20thou on the key. I also opened up the muffler a little.
I didn’t change the port timings other than by deleting the gasket.

It was lean in the 1st vid :rolleyes: The end of the 2nd is we’re I left it around 14k.

I could go into the saw again as I have time on my hands to play and experiment a bit more, and the best is the saw is still clean.
Although it’s hard to get some things as a lot of shops are closed.
 

drf256

Dr. Richard Cranium
GoldMember
Local time
5:17 AM
User ID
319
Joined
Dec 29, 2015
Messages
9,371
Reaction score
61,581
Location
Strong Island NY
Country flag
Didn’t take rings off piston? How did you clean it up after you cleaned the crown up?

They come off easily. The factory rings are more flexible than you think.

I’d wanna check the intake skirt to see if your bevels are good enough and not wearing into skirt.

You can go to 30 on that key easily, so 10 more.
 

Wonkydonkey

Plastic member
Local time
10:17 AM
User ID
3189
Joined
May 14, 2017
Messages
4,609
Reaction score
18,458
Location
Sussex, UK.
Country flag
I put the piston in the Ultrasonic bath with some Degrease solution for 1/2hr or more. Then ran it under the tap for a few mins to flush it clean and paying particular attention around the rings, Then dried which was by putting it in a warm oven. took the casting ridges off the piston and flushed it with the tap water, and repeated the cleaning the same way.

It’s had about 1/2 tank through it since.
I will take it apart and check all is ok, I’m sure we will be able to see if there are any different marks to the piston skirt ;),

I didn’t retake the timings since deleting the gasket so I will take this opportunity.


I have a key with 30thou off already as the 044 didn’t seem to like that much off, so I shall try it in this saw :D
The air filter on my saw is a nylon # 11251021607 as I have the zama intel carb like this one and not the flocked type
https://www.forestershop.com/replacement-chainsaw-air-filter-fo-0289.html
Those wire gauze air filters are few and far between here in the uk. do you have a part number in case I'm looking in the wrong direction
it looks like another rainy day tomorrow, so I shall dig back in..:zpong:

Thanks.
 

Wonkydonkey

Plastic member
Local time
10:17 AM
User ID
3189
Joined
May 14, 2017
Messages
4,609
Reaction score
18,458
Location
Sussex, UK.
Country flag
Update, it’s been taken apart, pics to follow.
I've compared the before and after pics, but sadly/or stupidly I only got pic's the piston with all the oil on when I first took it apart.:(

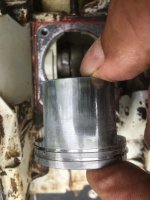
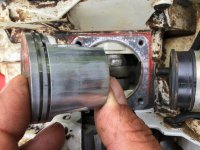
this time I’ve got both oil still on and wiped off, I think it’s had to say about the bevel, but I’ve since sanded them some more..
There seems to be some scratches on the intake of the piston that I don’t remember. So more than likely I never cleaned it enough.
Uncleaned intake
9889B0E4-7D2D-433A-999F-B33F57080068.jpeg
Cleaned intake
DA862135-9465-4689-9A20-9FCF8F143507.jpeg

Exhaust uncleaned
31945B61-C275-4EFD-8BEF-D351BAC80A06.jpeg

Exhaust cleaned
DDB593A2-5606-4C85-90AF-09F39331F9CD.jpeg
 

Wonkydonkey

Plastic member
Local time
10:17 AM
User ID
3189
Joined
May 14, 2017
Messages
4,609
Reaction score
18,458
Location
Sussex, UK.
Country flag
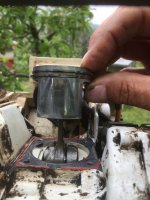
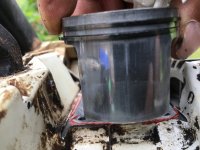
I’ve sanded the intake bevel, as before and after
AC5319AE-9BCA-432F-9FF8-D4FE2A4ECC3B.jpeg
I know it needs flushing of the sandings
A54A0D79-9200-4706-BAFE-1D06E2E255C4.jpeg
Edit, you may notice a ring in the last pic,, as I took one off, I shall do the other and try sanding the cylinder just a little
 
Last edited:
Top