High Quality Chainsaw Bars Husqvarna Toys Hockfire Saws

Let's Build a 266

jacktheripper

Papa Squat
GoldMember
Local time
10:41 AM
User ID
28875
Joined
Apr 5, 2024
Messages
376
Reaction score
1,145
Location
Wyoming
Country flag
Hello,

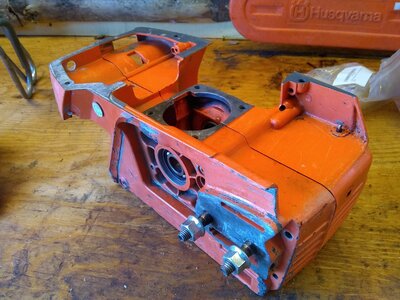
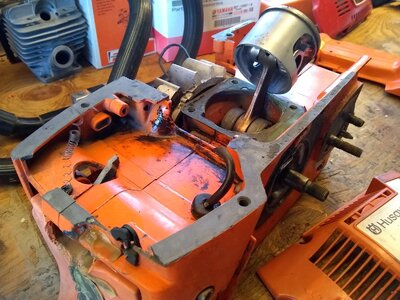
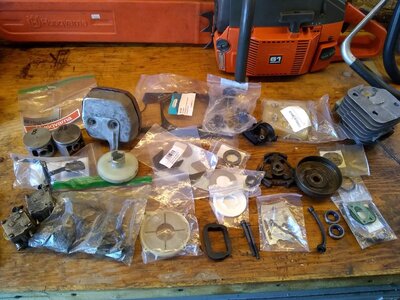
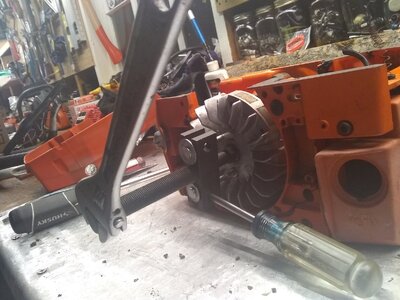
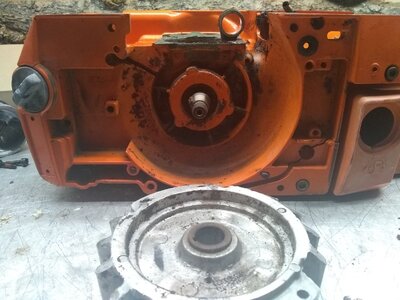
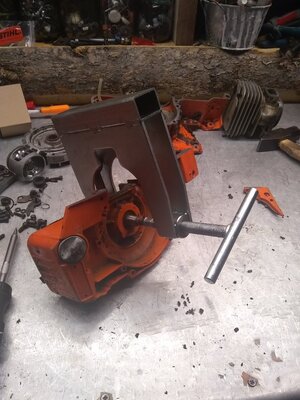
As I stated on another thread, I will be documenting the build of yet another 266. This one will be a total parts-bin build, with lots of parts from @Woodwackr and @HumBurner. I will also attempt to get some moderate gains with a light woods port job.

I built four other 266's over the summer, and kept the best of them for myself. I might end up keeping this one also...

The 266 is a legendary saw, in the same lineage as the 162, which came out in 1976! Arguably the best-respected among its peers the 162, 61, 66, 268, 272, and Jonsereds 625, 630, and 670. Ask almost any old logger and they'll recall the 266 being used for felling, most likely with high regard for its durability and power.

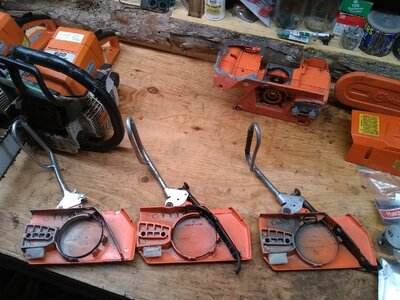
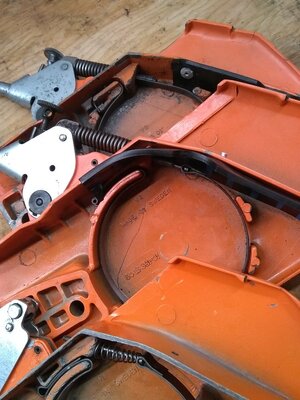
The 266 came out in 1981 as the 266se. The saw came out as the 266xp in 1987-ish with a series of rolling changes, such as a bigger carb, different chain brake mechanism, various mufflers, etc taking place. Production continued into 1990's at the TOMOS factory in Yugoslavia, concurrently with the 268.

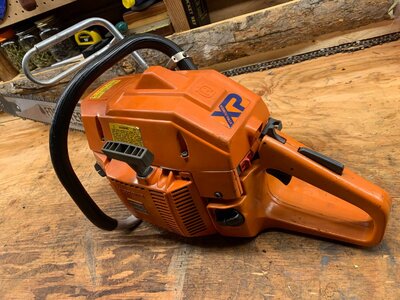
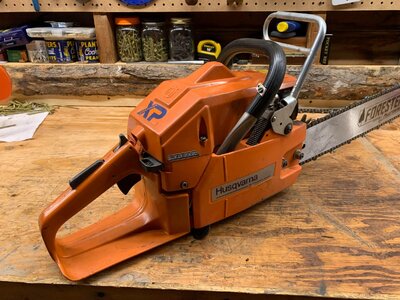
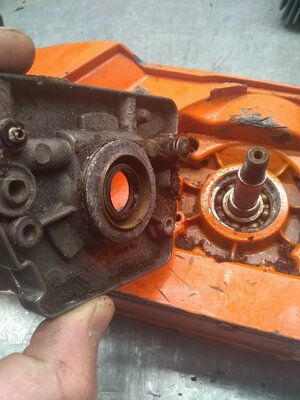
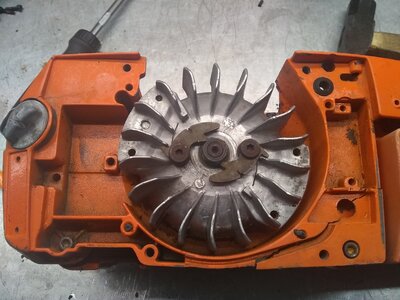
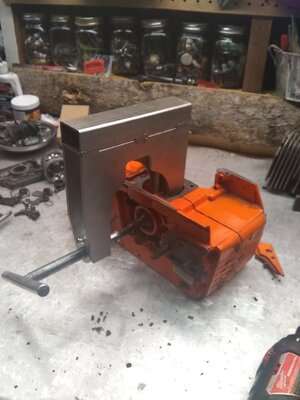
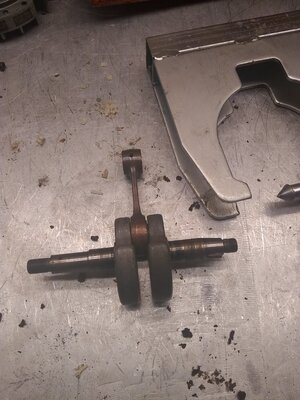
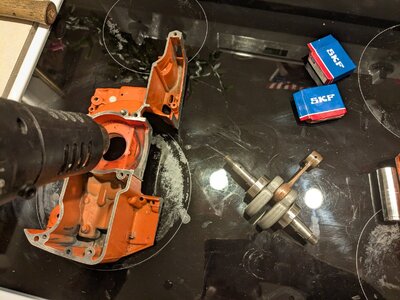
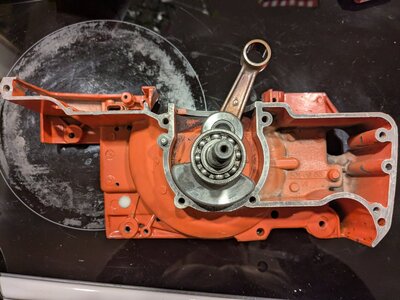
This saw will feature a 266se case and chain brake, 266xp cylinder and carb, 61 muffler, and TOMOS 266 crank and piston, all finished off with XP livery.

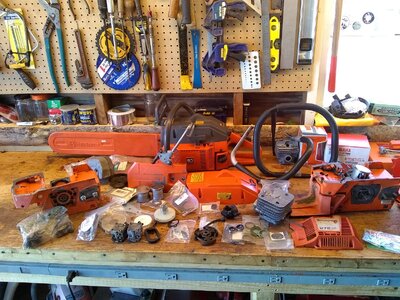
I also have a nice full-wrap handle to install. The saw will hopefully look something like this when I'm done, but with the wrap.
 

Attachments

  • IMG_0200 (2).jpg
    IMG_0200 (2).jpg
    246 KB · Views: 25
  • IMG_0201 (2).jpg
    IMG_0201 (2).jpg
    237.7 KB · Views: 22

jacktheripper

Papa Squat
GoldMember
Local time
10:41 AM
User ID
28875
Joined
Apr 5, 2024
Messages
376
Reaction score
1,145
Location
Wyoming
Country flag
I just got the cases cleaned up today in the parts washer. The donor TOMOS saw's cases were cracked in a few places, so I will steal the crank, flywheel, seal carrier, and oil pump from it.
 

Attachments

  • IMG_20250121_151934186.jpg
    IMG_20250121_151934186.jpg
    208 KB · Views: 17
  • IMG_20250121_152205940.jpg
    IMG_20250121_152205940.jpg
    219.8 KB · Views: 24

jacktheripper

Papa Squat
GoldMember
Local time
10:41 AM
User ID
28875
Joined
Apr 5, 2024
Messages
376
Reaction score
1,145
Location
Wyoming
Country flag
Also, I picked up two clutch covers with the metal brake lever from an old shop yesterday. They were in the parts bin. One is from a very early 162/61, the other is more of a "middle stage", and then there is the more common later model metal one, which I am putting on my saw. They are in order in the photos from left to right. Not bad for $25. The early model (left one) one is missing the big spring and screw to connect it to the band. Anyone have those pieces of hardware around?
 

Attachments

  • IMG_20250121_181049254.jpg
    IMG_20250121_181049254.jpg
    237.8 KB · Views: 21
  • IMG_20250121_181159009.jpg
    IMG_20250121_181159009.jpg
    145.1 KB · Views: 17
  • IMG_20250121_181037233.jpg
    IMG_20250121_181037233.jpg
    167.8 KB · Views: 17

Woodwackr

Here For The Long Haul!
GoldMember
Local time
10:41 AM
User ID
28333
Joined
Jan 18, 2024
Messages
3,507
Reaction score
16,205
Location
ID
Country flag
Also, I picked up two clutch covers with the metal brake lever from an old shop yesterday. They were in the parts bin. One is from a very early 162/61, the other is more of a "middle stage", and then there is the more common later model metal one, which I am putting on my saw. They are in order in the photos from left to right. Not bad for $25. The early model (left one) one is missing the big spring and screw to connect it to the band. Anyone have those pieces of hardware around?
Dang, why can't I fine stuff like that?
 

jacktheripper

Papa Squat
GoldMember
Local time
10:41 AM
User ID
28875
Joined
Apr 5, 2024
Messages
376
Reaction score
1,145
Location
Wyoming
Country flag
I started stripping down the TOMOS donor carcass. First step was removing the oil pump. This is also the carrier for the clutch side crank seal, and it seals to the crank case with a small-diameter O-ring. I immediately noticed that my oil pump had some mag rot on the inside of the seal carrier ring. It may clean up, but we'll see.
 

Attachments

  • IMG_20250121_183419618.jpg
    IMG_20250121_183419618.jpg
    120 KB · Views: 16

Woodwackr

Here For The Long Haul!
GoldMember
Local time
10:41 AM
User ID
28333
Joined
Jan 18, 2024
Messages
3,507
Reaction score
16,205
Location
ID
Country flag
I started stripping down the TOMOS donor carcass. First step was removing the oil pump. This is also the carrier for the clutch side crank seal, and it seals to the crank case with a small-diameter O-ring. I immediately noticed that my oil pump had some mag rot on the inside of the seal carrier ring. It may clean up, but we'll see.
I have a bunch from the group of SEs I processed, if you need one.
 

jacktheripper

Papa Squat
GoldMember
Local time
10:41 AM
User ID
28875
Joined
Apr 5, 2024
Messages
376
Reaction score
1,145
Location
Wyoming
Country flag
Next step was removing the flywheel. Remove the two 4mm hex head machine screws that retain the starter pawls and springs. Make sure not to lose the little washers. Then use an impact with 14mm socket to remove the flywheel nut, while holding the flywheel firmly. Remove the washer behind the nut, and then loosely thread the nut back on to the threads.
 

Attachments

  • IMG_20250121_183450553.jpg
    IMG_20250121_183450553.jpg
    183.7 KB · Views: 13
  • IMG_20250121_183633552.jpg
    IMG_20250121_183633552.jpg
    187 KB · Views: 14

jacktheripper

Papa Squat
GoldMember
Local time
10:41 AM
User ID
28875
Joined
Apr 5, 2024
Messages
376
Reaction score
1,145
Location
Wyoming
Country flag
I use pieces of a two-jaw puller and some long studs from an 044 carb box housing to pull the flywheel off. Make sure you thread the nut onto the crank before doing this, as you don't want to mushroom the crank where it is dimpled on the end.

When I got the flywheel off, I was surprised to find that there was no plastic seal carrier on the flywheel side crank case. The TOMOS saws must have been different than the Electrolux ones in this way. Regardless, now I will need a seal carrier and the associated screws for my build as well...
 

Attachments

  • IMG_20250121_183747630.jpg
    IMG_20250121_183747630.jpg
    169.5 KB · Views: 14
  • IMG_20250121_183858898.jpg
    IMG_20250121_183858898.jpg
    169.3 KB · Views: 21
  • IMG_20250121_184029238.jpg
    IMG_20250121_184029238.jpg
    170.1 KB · Views: 23

jacktheripper

Papa Squat
GoldMember
Local time
10:41 AM
User ID
28875
Joined
Apr 5, 2024
Messages
376
Reaction score
1,145
Location
Wyoming
Country flag
The next step was to split the case. Remove the handle by removing the three screws on each side that thread into the AV mounts. Remove the fuel line as well. Then clean out the heads of the four machine screws under where the oil pump was, and remove them. There are also two long screws that seal the oil tank and hold the bucking spike on the front. Remove these as well. I just realized as I was splitting the case that I am missing these screws as well.

Then use a case splitter tool to remove one side of the crankcase from the crankshaft. Then do the same on the other side. A bit of heat from a heat gun can help if it feels very stuck. I should have threaded the nut back on the flywheel side, but I forgot to. Luckily, it came off fairly easily.

I use this tool, and it has been fine for me. https://www.ebay.com/itm/355564417713
 

Attachments

  • IMG_20250121_184617960.jpg
    IMG_20250121_184617960.jpg
    147.1 KB · Views: 18
  • IMG_20250121_184454366.jpg
    IMG_20250121_184454366.jpg
    96.8 KB · Views: 20
  • IMG_20250121_184337387.jpg
    IMG_20250121_184337387.jpg
    186.5 KB · Views: 26
  • IMG_20250121_184705971.jpg
    IMG_20250121_184705971.jpg
    166.3 KB · Views: 17
Last edited:

Woodwackr

Here For The Long Haul!
GoldMember
Local time
10:41 AM
User ID
28333
Joined
Jan 18, 2024
Messages
3,507
Reaction score
16,205
Location
ID
Country flag
The next step was to split the case. Remove the handle by removing the three screws on each side that thread into the AV mounts. Remove the fuel line as well. Then clean out the heads of the four machine screws under where the oil pump was, and remove them. There are also two long screws that seal the oil tank and hold the bucking spike on the front. Remove these as well. I just realized as I was splitting the case that I am missing these screws as well.

Then use a case splitter tool to remove one side of the crankcase from the crankshaft. Then do the same on the other side. A bit of heat from a heat gun can help if it feels very stuck. I should have threaded the nut back on the flywheel side, but I forgot to. Luckily, it came off fairly easily.

I use this tool, and it has been fine for me. https://www.ebay.com/itm/355564417713
So, what is the orange thing that is in place of a seal holder on the FW side?
 
Last edited:

jacktheripper

Papa Squat
GoldMember
Local time
10:41 AM
User ID
28875
Joined
Apr 5, 2024
Messages
376
Reaction score
1,145
Location
Wyoming
Country flag
Ok, I'm back at it. I had a few saws to get done for other people in the time being - I rebuilt a 288 for a customer, converted an ms290 into a 390 for a buddy, got an old Jiffy ice auger running for another friend, and took a big trip to Santa Fe for work. I also got some parts in that I have been needing, many thanks to @Woodwackr.

Last night I assembled the cases and rotating assembly.

Step 1: Get the bearings installed on the crank. I first cleaned up the crank surfaces with some emery cloth until they were nicely polished. Then I took my bearings out, removed the inserted seals from them, and used solvent and an air gun to clean the grease out of them.

I used SKF Explorer 6202 c3 bearings for this - package says made in China. I didn't know that when I ordered them, but we'll run them and see how they do. They looked good and felt smooth.

When the bearings and crank are all prepped, hold the bearing with some slip-joint pliers and heat them until they are very hot with a heat gun. Then immediately slip the bearing onto the crankshaft so that it bottoms out on the lobe, and them come out just a hair. This was not very scientific. Do this for each side. I didn't get pictures of the process. I did all this on my kitchen stove top, because it was cold as heck in the garage, and the stove top was a good heat-tolerant surface to work on.
 

Attachments

  • PXL_20250218_051702290.MP.jpg
    PXL_20250218_051702290.MP.jpg
    174.7 KB · Views: 3

jacktheripper

Papa Squat
GoldMember
Local time
10:41 AM
User ID
28875
Joined
Apr 5, 2024
Messages
376
Reaction score
1,145
Location
Wyoming
Country flag
Step 2: Install crank assembly into flywheel side case half

I cleaned up the bearing pocket on the flywheel side case half lightly with some emery cloth, and then with a green scotchbrite pad. Then I used the heat gun to get the bearing pocket very hot. It can be helpful to stick the crank assembly into the freezer for a little while to cool it down from the heat of the bearings that you just slipped on.

When the case is pretty hot, take your crank (make sure it is oriented correctly, with the tapered end going on the flywheel side) and slide the bearing into the pocket. You want to be careful to judge the depth correctly, so the bearing doesn't stick too far into the case. It should be slightly inward from the inside of the case. If you get this wrong, you can use the heat gun to heat the case up again, and lightly tap on the crank with a hammer. Make sure you use a nut to cover the threads if you do this.
 

Attachments

  • PXL_20250218_051740506.jpg
    PXL_20250218_051740506.jpg
    224.2 KB · Views: 3
  • PXL_20250218_052205939.jpg
    PXL_20250218_052205939.jpg
    197.3 KB · Views: 3
Top