High Quality Chainsaw Bars Husqvarna Toys Hockfire Saws

FarmerTec 660 "Kit" - What's the latest on quality?

MustangMike

Mastermind Approved!
Local time
4:48 PM
User ID
338
Joined
Dec 30, 2015
Messages
11,486
Reaction score
36,226
Location
Brewster, NY
Country flag
I have not had any new 660 kits for a while, the last one was when the Blue covers first showed up.

The major change was a gizmo on the carb to make the hi idle work. It works sometimes, but not always.

I think they improved a few other things (I likely posted them), but don't remember what they were.
 

stihl_head1982

Here long time
Local time
4:48 PM
User ID
168
Joined
Dec 24, 2015
Messages
4,153
Reaction score
14,546
Location
USA
Country flag
3 friends and I bought saws recently, I ordered the g372xp and my friend ordered a 660, I know the color of the 372 has changed. When they all get delivered 3 of us will go over the saws for quality control.
The 036 I rebuilt this year I had a farmertech, Hyway and an OEM cylinder. Comparing all 3 side by side the Hyway looked the best of all 3. The farmertech had very restricted ports inside the cylinder and the outside had alot of the casting line unfinished, I used the Hyway and it is an excellent performing saw.


Would be interested to know how the 660 comes out. Have a friend that wants me to build one. Have been hesitant to pull the trigger. Thanks for the input.
 

afleetcommand

Pinnacle OPE Member
Local time
4:48 PM
User ID
2524
Joined
Jan 25, 2017
Messages
979
Reaction score
3,947
Location
CNY
Country flag
Hoping the rumors are true on some of the upgrades already done. Materials and some of the parts certainly since 2018, but really even at the level they were back when I was dealing with them, they were a hoot and with 100 bucks or so were within striking distance of a true work saw.
 

Jason628

Super OPE Member
Local time
1:48 PM
User ID
14651
Joined
Nov 21, 2020
Messages
479
Reaction score
1,108
Location
Washington
Country flag
Hoping the rumors are true on some of the upgrades already done. Materials and some of the parts certainly since 2018, but really even at the level they were back when I was dealing with them, they were a hoot and with 100 bucks or so were within striking distance of a true work saw.

I just ordered the MS660 kit for a winter project. I've been binge watching your videos and many others... I plan on starting with what is in the box and then upgrading as issues arise. I did order an extra gasket/seal kit from hyway. I would like to thank you for all your videos and information. Now I'm aware of the issues I may have and how to easily fix them. If this build goes well I would like to build an 036 or Ms361. My dad has an 036 pro and I love that saw for cutting firewood. I've owned an 046 mag and actually prefer the 036 for the stuff I usually cut. Anyways I'll probably post on my findings with the 066 and any issues I have and the fixes. I understand the quality of parts changes from time to time and no two kits are completely alike so it will be interesting and fun putting this thing together.
 

MustangMike

Mastermind Approved!
Local time
4:48 PM
User ID
338
Joined
Dec 30, 2015
Messages
11,486
Reaction score
36,226
Location
Brewster, NY
Country flag
Welcome to the site, and looking forward to your posts. I'm very curious if they have worked out most of the bugs.

Even so, I would still flush the bearings out with WD-40 before spinning them (in the past they have had grit) and would replace the piston pin bearing (a known weakness on the older kits, and why loose a saw for a $10 part).
 

Nutball

Here For The Long Haul!
Local time
3:48 PM
User ID
7732
Joined
Oct 31, 2018
Messages
4,214
Reaction score
11,651
Location
Mt. Juliet, TN
Country flag
Mine has lasted around 10-30 tanks on the original bearing. I chose to try it since it had more pins than the Cross bearing. I think I'll take it apart soon, swap the bearing, and raise the transfers and intake. Right now it's at about 103,125,84 if I measured correctly.
 

MustangMike

Mastermind Approved!
Local time
4:48 PM
User ID
338
Joined
Dec 30, 2015
Messages
11,486
Reaction score
36,226
Location
Brewster, NY
Country flag
If it is working fine, leave it. I took mine apart when I noticed an slight increase in vibrations, and that was the cause. May have just been a bad batch, but others reported problems with them also, so for $10 I just started replacing them. (Note: they are often cheaper directly from your local dealer than they are on line).
 

Jason628

Super OPE Member
Local time
1:48 PM
User ID
14651
Joined
Nov 21, 2020
Messages
479
Reaction score
1,108
Location
Washington
Country flag
Thanks, I'll stop by the stihl dealer and pick one up. I've read mixed reviews on the farmertec wrist pin bearing but, since the OEM part is cheap I will pick one up. I had to order some tools to put the crankcase together. Going to order the pressure test adapter and a degree wheel as well... it will probably be a month before I get my kit. Taking the slow boat over from china haha.
 

MustangMike

Mastermind Approved!
Local time
4:48 PM
User ID
338
Joined
Dec 30, 2015
Messages
11,486
Reaction score
36,226
Location
Brewster, NY
Country flag
The degree wheel and pressure tester are good ideas.

I don't use tools (except a HF Heat Gun) to assemble the cases.

I put the side of the case with the threads on 2 pieces of 2 X 4 (for clearance), heat the bearing, and the crank drops right in. Wear gloves, don't burn yourself! Make sure the rod is "up" so the crank fits into the case.

Make sure your case pins are in tight (this has been a problem) as they can cause great damage if they move after the saw is done (especially the one that goes into the clutch area).

I then heat the other bearing (be careful, that one usually has a nylon race that can not be over heated) and start it down the crank and align with the case pins. (Don't forget the gasket, I leave them dry) It usually does not go all the way down for me, but goes down enough for me to start the case bolts.

Get a 6" long T-27 bit and put it in a cordless drill to make things go faster. Also get a T handle T-27 if you don't already have one. I do a "torque pattern" on the bolts on setting "5", then tap the case with a hammer, then repeat on setting "10", repeat tapping, then "15" and keep going on 15 till it meets.

When you are finished, look to see if the crank is centered. Even if it looks centered you will want to tap it (moderate taps) in both directions with a steel hammer. This will center your crank and bearings and you will keep doing it until the crank spins freely (the seals will always provide some resistance).

Speaking of, don't forget to coat the seals with Vaseline or grease, and I always purchase extra seals (in advance) in case you ruin one (it is always the one on the second portion of the case, be careful when it goes over the lip of the crank.

Best of luck with it, hope this information helps you. I've done about a dozen cases this way w/o any problems, save two bad seals! (The seals are pre installed, you can leave them in).

Clean all bearings and lube them with WD-40 before assembly. Also make sure the cases are clean. One of the biggest problems is they often ship things with grit in them. Check main bearings and crank bearings before assembly, they should be smooth and free of any play.
 

Jason628

Super OPE Member
Local time
1:48 PM
User ID
14651
Joined
Nov 21, 2020
Messages
479
Reaction score
1,108
Location
Washington
Country flag
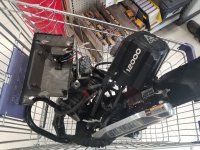
This year we didn't have much of a firewood cutting season because, it went from really dry to snowing then it warmed up a bit and rained a bunch. Pretty much closed the roads to where we go get firewood. About a week ago my buddy buried his 01 gmc sierra 2500. Tried to winch out with his badland apex 12000 and it exploded. Luckily harbor freight warrantied it.
 

Attachments

  • 20201118_133659.jpg
    20201118_133659.jpg
    238.5 KB · Views: 38

Jason628

Super OPE Member
Local time
1:48 PM
User ID
14651
Joined
Nov 21, 2020
Messages
479
Reaction score
1,108
Location
Washington
Country flag
The degree wheel and pressure tester are good ideas.

I don't use tools (except a HF Heat Gun) to assemble the cases.

I put the side of the case with the threads on 2 pieces of 2 X 4 (for clearance), heat the bearing, and the crank drops right in. Wear gloves, don't burn yourself! Make sure the rod is "up" so the crank fits into the case.

Make sure your case pins are in tight (this has been a problem) as they can cause great damage if they move after the saw is done (especially the one that goes into the clutch area).

I then heat the other bearing (be careful, that one usually has a nylon race that can not be over heated) and start it down the crank and align with the case pins. (Don't forget the gasket, I leave them dry) It usually does not go all the way down for me, but goes down enough for me to start the case bolts.

Get a 6" long T-27 bit and put it in a cordless drill to make things go faster. Also get a T handle T-27 if you don't already have one. I do a "torque pattern" on the bolts on setting "5", then tap the case with a hammer, then repeat on setting "10", repeat tapping, then "15" and keep going on 15 till it meets.

When you are finished, look to see if the crank is centered. Even if it looks centered you will want to tap it (moderate taps) in both directions with a steel hammer. This will center your crank and bearings and you will keep doing it until the crank spins freely (the seals will always provide some resistance).

Speaking of, don't forget to coat the seals with Vaseline or grease, and I always purchase extra seals (in advance) in case you ruin one (it is always the one on the second portion of the case, be careful when it goes over the lip of the crank.

Best of luck with it, hope this information helps you. I've done about a dozen cases this way w/o any problems, save two bad seals! (The seals are pre installed, you can leave them in).

Clean all bearings and lube them with WD-40 before assembly. Also make sure the cases are clean. One of the biggest problems is they often ship things with grit in them. Check main bearings and crank bearings before assembly, they should be smooth and free of any play.

Ya I will thoroughly clean everything before assembly and check on the clearances and port timing and stuff I can. I plan on going back through my buddies ms200t I did a top end and crank seals on years ago. It ran ok for a while and something went wrong with it... now it's hard to start and doesn't have much power. So I'll probably do the vacuum/pressure test on it and check everything over until I find the issue. It was kind of a pain in the butt to work on but, now I'll get all the right tools and thoroughly go through it. Again... lol
 

Czed

Aluminium Member
GoldMember
Local time
4:48 PM
User ID
568
Joined
Jan 17, 2016
Messages
33,265
Reaction score
189,825
Location
Wv
Country flag
Wow under $200.00 shipped. (From what I've learned a person needs to replace the wrist pin bearing, possibly purge the crank bearings, anything else?).
I have no experience with the 660 kits
These other guy's do.
I never liked the real 660s lol

I do like the 365/372 kits mine have paid for themselves
No mechanical failures no bad bearings
Just fuel/pulse line's suck.
 

stihl_head1982

Here long time
Local time
4:48 PM
User ID
168
Joined
Dec 24, 2015
Messages
4,153
Reaction score
14,546
Location
USA
Country flag
I have no experience with the 660 kits
These other guy's do.
I never liked the real 660s lol

I do like the 365/372 kits mine have paid for themselves
No mechanical failures no bad bearings
Just fuel/pulse line's suck.

With the extended delays on shipping I'm not in yet to pull the trigger.
I am hearing as much as 2 months on some shipments like this.
Makes me wonder if HLS has a stateside black Friday deal or something?
 

Jason628

Super OPE Member
Local time
1:48 PM
User ID
14651
Joined
Nov 21, 2020
Messages
479
Reaction score
1,108
Location
Washington
Country flag
Wow under $200.00 shipped. (From what I've learned a person needs to replace the wrist pin bearing, possibly purge the crank bearings, anything else?).

Yes, wish it was on sale when I bought mine 5 days ago haha. Paid $230 for mine. Hope it doesn't take two months to get it.... I'll probably forget I ordered it by the time it shows up haha.
 

Maintenance Chief

Disrupting the peace with an old chainsaw
Local time
4:48 PM
User ID
11378
Joined
Jan 4, 2020
Messages
3,915
Reaction score
12,623
Location
South Carolina
Country flag
Ok, so my friend showed up with the g660 and the g372xp today .
We took all the covers off the g660 and checked the squish .029 , both sides of the piston. And we replaced both decomps with oem Husqvarna.
All's I can say is that disassembling the 660 there wasn't a loose fitting or anything ill fitted the over all appearance was very well put together and I mean everything, it came with a full wrap(3/4) big spikes and nothing seemed flimsy or haphazardly rigged.
We took the saw out to the wood pile filled it with 32:1 97 octane ethanol free synthetic mix and bar oil.
Now you have to understand my buddy is a fine carpenter, intricate jewelry boxes ,fine furniture ect... so his first saw was a sh¡t Poulan.
I did a preliminary tune of our carburetors and I focused on my buddy getting the 660 started, I told him first fire maybe 8 or so pulls it should start . 5 pulls later it was running perfectly (idle was a little high but not running the chain) . He let it warm up amd proceeded to cut for about 45min . Honestly it performed perfectly not a hiccup no weirdness nothing , now all I had was a 25" es bar and a loop of skip so he wasn't over working it . That 660 is one nice saw.
 

Maintenance Chief

Disrupting the peace with an old chainsaw
Local time
4:48 PM
User ID
11378
Joined
Jan 4, 2020
Messages
3,915
Reaction score
12,623
Location
South Carolina
Country flag
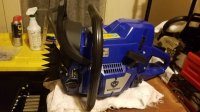
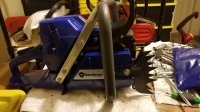
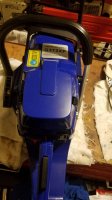
20201127_180018.jpg 20201127_182416.jpg 20201127_180036.jpg
I wish the same could be said for the saw I ordered, everything was tight ( despite YouTube chainsaw wizards checking every screw with maticious over tightening grunts) ,the tank seems smoother than the early ones I've seen.
The saw ran like garbage when it first started and wouldn't throttle up ? Apparently part of the problem was the filter was twisted in the tank(guess they missed that?) ,but the carburetor is finicky and even hunts idle alot.
It took me about an hr to get it idling and cutting normally ( I simply don't trust it now though, so that effects some decisions for future plans).
The plastic clips for the air cleaner feel like they are waiting to brake and the filter is held down by a garbage washer with a wing nut.
The saw runs strong though , completely on par with my other 70cc saws and other experiences with the OEM 372xp ( which also didn't make me see Jesus) so all in all dont expect the 372xp to be the same quality as the 660 clone ( just my raw experience).
 
Top