High Quality Chainsaw Bars Husqvarna Toys Hockfire Saws

What's on your bench?

WillG

Here For The Long Haul!
Local time
12:54 PM
User ID
10686
Joined
Oct 10, 2019
Messages
1,728
Reaction score
9,041
Location
Norwich CT
Country flag
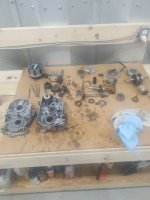
Mower deck fun...not...used the shop vac to clean off the top so I could see how bad the rot is...it's pretty bad. Gonna bandaid and patch to get me through the mowing season while I look for a replacement deck. Spindles are fine. Idler pulleys are fine as well. Hopefully a patch job, secure the baffle and lift bracket with some angle iron, some paint and a new belt will make her last just a little longer.
57808b65947dc3efc8db403b03e09521.jpg
f755b08ac7183de3e676c21bd7ba2ec9.jpg
f813eb17f4e19810230f59e944370866.jpg
7452829b38102d0f92afd5517bc57ea5.jpg
812be333a76701cf686b8758b794ad63.jpg


Sent from my E6910 using Tapatalk
 

av8or3

So many saw ... so little time...
GoldMember
Local time
12:54 PM
User ID
9318
Joined
Apr 24, 2019
Messages
1,885
Reaction score
7,838
Location
Waleska,Ga.
Country flag
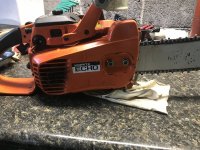
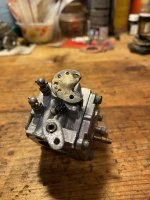
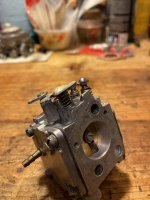
Highlight of my Sat morning. Saving this very hard to get HS6 after the bellcrank broke off the throttle shaft while I was wrenching it from the saw. That never happened before. :confused: It had been kinda repaired before and I finished it off. Anyway, tried some new silver solder we have at work and it stuck, good. Hopefully it will last. 1B117494-CFF7-474B-A797-9A7EA1E2F819.jpeg91613FB8-509C-4981-9E62-959C2DF21349.jpeg
 

MustangMike

Mastermind Approved!
Local time
12:54 PM
User ID
338
Joined
Dec 30, 2015
Messages
11,439
Reaction score
35,946
Location
Brewster, NY
Country flag
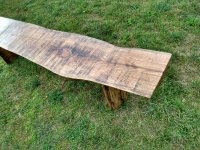
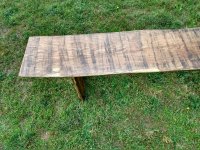
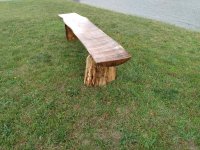
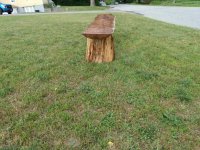
Delivered this bench to my Daughter today. It is Red Oak, very stout (even though it needed some work) and will live outdoors with it's Spar Urethane coating. Everything is half round (bench + legs) and it has some character!
 

Attachments

  • IMG_20200619_171802858_HDR.jpg
    IMG_20200619_171802858_HDR.jpg
    444.3 KB · Views: 39
  • IMG_20200619_171811977_HDR.jpg
    IMG_20200619_171811977_HDR.jpg
    448.8 KB · Views: 46
  • IMG_20200619_171832382.jpg
    IMG_20200619_171832382.jpg
    405.4 KB · Views: 43
  • IMG_20200619_171841891.jpg
    IMG_20200619_171841891.jpg
    369.8 KB · Views: 34

MustangMike

Mastermind Approved!
Local time
12:54 PM
User ID
338
Joined
Dec 30, 2015
Messages
11,439
Reaction score
35,946
Location
Brewster, NY
Country flag
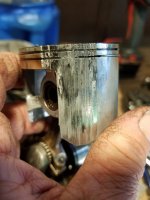
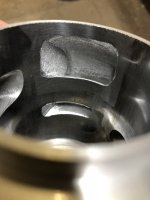
Had 6 unused OEM jugs on my bench today, did some crude measurements, and concluded the following:

Compared a 066 from a round top decomp saw (I ran it briefly on an Asian 660) to a 660 jug. The 066 jug is Stihl and the 660 is Mahle.

The 066 jug had squish of .020 w/o a BG and is 3 + 5/32 deep. The 660 jug is 3 + 3/16 deep, so it will likely have excess squish unless I hit it with a belt sander (Ha, Ha).

The port #s were very close on both jugs (except that I lowered the intake on the 066 a bit), but there is a noticeable difference in the transfers. The 066 jug transfers are smoother, and the lower transfer is wider. That and the tighter squish should make it run better. Both jugs have a lot of room to widen both the Ex and In ports, and I plan to do that before re using one of them.

I plan to put the OEM 066 jug on my OEM 066 saw, and transfer the Cross P+C to my Asian saw. (FYI, this is the saw in the HL Supply video for the Cross 660 jug). I will also port the Cross jug during the transfer.
 

MustangMike

Mastermind Approved!
Local time
12:54 PM
User ID
338
Joined
Dec 30, 2015
Messages
11,439
Reaction score
35,946
Location
Brewster, NY
Country flag
I also checked a 046-D Mahle jug, a 460 Mahle jug, a 440 Stihl jug, and a 044 (12 mm straight fin) Stihl jug.

I compared them to a New West BB jug that I had previously checked with a degree wheel. The #s for the NW BB were Ex 100, Tr 120 and In 66.

All 5 jugs have a total depth of 2 + 27/32, so all should have squish of approx. .020 (but I will check each one).

The NW Ex is 31/32 from the squish band. The 044 is a bit higher at 15/16 while the other 3 were all a bit lower at 1", so those 3 should have an Ex numerically a little above 100.

The 440 and 044 seemed to have the Tr at the same height as the NW BB, but the 046-D was a hair higher and the 460 was a hair lower.

Even though the piston pin spacing on the 12 mm 044 is wide, the intake port is noticeably more narrow than the 440 intake port (Stihl widened the intake ports at some point in time resulting in increase Hp ratings). They can both still go wider, and the low hanging fruit (IMO) is to lower the intakes some.

I still have 2 unbuilt Asian 440 kits and plan to use the 440 jug on one of them (with a Meteor piston) and either the 046-D or 460 jug on the other with an OEM piston (I purchased a few of them). Will be interesting to see if I can get them to run better than the NW BB jugs. The upper transfers on the NW jugs are not as wide as the OEM jugs. This could be hurting performance.
 
Last edited:

MustangMike

Mastermind Approved!
Local time
12:54 PM
User ID
338
Joined
Dec 30, 2015
Messages
11,439
Reaction score
35,946
Location
Brewster, NY
Country flag
So on all these builds I plan to widen the Ex and lower and widen the Intakes.

Where I get unsure of myself is the transfers. Many of my strongest running saws have bridge ports, but some builders say they are not needed if the transfer ports are done right. The 066 jug has such nice looking transfers I may just try leaving them out on that jug. It ran pretty well the way it was on the Asian platform, and I'm sure the mods to the Ex and In will improve it further.

I'm considering widening the lower transfers on the other jugs to put a little more pressure on the uppers, but that would also increase case capacity, which may not be a good thing.

Comments from anyone with more experience would be appreciated. This will be my first time seriously modding OEM jugs, and I don't want to blow it!

Thanks.
 

Mastermind

Chief Cat Herder
Staff member
GoldMember
Local time
11:54 AM
User ID
4
Joined
Dec 3, 2015
Messages
48,550
Reaction score
316,124
Location
Banner Springs Tennessee
Country flag
Thanks for the pic Kevin, just wish there was a "before" pic also to get a better perspective of the amount you changed it.

Most of the time not nearly as much material removable is needed as most folks think. It's more often a matter of removing material in just the right place, and at times adding some is more helpful.
 
Top