High Quality Chainsaw Bars Husqvarna Toys Hockfire Saws

Husqvarna 576xp - FixerUpper

hacskaroly

Pinnacle OPE Member
Local time
7:31 AM
User ID
27954
Joined
Nov 24, 2023
Messages
895
Reaction score
2,772
Location
Northern Idaho
Country flag
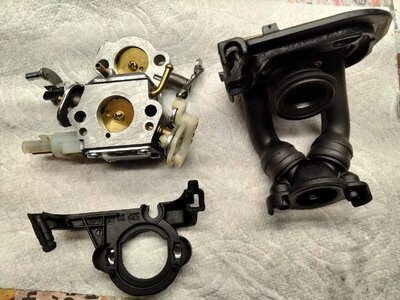
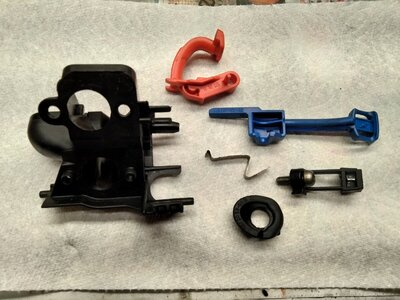
I have cleaned and reassembled the carburetor and the intake boot setup.
576 Carb Parts 1.jpg
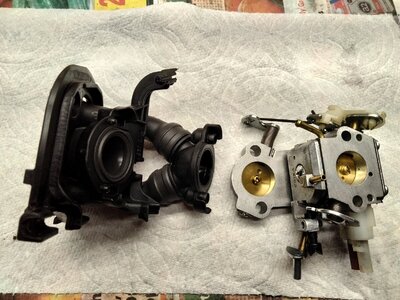
Since I found the saw already disassembled, I have to keep referring to the IPL and prefitting everything to make sure I get back together correctly.
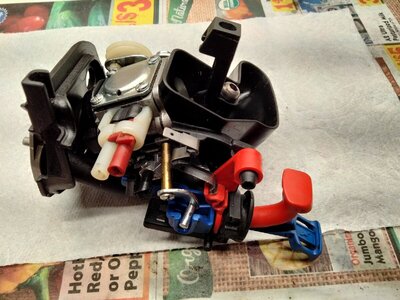
576 Carb Parts 2.jpg
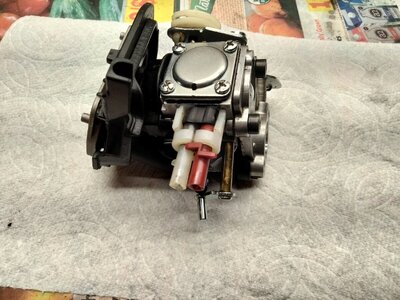
First connection made, the screws are in there temporarily to hold them together and make sure everything actuates correctly.
576 Carb Parts 3.jpg
 

hacskaroly

Pinnacle OPE Member
Local time
7:31 AM
User ID
27954
Joined
Nov 24, 2023
Messages
895
Reaction score
2,772
Location
Northern Idaho
Country flag
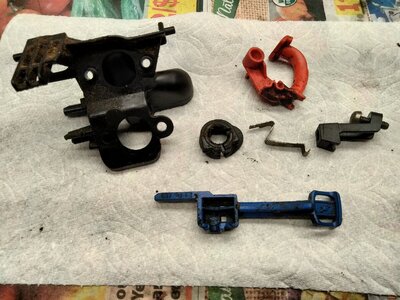
Next, working on the air filter elbow and choke/stop lever, all parts are there, but really dirty.
576 Elbow Throttle 1.jpg
I don't have a nozzle for my air compressor to blow all of the crud off, so I take my time with a screw driver, de-greaser, q-tips and paper towels. While time consuming, the stuff looks pretty good in the end.
576 Elbow Throttle 2.jpg
Final assembly of these components to the carb. I can't find the two shorter screws that connect the two, so I need to check the IPL and see what I can find that might work. Otherwise, so far everything is matching up and working properly.
576 Elbow Throttle 3.jpg
 

hacskaroly

Pinnacle OPE Member
Local time
7:31 AM
User ID
27954
Joined
Nov 24, 2023
Messages
895
Reaction score
2,772
Location
Northern Idaho
Country flag
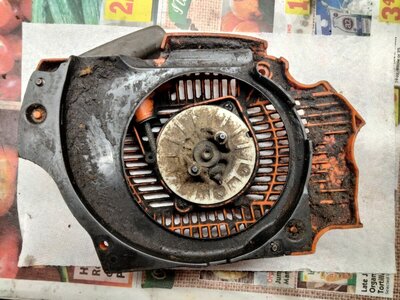
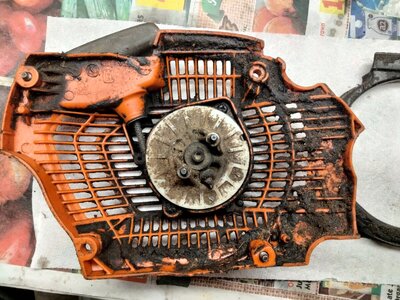
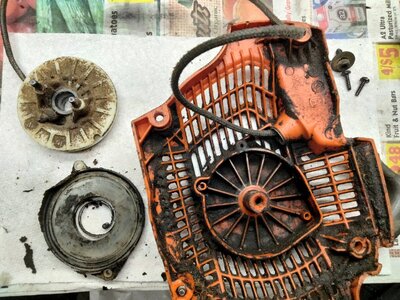
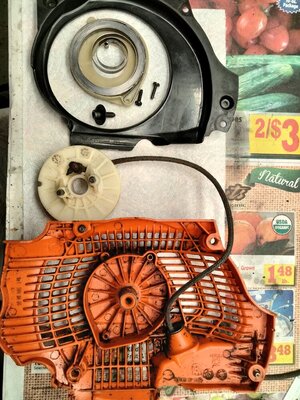
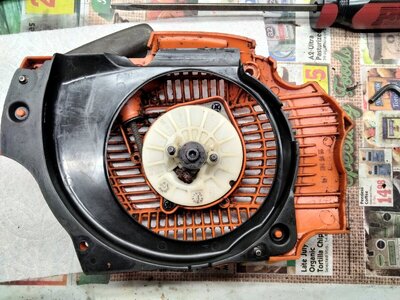
Next up is the recoil assembly. I have found so far if the saw is grimy, then it is very likely the recoil spring has some gunk in it, making it harder to recoil or stop recoiling all together. While not as bad as some others I have worked on, this one had some stuck on grime.
576 Recoil 1.jpg

576 Recoil 2.jpg

576 Recoil 3.jpg
I left the pull rope attached because it is in good shape, just a bit dirty. I took the rest apart to give it a good cleaning.
 
Last edited:

hacskaroly

Pinnacle OPE Member
Local time
7:31 AM
User ID
27954
Joined
Nov 24, 2023
Messages
895
Reaction score
2,772
Location
Northern Idaho
Country flag
I found one of the dollar stores has a box of 300 cotton swabs for $1.25, so I got a few boxes, they sure help when getting into the nooks and crannies! Helps get most everything without the luxury of an air compressor!
576 Recoil 5.jpg
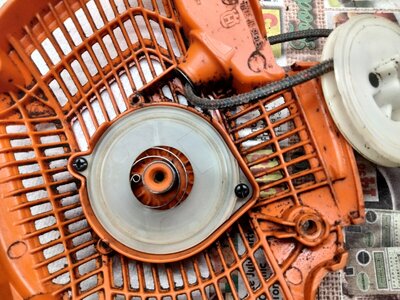
The spring went back in fairly easy, though I did have to pull it out, mate it up with the starter pulley assembly and then reinstall it.
576 Recoil 6.jpg
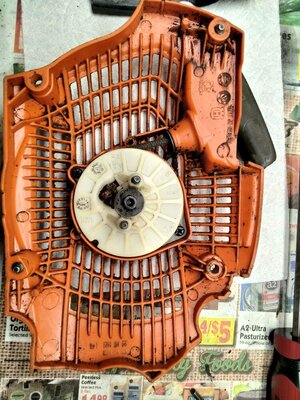
With the pull starter back in, it snaps back into place now when pulled. Sure makes a difference cleaning out the spring.
576 Recoil 7.jpg
With the air conductor back in place, this assembly is ready to go back on the saw.
576 Recoil 8.jpg
 

hacskaroly

Pinnacle OPE Member
Local time
7:31 AM
User ID
27954
Joined
Nov 24, 2023
Messages
895
Reaction score
2,772
Location
Northern Idaho
Country flag
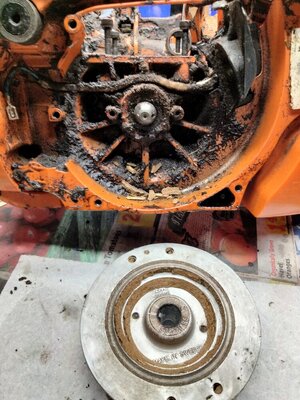
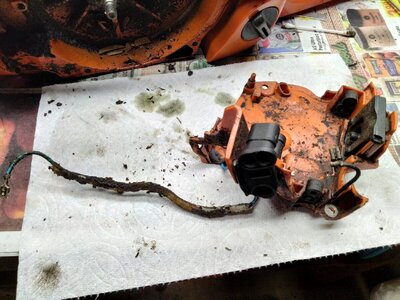
At this point I decided to remove the Carburetor Area Base plate, however I ran into an issue with the wire that leads to the coil. I tried to feed the wire through the hole it comes through and the connector would not fit. The wire leads behind the flywheel and is fitted in a plastic trough, so I could not pull it through that end. At this point, I had to remove the flywheel to get the wire out.
576 Flywheel.jpg
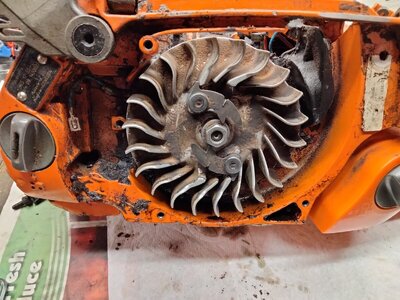
I recently bought a flywheel puller, but in accordance with Murphy's Law, does not fit this flywheel. I resorted to loosening the flywheel nut and then used my blacksmith hammer, gave it a few taps and the flywheel came off.
576 Flywheel Off.jpg
From here, I was able to get the wire worked out of its groove and the carburetor area base plate removed for cleaning.
576 Carb Area Base Off.jpg
 

hacskaroly

Pinnacle OPE Member
Local time
7:31 AM
User ID
27954
Joined
Nov 24, 2023
Messages
895
Reaction score
2,772
Location
Northern Idaho
Country flag
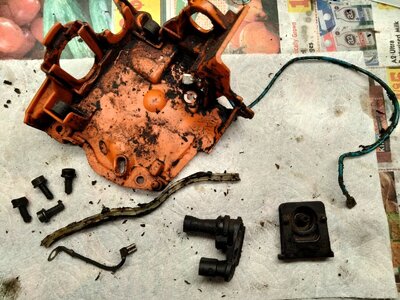
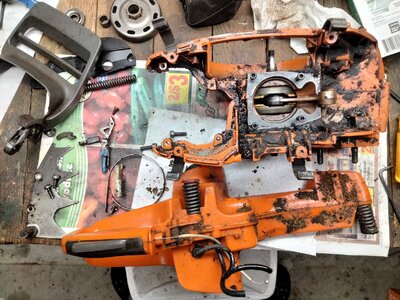
First step before cleaning is to take everything off that can come off.

576 Carb Base Area Apart.jpg

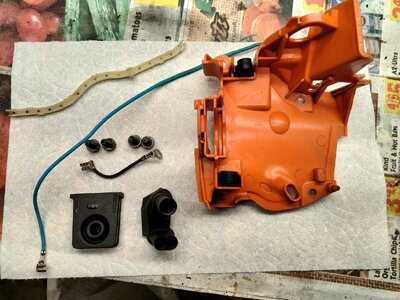
During the cleaning, I removed the dirt from around the wire and found that there is enough room to slide the wire out...so there is a way to take off the carburetor area base plate without having to take off the flywheel. No worries, the flywheel needed to come off for cleaning anyway! With the carb area plate and its associated parts clean, I put them in a box while the rest of the saw gets cleaned.

576 Carb Base Area Clean.jpg
 
Last edited:

hacskaroly

Pinnacle OPE Member
Local time
7:31 AM
User ID
27954
Joined
Nov 24, 2023
Messages
895
Reaction score
2,772
Location
Northern Idaho
Country flag
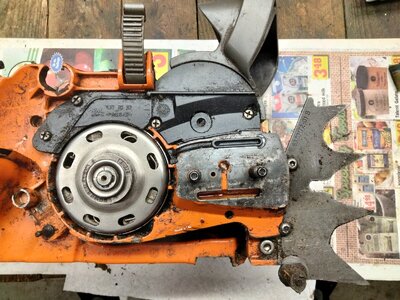
Next up, I worked on disassembling the clutch and chain brake assemblies. Not too bad looking with the clutch cover off.
576 01 clutch.jpg
Removed the chain brake cover and pulled the main spring.
576 02 clutch.jpg
Pulled the rest of the chain brake assembly.
576 03 clutch.jpg
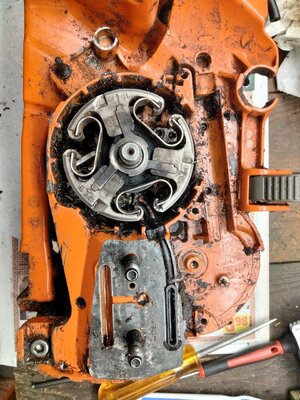
I tried to get the clutch off, but am having issues. I immobilized the piston rod. Unfortunately I don't have a clutch puller that will fit this clutch. I tried using a screwdriver on the edge detents to knock it free, but it didn't work. I am thinking I will need to put the piston and cylinder back on and put in a piston stop/rope and give it another try. I decided to separate the fuel tank at this time too.
576 04 gastank off.jpg
Dirty clutch cover and parts.
576 05 clutch cover dirty.jpg
 

hacskaroly

Pinnacle OPE Member
Local time
7:31 AM
User ID
27954
Joined
Nov 24, 2023
Messages
895
Reaction score
2,772
Location
Northern Idaho
Country flag
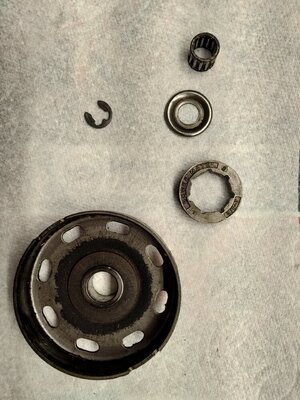
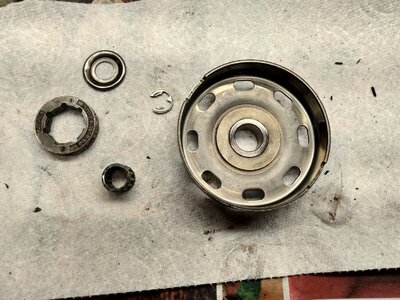
Clutch cover and associated parts are cleaned, needle bearing will be greased before re-installation.
576 07 clean clutch cover.jpg
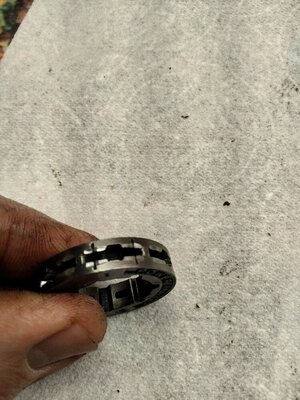
Looking at the rim sprocket, what is a good way to tell if it is ready to be replaced when looking at it? I know Stihl recommends changing them every two chains, but what is your practice?
576 rim sprocket.jpg
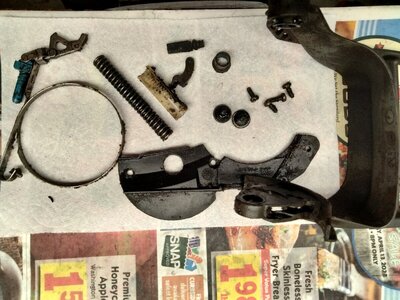
Next up is the chain brake assembly....dirty image first:
576 08 dirty chainbrake.jpg
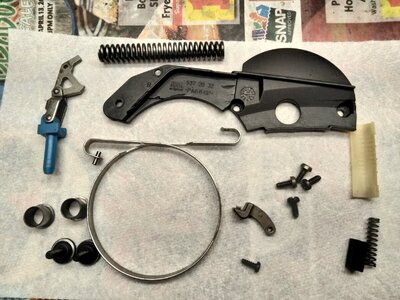
Parts after cleaning. Will have to wait until I clean the main body to put them all back in.
576 09 clean chainbrake.jpg
 

Squareground3691

Here For The Long Haul!
Local time
10:31 AM
User ID
16376
Joined
May 1, 2021
Messages
2,739
Reaction score
12,658
Location
New England
Country flag
Clutch cover and associated parts are cleaned, needle bearing will be greased before re-installation.
View attachment 404236
Looking at the rim sprocket, what is a good way to tell if it is ready to be replaced when looking at it? I know Stihl recommends changing them every two chains, but what is your practice?
View attachment 404237
Next up is the chain brake assembly....dirty image first:
View attachment 404238
Parts after cleaning. Will have to wait until I clean the main body to put them all back in.
View attachment 404240
I’ll say one thing, 576’s are silky smooth 👍
 

Mastermind

Chief Cat Herder
Staff member
Yearly GoldMember
Local time
9:31 AM
User ID
4
Joined
Dec 3, 2015
Messages
50,066
Reaction score
330,176
Location
Banner Springs Tennessee
Country flag
Looking at the rim sprocket, what is a good way to tell if it is ready to be replaced when looking at it? I know Stihl recommends changing them every two chains, but what is your practice?
That one will run awhile longer.
 

hacskaroly

Pinnacle OPE Member
Local time
7:31 AM
User ID
27954
Joined
Nov 24, 2023
Messages
895
Reaction score
2,772
Location
Northern Idaho
Country flag
That one will run awhile longer.
Thanks, I have not run a saw long enough to have to change one out yet, but have seen a few come in the shop that were obviously ready for a change, especially those that converted from a one piece rim to a two-to-three piece rim...

I have felt the drivers on chains start to get really rough when a chain is run loose or a rim is worn out. They are fairly cheap enough to not have to run them to the very end to milk every cent out of it.
 

beaglebriar

The Peanut Gallery
GoldMember
Local time
10:31 AM
User ID
377
Joined
Jan 1, 2016
Messages
18,795
Reaction score
105,884
Location
Warren Center, PA
Country flag
In my opinion you have to pull that clutch and check the crank bearing for play. The bearing pocket on these saws are known to fail on the clutch side. You can butcher up a one inch deep well socket or similar to make a clutch puller or find something about the right diameter and make one. The one I have is made from a large wrist pin. Hit it with an impact and it’ll come off, no need to reassemble. Hold onto the rod, I usually wear a glove cuz it’ll wanna pinch your hand.
 

hacskaroly

Pinnacle OPE Member
Local time
7:31 AM
User ID
27954
Joined
Nov 24, 2023
Messages
895
Reaction score
2,772
Location
Northern Idaho
Country flag
Pics for reference. If you have access to a mill this will be easy. I made mine with a death wheel in a 4” grinder iirc… It’s been awhile. Or buy one but what’s the fun in that?
I appreciate the reference photos. Unfortunately I do not have access to a mill, I will have to look for another way, maybe with an angle grinder or something. That does give me a better idea what I need! I am definitely going to get the clutch off before this all goes back together, just getting off all the crap on the outside, so there is less chance of it getting around the crank. The last 372 I worked on had issues with the crank going around, come to find out when someone else took off the cylinder, they knocked some junk in there and apparently there was a 1/2" long piece of metal that got in there and prevented the cylinder from going around. I flushed it a couple of times with mix fuel and it finally washed out and the crank could spin freely.
 

Maintenance Chief

Disrupting the peace with an old chainsaw
Local time
10:31 AM
User ID
11378
Joined
Jan 4, 2020
Messages
3,864
Reaction score
12,370
Location
South Carolina
Country flag
I made my clutch removal socket with a 4.5" grinder/cut off wheel.
I jamb a wooden dowel, plastic handle,rope,rag, or whatever into the crankcase to hold the crankshaft while removing the clutch. A scrench through the wrist pin resting on some blocks works to.
I've taken a big adjustable wrench and closed the jaws in the clutch and turned it off with another adjustable wrench too.
 

hacskaroly

Pinnacle OPE Member
Local time
7:31 AM
User ID
27954
Joined
Nov 24, 2023
Messages
895
Reaction score
2,772
Location
Northern Idaho
Country flag
I made my clutch removal socket with a 4.5" grinder/cut off wheel.
I jamb a wooden dowel, plastic handle,rope,rag, or whatever into the crankcase to hold the crankshaft while removing the clutch. A scrench through the wrist pin resting on some blocks works to.
I've taken a big adjustable wrench and closed the jaws in the clutch and turned it off with another adjustable wrench too.
I made one myself as well, but the clutch was so tight I couldn't get it to work.
Ended up losing patience and hitting it with a punch and a hammer. Damaged more than I should have.

Then I ordered the official clutch tool and it really works the best for me.
I might have to try the adjustable wrench trick...but in the end I might be best off buying the actual tool...depends on how badly I scrape up my knuckles in the process...lol.
 
Top