High Quality Chainsaw Bars Husqvarna Toys

372 X-torq Mod Discussion Final Woods Port Video Posted

XP_Slinger

They’re Just Saws
Local time
2:42 AM
User ID
845
Joined
Feb 9, 2016
Messages
6,089
Reaction score
27,519
Location
Central NY
Country flag
Due to growing interest in another thread I'd like to get a conversation going on x-torq mods and porting.

So here's where I'm at. My 372XT has had the base gasket deleted (.024 squish), a muffler mod and reshaped lower transfers to more effectively "funnel" the crankcase charge into the transfers.

Today I am going to remove all strato dividers in the intake chain of components (filter mount, carb, intake boot). In addition to this I'm also going to reshape the cylinder intake to enhance flow and possibly make it favor the main intake passage vs the small strato ports that are above it. Another member was kind enough to provide me with some of his porting numbers and I intend to document the numbers on my stock cylinder to compare. I'd like to get some brain storming going on porting and even general mod theories for this model as there seems to be a growing interest in them.
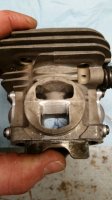
I will be posting pics of before and after of what I do today to aid in understanding of how this design works for those that may not be familiar. For starters, here is a pic of what I did to my lower transfers a few weeks ago. The first pic shows the difference between the stock lower transfer.
20160101_142458.jpg 20160101_153215.jpg
 

mdavlee

Hillbilly grinder
Local time
2:42 AM
User ID
279
Joined
Dec 28, 2015
Messages
14,194
Reaction score
64,602
Location
TN
Country flag
I say do the other stuff first before you gut it. Once you do there's no going back. You can try the other mods first and if you decide you want to see if more is there gut the stratos
 

Keith Gandy

Maxima K2 40:1 87 Pump Gas
Local time
1:42 AM
User ID
341
Joined
Dec 30, 2015
Messages
6,207
Reaction score
16,189
Location
Provencal, Louisiana
Country flag
I say do the other stuff first before you gut it. Once you do there's no going back. You can try the other mods first and if you decide you want to see if more is there gut the stratos
Ever gutted one Mike??
 

XP_Slinger

They’re Just Saws
Local time
2:42 AM
User ID
845
Joined
Feb 9, 2016
Messages
6,089
Reaction score
27,519
Location
Central NY
Country flag
Currently out on a mission to find a sleeve to extend the crank shaft so I can mount my degree wheel.
 
Last edited:

XP_Slinger

They’re Just Saws
Local time
2:42 AM
User ID
845
Joined
Feb 9, 2016
Messages
6,089
Reaction score
27,519
Location
Central NY
Country flag
I've done them both ways......and I don't gut them.

If you do decide to gut it......leave the divider in the carb.

Wish I would've checked the forum throughout the day. I already removed the divider and now that you mention it, it makes sense to leave it in to "aim" the fuel + air charge towards the the main intake passage. I'm fixin to post pics in this thread of everything I did today. Might take a bit, Big fingers, little phone...lol
 

XP_Slinger

They’re Just Saws
Local time
2:42 AM
User ID
845
Joined
Feb 9, 2016
Messages
6,089
Reaction score
27,519
Location
Central NY
Country flag
I like that reshaping of the lower transfers. Thanks for sharing that pic. I'm going to add that to my 2166 test mule that I've been working on. :clap2:

No problem Spike, glad I was able to help. Looking forward to running these mules.
 

XP_Slinger

They’re Just Saws
Local time
2:42 AM
User ID
845
Joined
Feb 9, 2016
Messages
6,089
Reaction score
27,519
Location
Central NY
Country flag
Step 1: Filter Mount

Pretty straight forward, I clipped the majority of the divider out with dikes then smoothed everything out with a dremel. TIP: keep the dremel speed low, too much speed melts the plastic very fast and makes it a little more time consuming to clean up after the cutting is done.

20160220_124723.jpg
 

XP_Slinger

They’re Just Saws
Local time
2:42 AM
User ID
845
Joined
Feb 9, 2016
Messages
6,089
Reaction score
27,519
Location
Central NY
Country flag
Step 2: Carb Divider (Or not, to try a different method mentioned by mastermind above).

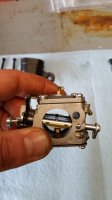
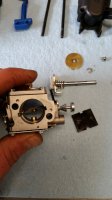
This step is a little more intricate. To remove the divider you have to remove the throttle butterfly and shaft. Once the shaft is removed simply pull the divider out of the carb via the slot that it resides in. My divider needed gentle persuasion with needle nose pliers. TIP: The retention screw for the butterfly had low grade thread locker on it. I reapplied low grade locker upon reassembly. Cheap insurance to keep a saw killing screw out of your crank case.

Before:
20160220_115053.jpg

After:

20160220_121726.jpg
 

XP_Slinger

They’re Just Saws
Local time
2:42 AM
User ID
845
Joined
Feb 9, 2016
Messages
6,089
Reaction score
27,519
Location
Central NY
Country flag
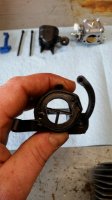
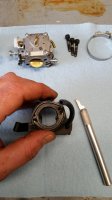
Step 3: Intake Boot

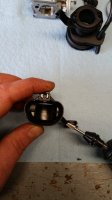
This step is very delicate, if you're not careful you WILL cut a hole in your intake boot. Take your time and pay close attention to what collateral damage could be done by portions of your blade that aren't cutting the intended material. The hobby knife in the picture worked especially well for this.

Before:

20160220_115031.jpg

After:

20160220_120502.jpg
 

XP_Slinger

They’re Just Saws
Local time
2:42 AM
User ID
845
Joined
Feb 9, 2016
Messages
6,089
Reaction score
27,519
Location
Central NY
Country flag
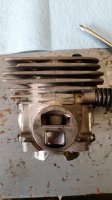
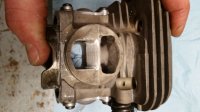
Step 4: Cylinder Intake

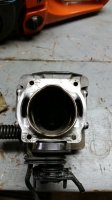
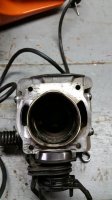
This step is more experimental than the previous ones. I had 2 schools of thought, 1st; blend the edges between the ports to smooth out the flow, or 2nd; blend them but make the flow favor the main (lower) intake passage. I opted for the 2nd option. I continued the intake roof angle up through the material between the main and strato passages. I didn't make the intake wider down lower because the intake boot was actually fit to its shape very closely. The stratos were largely untouched with the exception of bringing the edge together with the lower intake.

Before:

20160220_114953.jpg

After:

20160220_133309.jpg

Sorry about the rotation...but I thinks it's still easy to see the difference.
 

XP_Slinger

They’re Just Saws
Local time
2:42 AM
User ID
845
Joined
Feb 9, 2016
Messages
6,089
Reaction score
27,519
Location
Central NY
Country flag
Step 4: Cylinder Intake

This step is more experimental than the previous ones. I had 2 schools of thought, 1st; blend the edges between the ports to smooth out the flow, or 2nd; blend them but make the flow favor the main (lower) intake passage. I opted for the 2nd option. I continued the intake roof angle up through the material between the main and strato passages. I didn't make the intake wider down lower because the intake boot was actually fit to its shape very closely. The stratos were largely untouched with the exception of bringing the edge together with the lower intake.

Before:

View attachment 12124

After:

2016-02-20 17.53.44.jpg
 
Top