High Quality Chainsaw Bars Husqvarna Toys Hockfire Saws

Hybrid clonesaw 365 with a 390 topend - aka the "86'r from youtube"

Mad Professor

Super OPE Member
Local time
11:23 AM
User ID
14251
Joined
Oct 21, 2020
Messages
310
Reaction score
1,116
Location
Northeast USA
Country flag
It is dead flat. I got it at a garage sale probably 20yrs ago…just for the purpose of flattening small items.

Handy to have. I went to HS with a friend who owns a glass/window shop. He'll cut me a nice piece of thick scrap plate for free.
 

upstateamish

Super OPE Member
Local time
11:23 AM
User ID
17558
Joined
Jul 13, 2021
Messages
103
Reaction score
359
Location
upstate new york
Country flag
Ok, weekend update - parts have shown up

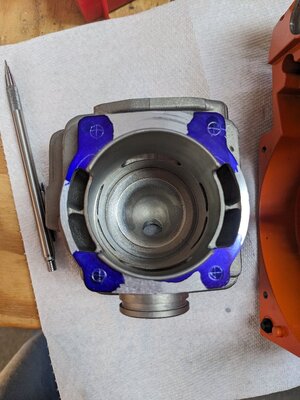
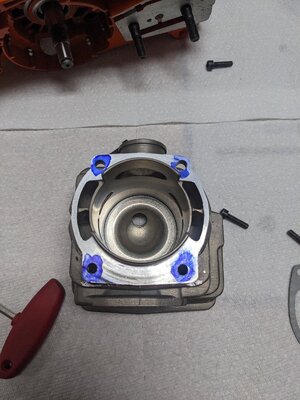
Round 2 of the cylinder in process: one of my plugs came out when drilling (upper left on this picture, should't matter though, everything still tightens up.)
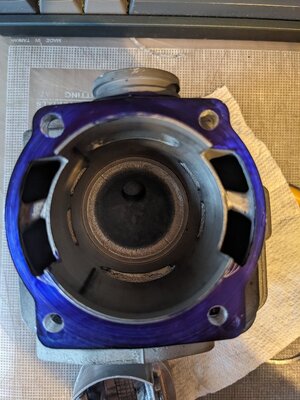
PXL_20250329_202813634.jpg

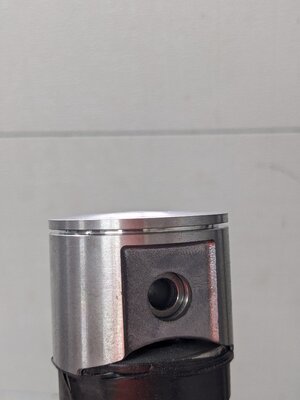
I decided to replace the 056 piston due to current fitment & there are a couple vertical scratches that would impact compression.

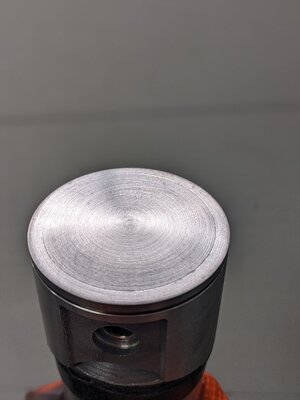
Since I have a few of 390 pistons accumulating here, I decided to to try turning one to a single ring. My thought was taking the top ring portion out would allow it to spin all the way around in the cylinder. As you can see on my first attempt I found out where the top is thin (as others noted) however, it did spin all the way around in the cylinder.

So, in the interest of learning, science (and not haven't another 56mm piston to turn down with this wrist pin diameter) I gave it another shot.


PXL_20250330_180438803.MP.jpg
I turned the second one with a slight dome to it starting around where the ring pin ended (hopefully it's thick enough here to not blow out) we'll see.
PXL_20250330_192707190.PORTRAIT.ORIGINAL.jpg
PXL_20250330_192710270.PORTRAIT.jpg

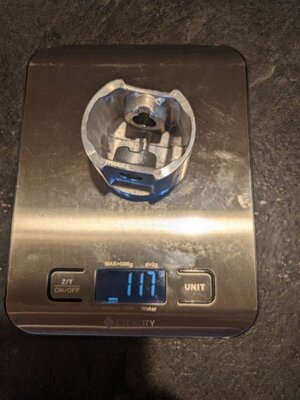
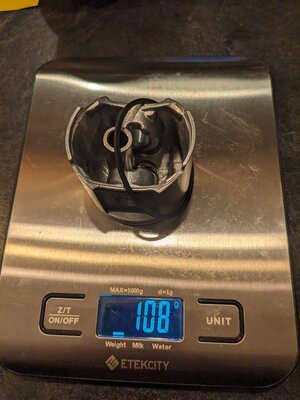
Weight after all the machine work/ lightening - 108 grams with a ring, the wrist pin & clips (which ended up being the same weight as the 056 piston setup)
PXL_20250330_230735508.MP.jpg

got things tightened down the block (no base gasket, but with 1184 so have to wait for it to setup) & I'll do a leakdown test tomorrow

The numbers (without a base gasket): which from the threads I've been digging through on 390 porting sound like it may work ok as a base to work from.

- Squish: 0.025 (I was limited with where things ended up by taking off the 1st the ring)
- Exhaust: 96
- Transfers: 120
- Intake: 79

If this works, this approach might be better. (less machine work to get things to fit & you're able to use a standard 55mm ring.) I think without the 395 connecting rod on the 390 crank, you probably could just use the regular piston as the connecting rod is about 7mm shorter.

Assuming the leakdown test passes, I hope to put everything back together and test fire it. fingers crossed
 

upstateamish

Super OPE Member
Local time
11:23 AM
User ID
17558
Joined
Jul 13, 2021
Messages
103
Reaction score
359
Location
upstate new york
Country flag
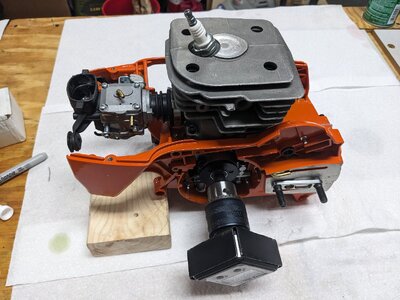
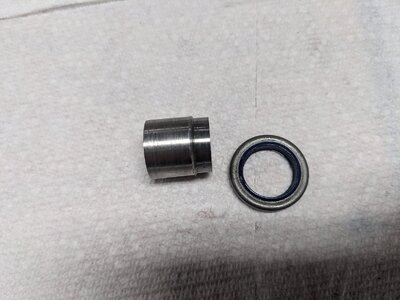
Pressure test failed (expected failure point at the clutch side seal) I trimmed down my crank sleeve bushing a bit to better fit an o-ring under it and replaced the seal, and it passed. We'll see if (or how long) that works. Proceeded to put it back together, it runs!

Grabbed a video of it running, the carb needs more tweaking on the high end, but want to check how things look before I let it rip for to long here.

As a side note: I just replaced the tinytach's battery. (It seems extremely sensative, freaks out and resets when I get it remotely close to the spark plug...) I was hoping the new battery would fix it, but it's still doing that. I'll reach out to see what they say but I'm not holding my breath I've had this quite awhile and I'm well out of warrenty phase.
 

upstateamish

Super OPE Member
Local time
11:23 AM
User ID
17558
Joined
Jul 13, 2021
Messages
103
Reaction score
359
Location
upstate new york
Country flag
ok, cut a bit on my lunch break. Was fighting the saw overfueling at WOT (which you can hear a bit in the above video) it would barely get over 9000 rpm out of the wood.

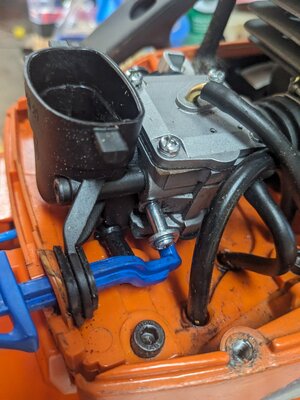
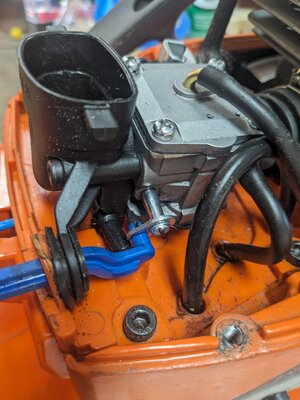
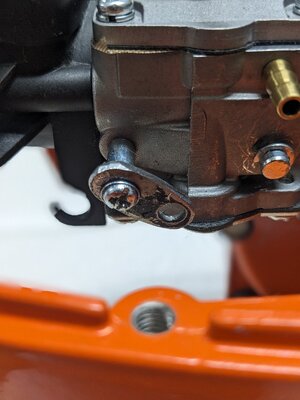
I did a bit more research on it, lots of what I found pointed to a metering lever being out of adjustment (but I had just checked that) so I decided to look a bit closer at the choke lever setup. The linkage actuator I had drilled out on the 395 carb for the x-torq choke lever is to long, it's got to much throw in and doesn't allow the choke plate to fully open. So the effect was running at WOT on partial choke.

I've replaced that with a choke actuator from a 372/390 style carb

PXL_20250401_211827277.jpg
PXL_20250401_212545529.MP.jpg
PXL_20250401_212548821.jpg
Now we have full swing operation and it's spinning quite happily in the upper rpm range (watch your ears, I didn't adjust the levels in this one)

I'm pretty psyched about how it's running now and hope to give it a shot in the wood pile over the next few days.
 

upstateamish

Super OPE Member
Local time
11:23 AM
User ID
17558
Joined
Jul 13, 2021
Messages
103
Reaction score
359
Location
upstate new york
Country flag
Over my lunch break I got some vid of the prototype 2 run against my 500i with a west coast air filter. Same length bar, same chain setup.

But only got three cuts because the chain loosened up on the P2 saw (you can see it in the last cut) then I ran out of time and wasn't able to address it/get more video.

But, seems to be responsive, idling well and feels strong overall. I'll work on tuning the high end a bit (once the rain we have projected the next few days passes)

Here's some side by side comparison test cuts (Standing dead dry ash with the skip tooth chain)
 

upstateamish

Super OPE Member
Local time
11:23 AM
User ID
17558
Joined
Jul 13, 2021
Messages
103
Reaction score
359
Location
upstate new york
Country flag
Prototype number 3:
I'm happy enough with how the prototype #2 is running (and it's been a bit rainy so I haven't had much time to continue running it.) so tonight I decided to start working on the 3rd prototype with the parts I have started to accumulate for 3rd and 4th prototype.

I started by pulling apart the AM 372 short block (I picked up for a spare case) knocked out the bearings, etc

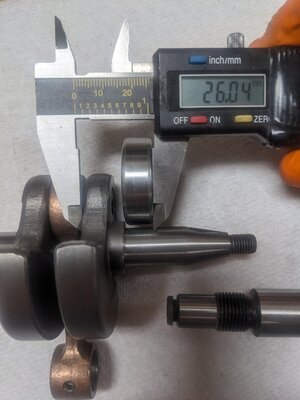
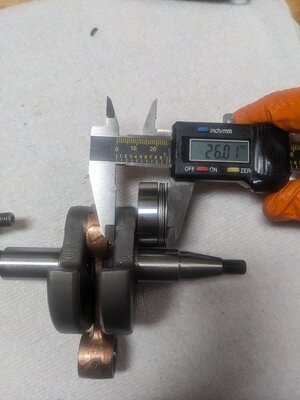
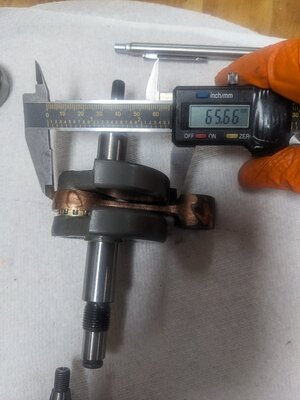
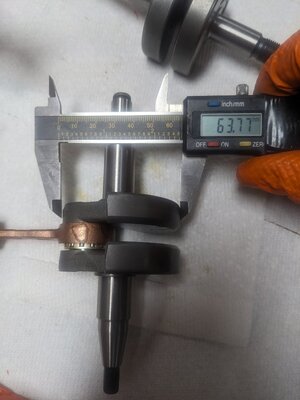
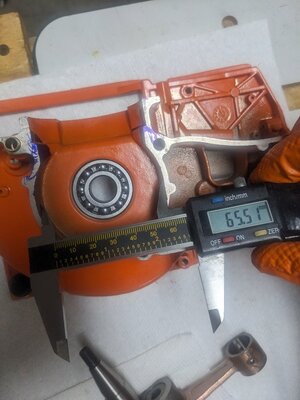
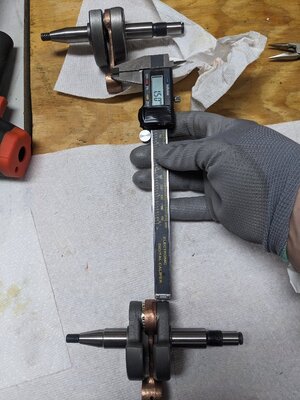
Took a couple rough measurements on the AM 390 crank to see how it matched up against the 372 crank, especially on the flywheel side to figure out number of 25x35x1 mm spacers needed to take up the space on the flywheel side with the thinner SKF 6003 C3 bearing (and crank shoulder that's also not as wide)

372 crank with 6202 bearing
PXL_20250411_003627925.jpg

390 crank with a 6003 bearing & four 1mm spacers is about right
PXL_20250411_003658439.MP.jpg

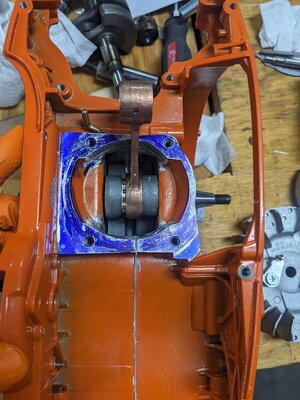
Comparing the 390 crank diameter to the case the lobes, it shouldn't require machining the crank to fit. Though it will take some (about 0.10 mm) of case trenching for the connecting rod to clear in the center (Note: this is similar to what I ended up having to do for the 2nd prototype)

PXL_20250411_004316717.jpg
PXL_20250411_004643532.jpg
PXL_20250411_004654896.jpg
 

upstateamish

Super OPE Member
Local time
11:23 AM
User ID
17558
Joined
Jul 13, 2021
Messages
103
Reaction score
359
Location
upstate new york
Country flag
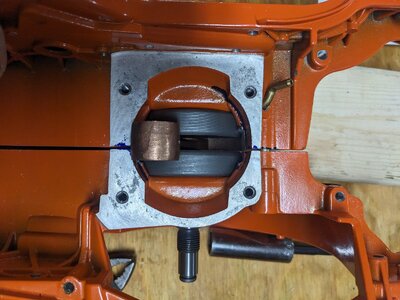
Rough measuring showed the connecting rod sits about 1.5mm below the end of the crank lobe at BDC. as I got into it, it turns out I did have to clearance where the crank lobes spin inside the case as well.
PXL_20250411_215300687.jpg

When I put the cases together I found that it was tight on the sides so I turned the sides of the crank down (did a bit of clearancing on the sides as well so it fits without a problem)
PXL_20250412_001630694.jpg
PXL_20250412_032014944.jpg

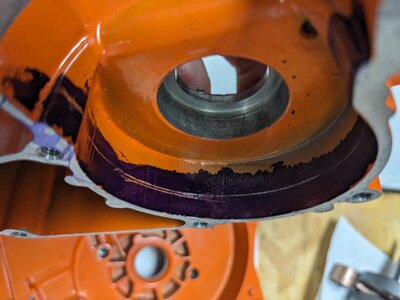
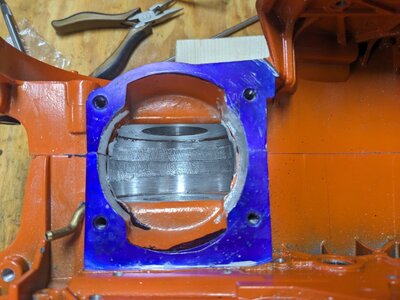
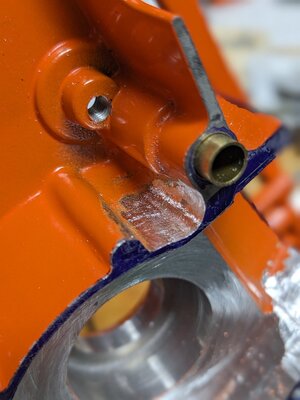
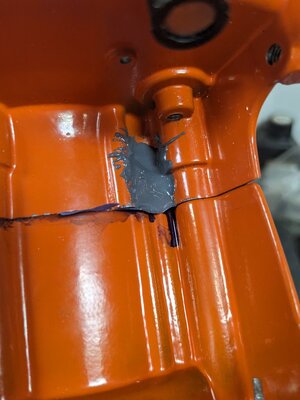
The rear case edge on the flywheel side seemed a little thin. Not sure why the but the different case castings don't match up. Must be how the molds were done I guess. Anyway, I took the paint off on the area in question and threw on some painters tape to act as a dam added some jb weld to give the gasket a bit more surface area to seal against. Waiting for that to harden now.
PXL_20250412_210531109.PORTRAIT.jpg
PXL_20250412_211444349.MP.jpg
 

upstateamish

Super OPE Member
Local time
11:23 AM
User ID
17558
Joined
Jul 13, 2021
Messages
103
Reaction score
359
Location
upstate new york
Country flag
I have been working away on other life projects and work is getting in the way but on the down time I'm still working on/getting closer with this.

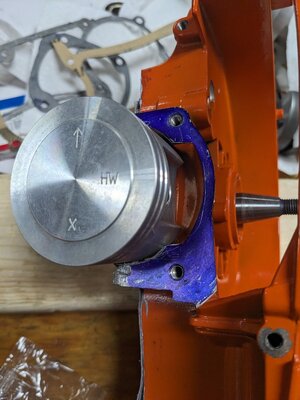
I've got most of it clearanced. Test fit the top end for the piston (confirmed it doesn't bottom out)

PXL_20250415_220127857.jpg
Turned down the Cylinder skirt a bit to leave a bit of meat in the case
PXL_20250415_234139365.jpg
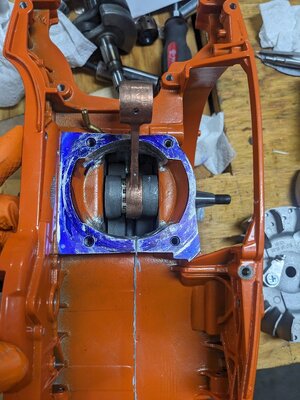
Clearancing things has been quite the journey I have put the cases together and taken it back apart a few times. I Thought I had it fully clearanced but after putting things together this last round I found I've still have some crank rub... so it will need to come back apart to see where that's happening.
PXL_20250417_012923371.jpg

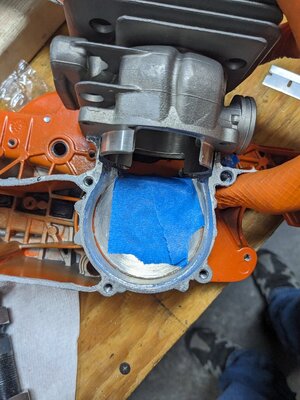
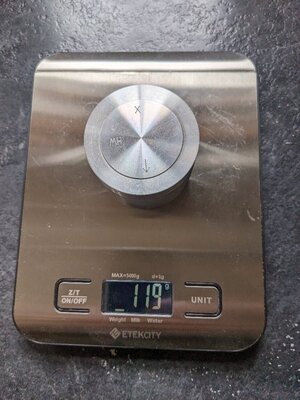
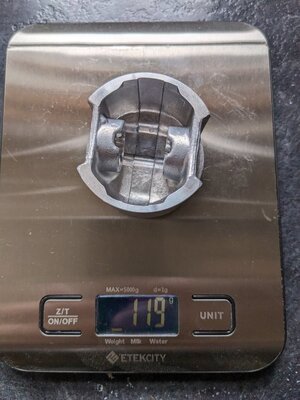
The 57mm piston weighs in at pretty heavy, but it seems like it's got quite a bit of material so I'm hopeful removing some of that will help lighten it up.

PXL_20250415_185600478.jpgPXL_20250415_185606065.jpg
 

Ketchup

Epoxy member
Local time
9:23 AM
User ID
5594
Joined
Mar 12, 2018
Messages
2,257
Reaction score
7,302
Location
Colorado
Country flag
I have been working away on other life projects and work is getting in the way but on the down time I'm still working on/getting closer with this.

I've got most of it clearanced. Test fit the top end for the piston (confirmed it doesn't bottom out)

View attachment 457079
Turned down the Cylinder skirt a bit to leave a bit of meat in the case
View attachment 457080
Clearancing things has been quite the journey I have put the cases together and taken it back apart a few times. I Thought I had it fully clearanced but after putting things together this last round I found I've still have some crank rub... so it will need to come back apart to see where that's happening.
View attachment 457081

The 57mm piston weighs in at pretty heavy, but it seems like it's got quite a bit of material so I'm hopeful removing some of that will help lighten it up.

View attachment 457078View attachment 457083

You can take a lot off the crown, the slab sides and the skirt buttresses. I was able to get it to 96g. You might be able to get 94g with more grinding on the inside. You could probably raise the slab sides as well.

Is the crank binding when the rod big end is passing the edge of the case? The rod has less travel when everything is assembled. It’s worth putting the piston and jug on to check crank clearance.
 

Ketchup

Epoxy member
Local time
9:23 AM
User ID
5594
Joined
Mar 12, 2018
Messages
2,257
Reaction score
7,302
Location
Colorado
Country flag
You can take a lot off the crown, the slab sides and the skirt buttresses. I was able to get it to 96g. You might be able to get 94g with more grinding on the inside. You could probably raise the slab sides as well.

Fellas, I gotta correct this. I was out in the garage last night and put the 57mm piston on the scale. 106g with a whole lot of grinding and lathe work. This is the long skirt version but I can’t see getting it below 103g even if you raise the skirt and epoxy the intake.
Not sure what piston I was thinking of now. Probably 56mm for 2100 or 395. Maybe 52mm 372.
 

upstateamish

Super OPE Member
Local time
11:23 AM
User ID
17558
Joined
Jul 13, 2021
Messages
103
Reaction score
359
Location
upstate new york
Country flag
Is the crank binding when the rod big end is passing the edge of the case? The rod has less travel when everything is assembled. It’s worth putting the piston and jug on to check crank clearance.

Initially there was some slight rub on the crank lobe while turning things over by hand with everything dry. However, after messing around with it a bit more I think I might have spoken a bit too soon on having to tear things apart. I've alternated carb cleaner & wd40 turning things over, and have run some paper towels through to clean up anything being left behind. No flakes are occuring, and after doing this a few times It's now spinning freely.

As you note, the connecting rod without the piston could have a larger throw and bind on the side, but with a piston /cylinder attached it spins through full range without hitting (base or top end) I'm working on getting the cylinder base holes filled and re-drilled, then I'll be able to get some squish measurements & timing numbers
 

upstateamish

Super OPE Member
Local time
11:23 AM
User ID
17558
Joined
Jul 13, 2021
Messages
103
Reaction score
359
Location
upstate new york
Country flag
Alright... I guess I had to take it back apart afterall. (and trim the crank down on the clutch bearing spacer side) it wasn close but not 100% centered. Would turn freely but when I got the piston/cylinder on the connecting rod would hit the clutch side crank lobe ... so I pulled things apart, machined the crank and addressed where the case was just slightly rubbing.
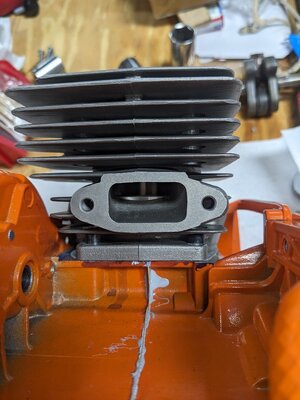
On the cylinder, the aluminum plugs held on the exhaust side but pulled out on the intake side (not really a huge deal but in the future I will have to figure out a better way to get them to stay in place)

Got things back together everything spins free & no binding

I'll have to dig into what stock 390 big bore numbers are but here are the current numbers I read (with a base gasket):

Exhaust: 105
Transfers: 135
intake: 86
squish: 0.028"

here's a before pic of how far out the crank was spaced on the clutch side (I don't have an after but I was able to gain about 1mm or so) which seems to have been the right amount to get it centered
PXL_20250417_012923371.jpg
PXL_20250422_220255956.jpg
PXL_20250423_000629239.jpg
PXL_20250422_233634614.jpg
PXL_20250423_000941311.jpg
 

Outback

Super OPE Member
Local time
8:23 AM
User ID
2046
Joined
Oct 28, 2016
Messages
162
Reaction score
404
Location
Oregon
Country flag
The crank looks off center, Its probably just the angle of the picture. When I drop the crank in a hot case and bearing I put a feeler gauge in the case to set the location till it cools a tad. I don't like knocking the crank around. You could run a tap in the cylinder holes and a die over your plug material with a little red loctite. That might keep them in there after you redrill. As regards the crank I measure before I tear it down which you can't really do because your going full custom so some or all of this might not apply. Still really enjoying your journey.
 

upstateamish

Super OPE Member
Local time
11:23 AM
User ID
17558
Joined
Jul 13, 2021
Messages
103
Reaction score
359
Location
upstate new york
Country flag
The crank looks off center, Its probably just the angle of the picture. When I drop the crank in a hot case and bearing I put a feeler gauge in the case to set the location till it cools a tad. I don't like knocking the crank around. You could run a tap in the cylinder holes and a die over your plug material with a little red loctite. That might keep them in there after you redrill. As regards the crank I measure before I tear it down which you can't really do because your going full custom so some or all of this might not apply. Still really enjoying your journey.
Yup, you are correct that's the before I pulled things back apart and took material off the clutch side of the crank. Good idea on using the feeler gauges for spacing & great idea on tapping the cylinder for plugs (I ... totally should have thought of that seeing how this is not the first one I've done 🤦‍♂️) Thanks for that!

Glad to share what I've learned so far in case others want to try it out. Hopefully the lessons I've been uncovering are helpful
 
Last edited:

Powerstroke Cowboy

Pinnacle OPE Member
Yearly GoldMember
Local time
9:23 AM
User ID
26178
Joined
Feb 23, 2023
Messages
1,721
Reaction score
5,496
Location
Montana
Country flag
Looking good! Glad to see it's coming along as well as it is. All the little (sometimes big) hurdles is what makes these builds interesting. I'm enjoying watching the journey.


Do you have any plans to tighten the squish up?

The numbers you have need changed. But they are all workable. 30 degrees is a lot of blowdown! That's going to have to be addressed. That's going to take some grinding.

I'd try 105/125/80 or 78. Get it running then go from there. It might realy like 102/120/78 or 80. Or you could try 102/122/78 and see how it runs.

Looks like the intake will need to be epoxyed.

Just some thoughts. Ask the pros.
 

upstateamish

Super OPE Member
Local time
11:23 AM
User ID
17558
Joined
Jul 13, 2021
Messages
103
Reaction score
359
Location
upstate new york
Country flag
Looking good! Glad to see it's coming along as well as it is. All the little (sometimes big) hurdles is what makes these builds interesting. I'm enjoying watching the journey.

Do you have any plans to tighten the squish up?

The numbers you have need changed. But they are all workable. 30 degrees is a lot of blowdown! That's going to have to be addressed. That's going to take some grinding.

I'd try 105/125/80 or 78. Get it running then go from there. It might realy like 102/120/78 or 80. Or you could try 102/122/78 and see how it runs.

Looks like the intake will need to be epoxyed.

Just some thoughts. Ask the pros.
Agreed on that amount of blowdown it seems like a lot. But I was reading somewhere (maybe this thread?) that this particular bigbore kit was similar to a dolmar 7900 cylinder (e.g. it has tight thin transfers so it needed the additional blowdown to move the air?) I'll have to dig back through my history to see if I saved that thread.

I have picked up a squish band cutting tool off dyno joe so that will be an easier job this round. But the first phase of prototype 3 is pick some numbers to get things running, see if it holds up (which I hope it will.) I think i'll work on getting the intake into the 78-80 range and do some minor adjustment on lower transfers to gasket match it so it'll flow with to the case. Focus on getting it together for shake down testing. Then go back in to do some port work.

But, I need to make the crank sleeve bushing next. That should go pretty quick since as I've figured out the pattern/size on the 2nd prototype and have the material with the right ID to slip on to the crank (one less machining operation.)
 

Ketchup

Epoxy member
Local time
9:23 AM
User ID
5594
Joined
Mar 12, 2018
Messages
2,257
Reaction score
7,302
Location
Colorado
Country flag
My first try was 82/100/122. It’s apart right now and I bumped to 82/98/122. I epoxied the transfers but didn’t break through.

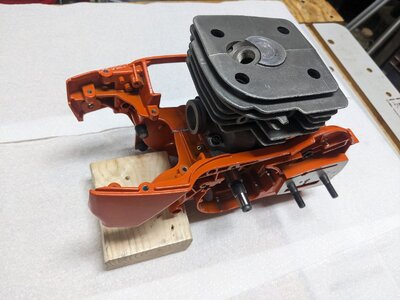
Once you open up the primaries to match the 372 case the tunnel volume is pretty good. I raised the bore wall a lot at the lowers as well. It doesn’t seem to behave like a 7900. More like a 395.
 
Last edited:
Top