High Quality Chainsaw Bars Husqvarna Toys

My first 262xp, rebuild + issues + pics

Adamski

Plebus Splederns
Local time
1:33 PM
User ID
3128
Joined
May 3, 2017
Messages
1,120
Reaction score
2,684
Location
Essex, UK
Country flag
So here it is, hopefully a thread with pictures. I have rebuilt from scratch a few saws and each time I miserably forget to take and add pictures of the build. This time I have made an attempt.

This is the saw I have been hunting for for a long time, A non starting 262xp with a clean OEM piston and original kolbenschmidt non decomp cylinder and silky smooth bearings. It will fire on choke and either rev up or die, think a full rebuild is needed.

All things after stripping the saw seem to be original or OEM, so this is promising.

Firstly a quick wash and degrease to save me the hassle of dirt everywhere... and this is what I ended up with, not too shabby for a 17-18 year old saw..
IMG_20170629_214333_246.jpg

Then a full strip down of the saw, popped the seal cover of the flywheel side and the seal had gone brittle and perished, forgot to take a picture of the seal but here is one after I had pressed a new one in to the cover plate ready to re fit the screws with thread lock..
IMAG1612.jpg

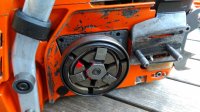
Next item, tackle the clutch side. Once again forgot to take picc's but this is better than my usual efforts. Took ages to prise the cover washer off the crank so that the oiler could be removed. Next had a mission to get the brass worm gear off the crank to access the seal. Here is another picture part way through reassembly, ready for the 3 allen screws and some more thread lock. All in all this saw is pretty clean I think.
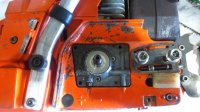
IMAG1613.jpg

Reassembly of the flywheel and coil, advanced the timing all of 1 degree to compensate for my hopeful gasket delete or squish of around .20" .... if it doesn't suit the saw I will set the timing back to stock. Coil gap set to factory. New flywheel nut added as previous owner had stripped the threads (crank threads A.O.K still)
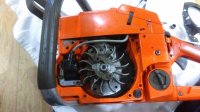
IMAG1614.jpg

Next up had to heat shrink the kill switch ground to the spark plug lead as the clips on the flywheel cover are snapped amd the wire drops down from the channel. Once again no image, I will get one soon (and the kill switch wire is not in situ in the pic)...
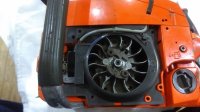
IMAG1615.jpg
 
Last edited:

Adamski

Plebus Splederns
Local time
1:33 PM
User ID
3128
Joined
May 3, 2017
Messages
1,120
Reaction score
2,684
Location
Essex, UK
Country flag
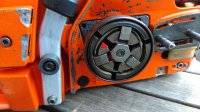
Clutch reassembled, new 7 tooth 3/8" sprocket. The other one was neglected, I can see why as the clutches are a pig to get off without the correct tool. Chalk marker pen is a leak from marking an old 19mm socket ready for grinding into a clutch removal tool. Not sure what the lower buffer is for as it doesn't sit on or touch the clutch cover when assembled. Upper buffer I assume is to minimize lateral movement when pulling the handle towards the case? Why are there two chain catcher arrangements on the casing in the lower right? Both missing?

IMAG1619.jpg


Notice the damage from some wally repeatedly assembling the clutch cover over the case at the rear rather than locating it in the slots? Wondering whether to fully repair these in the future when this saw gets a full repaint after testing..

IMAG1618.jpg
 

Adamski

Plebus Splederns
Local time
1:33 PM
User ID
3128
Joined
May 3, 2017
Messages
1,120
Reaction score
2,684
Location
Essex, UK
Country flag
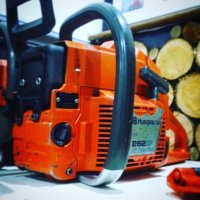
I have called it a day with the saw for today, now that the I have cleaned, washed and replaced the crank shaft seals and the rim sprocket. Here it is sitting all happy now that it knows that it is getting lots of new parts and a loving home. Think the 262xp looks damn fine in a small 154/254 based package and it looks good with it's high 372esque filter cover.

As you might notice the top cover had to be trimmed back as it has a decent amount of heat damage. I have trimmed it back and put an angle on it following the chain brake handle if looking from above. It may help with heat, it cleans it up a little and it is similar to the 3-series exhaust to top cover correlation. I think it looks good, I will get pictures of it from all angles.

Next time I will be taking images and posting about my problems and how I have gone about fixing the three top covers case screw holes that are all wallowed out. Then I will approach the issues I found with the carb and anything else I find.

IMG_20170705_071710_058.jpg
 
Last edited:

Adamski

Plebus Splederns
Local time
1:33 PM
User ID
3128
Joined
May 3, 2017
Messages
1,120
Reaction score
2,684
Location
Essex, UK
Country flag
nice looking saw for sure. lower round ring on the handle is a movement limiter for up and down movement.
It was covered in cr*p when I got it in the post. Looks like it was never cleaned..

How does that work then. I thought the limiter was on the case bottom left of the same image below the oiler. It has a black grommet in there with what I thought was an rubber mount with a screw??
 

cus_deluxe

terms of service violator
Local time
8:33 AM
User ID
393
Joined
Jan 3, 2016
Messages
5,195
Reaction score
24,220
Location
Michigan
Country flag
that rubber thing in the case is just sort of a bumper to space the fuel tank from the case. that hard plastic ring limits the movement of the handle/fuel tank upward when leaning on it a bit. think it just bumps into a spot on the clutchcover at some point.
 

Adamski

Plebus Splederns
Local time
1:33 PM
User ID
3128
Joined
May 3, 2017
Messages
1,120
Reaction score
2,684
Location
Essex, UK
Country flag
that rubber thing in the case is just sort of a bumper to space the fuel tank from the case. that hard plastic ring limits the movement of the handle/fuel tank upward when leaning on it a bit. think it just bumps into a spot on the clutchcover at some point.
Yep just investigated it. There are two shoulders on the cover above and below the plastic ring. Nice to know it's purpose. Cheers.
 

Adamski

Plebus Splederns
Local time
1:33 PM
User ID
3128
Joined
May 3, 2017
Messages
1,120
Reaction score
2,684
Location
Essex, UK
Country flag
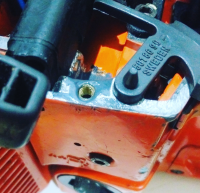
Update - managed to find some time to go about setting this insert in some JB weld. Never used JB before, I have always used Hysol as I acquired 12 packs of it a few years back. I like this JB stuff, 20 mins after mixing and it was a soft putty, easy to use and to kind of 'keep it where you want it'. I made a small jig to keep the insert in the right place whilst setting, consisting of a waxed m5 bolt and a strip of waxed metal sitting on top of the case to keep it flat and true.

Just need to flatten the top surface with a sanding block and there it is, one of three screw holes back in business.

upload_2017-7-6_8-43-5.png
 

Adamski

Plebus Splederns
Local time
1:33 PM
User ID
3128
Joined
May 3, 2017
Messages
1,120
Reaction score
2,684
Location
Essex, UK
Country flag
Second insert, muffler end done, got a small die grinder end to create a groove about half way down the hole around its circumference (hope this will add a greater degree of strength to the insert adhesion to the case)

The inserts I have used are these, they have a barbed outer surface giving reduced pull out.. Something everyone strives for.

barbsert-threadedinserts-pressininserts-manufacturing-groovpin.jpg


The latest thread is now ready..

IMAG1625[1].jpg
 

Adamski

Plebus Splederns
Local time
1:33 PM
User ID
3128
Joined
May 3, 2017
Messages
1,120
Reaction score
2,684
Location
Essex, UK
Country flag
On a side note, went to start the saw last night just for fun, no spark, seems the coil has packed in over the last week.. Checked all grounds, plug in another saw and new plug, swapped caps etc. Nothing.. Now got to wait for another coil to arrive..

The costs are already building up.
 

Mattyo

Youtube speciawist
GoldMember
Local time
8:33 AM
User ID
441
Joined
Jan 8, 2016
Messages
4,282
Reaction score
10,906
Location
Farmington, CT
Country flag
interesting inserts.... far as I can tell, those are only available in quantity of 100...per pack... at $90 ...
 

Adamski

Plebus Splederns
Local time
1:33 PM
User ID
3128
Joined
May 3, 2017
Messages
1,120
Reaction score
2,684
Location
Essex, UK
Country flag
Hard to see in the pictures but it looks like a 1992 saw and if so, likely has the HDA 87 carb. Good score!
Well, I struggled a bit with this one today.. threw it all back together (properly I must add, yet temporarily) reset metering lever and a pop and fast idle, then idle and then it dies. As if it doesn't get any more fuel. So pulled the breather out and tried. Same thing. Inspected the hose and filter. All seem fine. Pulled the carb apart and cleaned it all again. Same thing.. any ideas. Thought about the impulse but it is through the manifold and seemed OK.. once again any ideas, I was too busy to think about it. So I pulled out the 181 and 357 to finish up the 1-2 cords that I needed to cut up for firewood.. I'm still stumped after thinking.

So far the saw has new crank seals and a coil. Plus other things that wouldn't affect it running..

Sent from my HTC One M8s using Tapatalk
 

Adamski

Plebus Splederns
Local time
1:33 PM
User ID
3128
Joined
May 3, 2017
Messages
1,120
Reaction score
2,684
Location
Essex, UK
Country flag
Will it run at fast idle?

How about WOT?
Nope.. nadda.. will rev and then die. Like you have just hit the kill switch. It doesn't race like it is still getting fuel but not enough. Havnt come across symptoms like this before..

Sent from my HTC One M8s using Tapatalk
 

Adamski

Plebus Splederns
Local time
1:33 PM
User ID
3128
Joined
May 3, 2017
Messages
1,120
Reaction score
2,684
Location
Essex, UK
Country flag
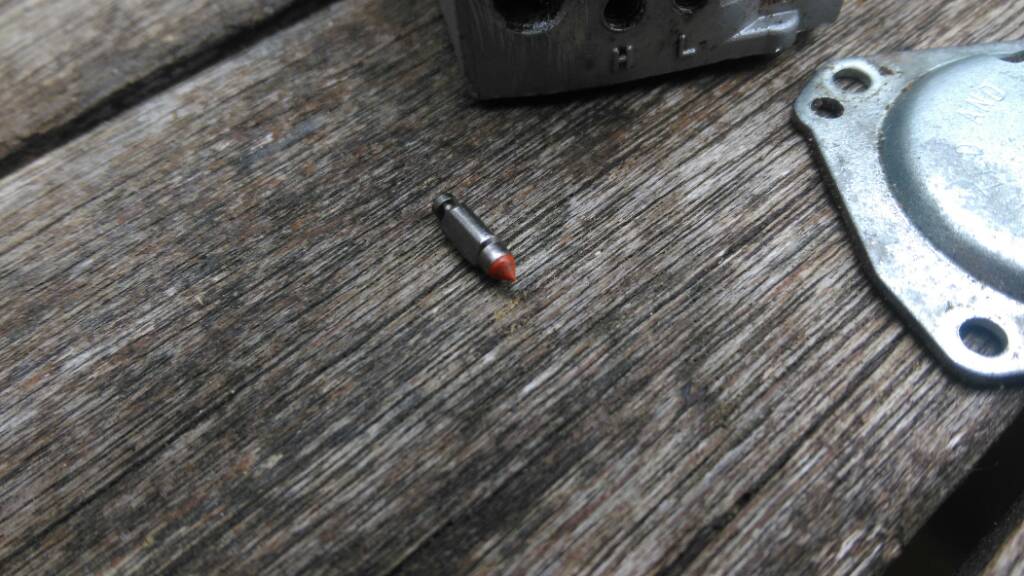
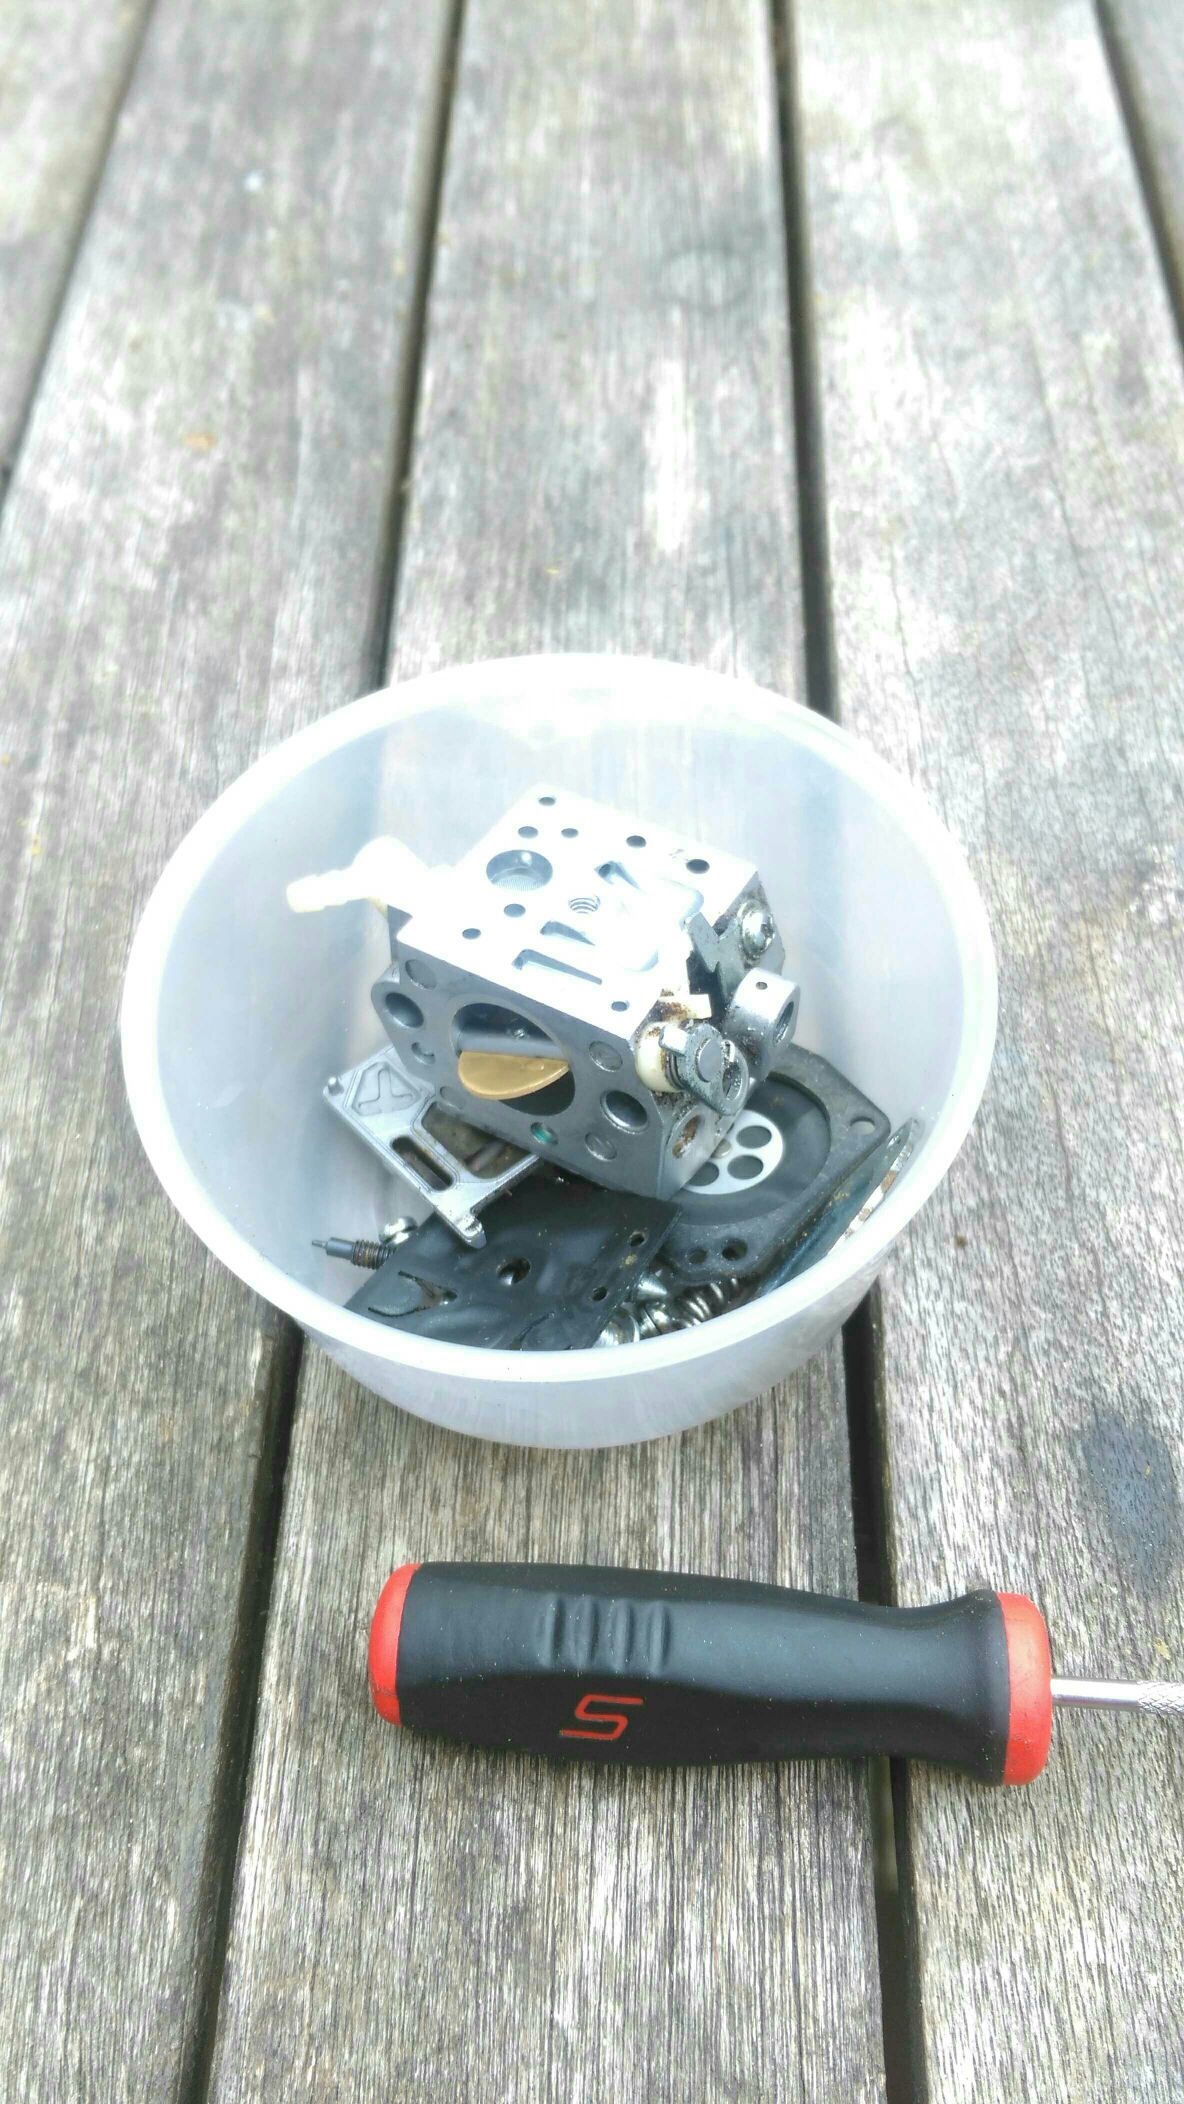
So is this normal. I have not come across a metering pin that has a silicone tip to it? The saw is not delivering fuel. So a full strip down and clean is in order. But this silicone tip is perplexing me.
770a9b7b3bda9fc9aae4fc55ef18d977.jpg
ae60b8d1cf0d01788ba6a8c68e8aa213.jpg


Sent from my HTC One M8s using Tapatalk
 
Top