High Quality Chainsaw Bars Husqvarna Toys Hockfire Saws

Wakizashi

paragonbuilder

Mastermind Approved!
Local time
11:50 PM
User ID
384
Joined
Jan 2, 2016
Messages
9,229
Reaction score
33,867
Location
Norwich, CT
Country flag
How many guys take the time to case match? Do these little details matter? Or are they a waste of time?

View attachment 46063

Been trying hard to stimulate some discussion and show some things that beginners might not consiser or pick up on.

I was happy to see Randy felt the details add up!

Anyhow, onward with my build thread.

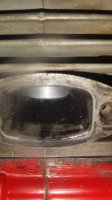
I am grateful for you sharing the details of this build. I am learning. The details are what make this interesting to me. In the pic with the cylinder bolted on to the case, it looks like there is a void in the corners. Will this effect flow?
Also in that pic, what would case matching entail? Grinding that lip on the case? You are trying to eliminate steps that cause turbulence, correct?
 

Four Paws

Chrome won't get you home
Local time
9:50 PM
User ID
364
Joined
Dec 31, 2015
Messages
826
Reaction score
2,701
Location
ID
I am grateful for you sharing the details of this build. I am learning. The details are what make this interesting to me. In the pic with the cylinder bolted on to the case, it looks like there is a void in the corners. Will this effect flow?
Also in that pic, what would case matching entail? Grinding that lip on the case? You are trying to eliminate steps that cause turbulence, correct?

Good observation. There is a "void" as you call it, in the corners. It's hard to see what all is going on in 2D photos.

The jug has a lip that hangs down in the case - this lip supports the skirts at BDC. There is also "space" behind it - this makes up some of the case volume on this saw. As the transfers open, most of the charge would fill from the bottom of the crank lobes and through the small piston windows. Some charge would also fill from this "void" as you called it. I case matched the jug to the case in these areas so some charge could slip up the transfer tunnels in a more unobstructed way - smooth, radiused entry vs. sharp, perpendicular entry.
 

Four Paws

Chrome won't get you home
Local time
9:50 PM
User ID
364
Joined
Dec 31, 2015
Messages
826
Reaction score
2,701
Location
ID
Time for more learning and discussion.

Of interest on these saws is cylinder design and associated geometry.

The squish is HUGE from the factory - there had to be a reason - perhaps low grade fuel in the international market?

The pistons are small - not much spare skirt length or compression height to work with. I attribute this to the benefits of a low reciprocating mass and the Japanese principals of minimizing waste.

The intake port is narrow @45% of bore and maximized vertically, as evidenced by the rings that descend into the port at BDC. A trick many of us have used is to raise the intake to gain more time area without the negative effects of a long intake duration - reducing case compression, excessive spitback, etc. These engines have implemented this "trick" since the early 80's.
 

Four Paws

Chrome won't get you home
Local time
9:50 PM
User ID
364
Joined
Dec 31, 2015
Messages
826
Reaction score
2,701
Location
ID
So, first order of business was to figure out how to manage the squish and port geometry. I knew I wanted to run a base gasket for reliability. I also wanted to tighten it up, but I also knew the piston didn't afford me enough skirt length to drop the base AND cut the squish. In fact, I had to compromise to get the squish to .023". At this measurement, the piston free ports just a hair at TDC.

20161230_105015.jpg

I figured it was well worth it as having a reasonable squish clearance will make a favorable performance impact, and a very small bit of free porting is known to be a non-issue.
 

Four Paws

Chrome won't get you home
Local time
9:50 PM
User ID
364
Joined
Dec 31, 2015
Messages
826
Reaction score
2,701
Location
ID
Next up was figuring out the intake.

If you recall, the stock intake is 45% of bore width. Measuring the piston, we discover the ring pins are 29mm apart - that's just under 65% of bore width. Because the rings descend so far into the intake, I want to leave ample supporting material. That limits my width substantially. But, the piston skirt is 34mm wide, and I can run a D shaped port - nice radius on top to keep it easy on the rings, nice square bottom to maximize area when the port opens.

So, I settled on a port 25.4mm wide with a 75 degree open time.
 
Last edited:

Four Paws

Chrome won't get you home
Local time
9:50 PM
User ID
364
Joined
Dec 31, 2015
Messages
826
Reaction score
2,701
Location
ID
This is great Josh! I don't have anything to add or ask at the moment. But I am soaking all this up!!!

Me too. Following along with a 575 piston and cylinder so I can see it in 3D.

Thanks for sharing such a detailed thread Josh. I'm really looking forward to the finished product.

Nice to know you guys are enjoying it! For a minute I was beginning to wonder if anyone was still with me.

I am doing my best to show all the things that are considered, pondered, studied, and implemented in a woods ported saw.
 
Last edited:

exSW

'Cause Thomas is a poopyhead
Local time
11:50 PM
User ID
109
Joined
Dec 23, 2015
Messages
5,072
Reaction score
16,698
Location
United States
Country flag
Nice to know you guys are enjoying it! For a minute I was beginning to wonder if anyone was still with me.

I am doing my best to show all the things that are considered, pondered, studied, and implemented in a woods ported saw.
Don't want to clutter up your thread with chatter.

About chatter check your in box.
 
Top