High Quality Chainsaw Bars Husqvarna Toys Hockfire Saws

Stihl MS695XP SUPER Build Thread

Nutball

Here For The Long Haul!
Local time
5:02 AM
User ID
7732
Joined
Oct 31, 2018
Messages
4,214
Reaction score
11,644
Location
Mt. Juliet, TN
Country flag
Good idea, I just hate the thought of taking the case apart after the trouble of putting it together, and I've never taken one apart before. I could try using a vacuum while grinding on the assembled case, it would be slow going keeping the rpm low so as not to throw shavings away from the vacuum.

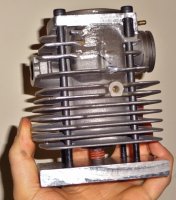
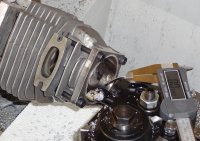
The cylinder is still a ways off from fitting. It already looks tight, and still has to drop a lot more. I don't like how the bolt holes have turned out. I'm thinking I'll JB Weld the holes and redrill them with the hard part being keeping the drill straight cutting partially through hard aluminum and lots of soft epoxy. There isn't much room for the bolt heads to fit the new pattern with a 58mm bore. I'll have to make a nylon adapter of sorts to try to align a 660 gasket to mark the holes.

Looking ahead, I'll need .100" cut out of the squish band, and a little more than .060" off the top of the piston. I'll loose the top ring due to lost plating at the top of the cylinder. Would it be a good idea to drill little holes to put pressure behind the remaining ring?
 
Last edited:

Lightning Performance

Here For The Long Haul!
Local time
6:02 AM
User ID
677
Joined
Jan 26, 2016
Messages
10,991
Reaction score
28,057
Location
East of Philly
Good idea, I just hate the thought of taking the case apart after the trouble of putting it together, and I've never taken one apart before. I could try using a vacuum while grinding on the assembled case, it would be slow going keeping the rpm low so as not to throw shavings away from the vacuum.

The cylinder is still a ways off from fitting. It already looks tight, and still has to drop a lot more. I don't like how the bolt holes have turned out. I'm thinking I'll JB Weld the holes and redrill them with the hard part being keeping the drill straight cutting partially through hard aluminum and lots of soft epoxy. There isn't much room for the bolt heads to fit the new pattern with a 58mm bore. I'll have to make a nylon adapter of sorts to try to align a 660 gasket to mark the holes.

Looking ahead, I'll need .100" cut out of the squish band, and a little more than .060" off the top of the piston. I'll loose the top ring due to lost plating at the top of the cylinder. Would it be a good idea to drill little holes to put pressure behind the remaining ring?
I don't wana burst your bubble man but this stuff sounds like a JMS build lol.
You need a belt sander and more grit in your bearings and used... more used parts.
Your gonna need a new clutch man, it's a requirement :-)
Maybe move the transfer entries?

Subbed :icon_popcorn:
:wave:
 

Nutball

Here For The Long Haul!
Local time
5:02 AM
User ID
7732
Joined
Oct 31, 2018
Messages
4,214
Reaction score
11,644
Location
Mt. Juliet, TN
Country flag
I'll see if I can cut the squish band and cylinder extension tonight. I have another piston that is still long, so I'll give grinding on the case a shot, and use a vacuum at the same time and see how that goes. It seems a bit pointless to go with a big bore when it will free port a lot.
 

srcarr52

Shop rat, backyard slice cutter.
GoldMember
Local time
6:02 AM
User ID
522
Joined
Jan 12, 2016
Messages
4,087
Reaction score
26,849
Location
Iowa City
Country flag
Good idea, I just hate the thought of taking the case apart after the trouble of putting it together, and I've never taken one apart before. I could try using a vacuum while grinding on the assembled case, it would be slow going keeping the rpm low so as not to throw shavings away from the vacuum.

The cylinder is still a ways off from fitting. It already looks tight, and still has to drop a lot more. I don't like how the bolt holes have turned out. I'm thinking I'll JB Weld the holes and redrill them with the hard part being keeping the drill straight cutting partially through hard aluminum and lots of soft epoxy. There isn't much room for the bolt heads to fit the new pattern with a 58mm bore. I'll have to make a nylon adapter of sorts to try to align a 660 gasket to mark the holes.

Looking ahead, I'll need .100" cut out of the squish band, and a little more than .060" off the top of the piston. I'll loose the top ring due to lost plating at the top of the cylinder. Would it be a good idea to drill little holes to put pressure behind the remaining ring?

Why not make a spacer to run between the cylinder and case?

Also I’d fill the existing holes with aluminum bolts covered in epoxy so you have some structure for the new holes you intend to drill.
 

Nutball

Here For The Long Haul!
Local time
5:02 AM
User ID
7732
Joined
Oct 31, 2018
Messages
4,214
Reaction score
11,644
Location
Mt. Juliet, TN
Country flag
Why not make a spacer to run between the cylinder and case?
Because I didn't think I had any practical way of doing that, but I'll look into it. I just remembered I might have a piece of scrap aluminum that is the right width and thickness, shouldn't be hard.

Also I’d fill the existing holes with aluminum bolts covered in epoxy so you have some structure for the new holes you intend to drill.
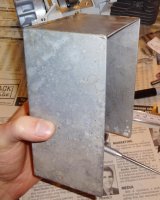
Thanks for the good idea. I tend to forget stuff like that even though I recently did that to a mounting block for cutting squish bands because I drilled too big of a hole to tap, filled with epoxy, and tapped it, which lasted 2-3 uses, then epoxied in a rod to re drill and thread.
 

Nutball

Here For The Long Haul!
Local time
5:02 AM
User ID
7732
Joined
Oct 31, 2018
Messages
4,214
Reaction score
11,644
Location
Mt. Juliet, TN
Country flag
No rush till I get some more details figured out. Your input is welcome and helpful.

Without cylinder extension or piston skirt cut:
EX: 100
TR: 112.5
IN: 73.5

With cylinder extension cut & no spacers under the cylinder I estimate:
EX: 105-110
TR: ~130
IN: 85-90

I have scrap aluminum to make a .060 spacer or two, and as long as I don't screw it up, I'll go with 2 sheets for about .120". That should end up somewhere around 103, 120, 87, so I'll just raise the intake for the most part. Due to the weight of the piston, and being a FT crank, I was considering porting this one for peak power at lower rpm to hopefully get some run time out of it before the bearings blow, and I like low end torque. At least I'd be left with a cylinder that now fits a 660, and it could be used on a high quality bottom end and ported for a higher rpm power peak.

The piston crown is very thick: .180-.200", I was thinking of cutting it concave for less weight and more volume.

Fun fact: a new Hyway 395 BB cylinder weighs 1.90lbs
 

Nutball

Here For The Long Haul!
Local time
5:02 AM
User ID
7732
Joined
Oct 31, 2018
Messages
4,214
Reaction score
11,644
Location
Mt. Juliet, TN
Country flag
So, how should I go about cutting the plated squish band of the hyway cylinder without leaving a flakey mess of the plating? I got the squeak, squeak, boom just cutting the bottom.
DSC04379 (800x566).jpg
Hyway plating appears to be .004" thick.
 

huskihl

Muh fingers look really big
GoldMember
Local time
6:02 AM
User ID
360
Joined
Dec 31, 2015
Messages
22,922
Reaction score
146,255
Location
East Jordan, MI
Country flag
So, how should I go about cutting the plated squish band of the hyway cylinder without leaving a flakey mess of the plating? I got the squeak, squeak, boom just cutting the bottom.
View attachment 271650
Hyway plating appears to be .004" thick.
.004”....consider yourself lucky. Meteor has to be at least .010”. Take it slow. .001” or less per pass and good carbide will score it out of there. Doesn’t leave it flaky
 

Nutball

Here For The Long Haul!
Local time
5:02 AM
User ID
7732
Joined
Oct 31, 2018
Messages
4,214
Reaction score
11,644
Location
Mt. Juliet, TN
Country flag
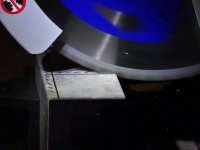
I really expected it to be thicker, I'm sure it varies as you can see spots deeper than the honing marks. I'll give shaving away at it a go. I took the precaution of cutting the plating thin with a cutoff wheel before cutting the base extension in case it wanted to chip off chunks just like it did, but first I will shave more off the flywheel side of the cylinder so the bore aligns to the case better.
 
Top