- Local time
- 8:28 PM
- User ID
- 26310
- Joined
- Mar 13, 2023
- Messages
- 1,033
- Reaction score
- 2,914
- Location
- Maryland, USA
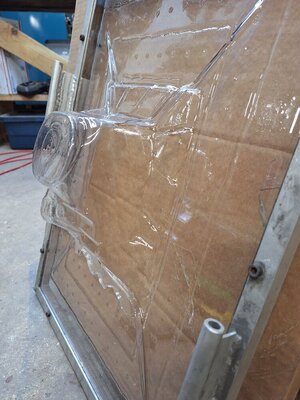
Very rough cutout and fit up to determine where the buck needs to be adjusted. Again, we'll pleased. I'm glad I didn't give up.


Thanks Caleb! Yeah chapter 3That’s cool. I think I have that same shop vac. How are you heating the polymer sheet?
Also, what are you using as a release agent? We want the details!
Really enjoying chapter 3 (4?).
 .
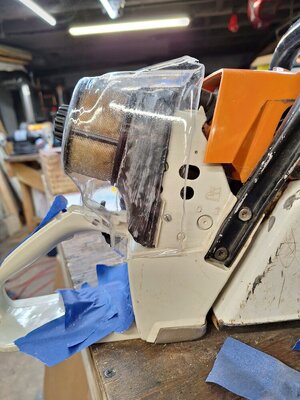
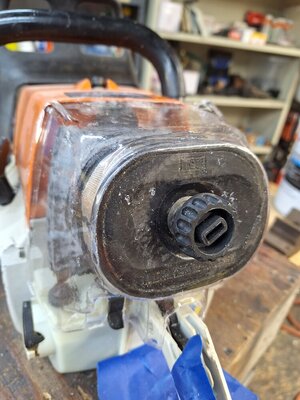
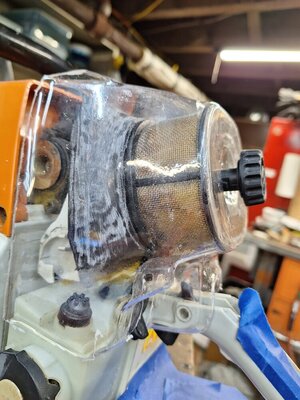
. That was one of the motivating factors in taking this approach. That, and paint can be applied to the inside, so it won't scratch off. And it can be applied carelessly to a degree, as the finish is determined by the outside plastic. I'll likely do one masked off near the filter element, so you can check the filter without checking the filterHaving a clear AF cover might not be the worst thing…


Not yet Mike. I haven't tried dying any plastic yet. Not since my high school lacrosse stick.@NateSaw Have you tried dying that plastic?
My prediction is that scuffing the inside with scotchbrite would help the dye. I'd appreciate your input on dying. I've seen yours. It looks good and seems to hold up!@NateSaw Have you tried dying that plastic?
It'd be cool to find out it'd take other colors. So far it seems black is what they all turn to.Nothing to it really. Just heat up a big pot of water to a real low boil, add the dye and put the plastic parts in. I usually let ‘em soak for at least 1/2 hour and then give em a good wash in fresh water. The longer the parts soak the deeper the dye penetrates. Some guys add (I think) salt or white vinegar to the mix. It’s supposed to help open the pours in the plastic for even better dye absorption.
Your finish will reflect the condition of the original parts. Dull finish on a dull part, shiny finish on a new shiny part.
Typically guy use black over orange parts but since you have clear plastic and assuming the plastic will take the dye you could probably go with any colour.


Acetone does neat things to plastic. I believe I've read alot about dawn dish soap in the dye water.Now that I think about it, it might of actually been a little acetone that guys were adding to the dye and water soak.
I know the maxflow plastic and stihl bar scabbards won’t take the dye but I also never tried adding anything to the soak other then water and dye.
Thanks David!Very nice Nate! This is a true custom one off build. Keep up the good work! I'm sitting here on the sidelines cheering you on!
Thank ye Randy!Wow. Just so cool Nate.