High Quality Chainsaw Bars Husqvarna Toys Hockfire Saws

MS460 PTO Crank Seal Problems

jacktheripper

Papa Squat
GoldMember
Local time
5:28 PM
User ID
28875
Joined
Apr 5, 2024
Messages
213
Reaction score
480
Location
Wyoming
Country flag
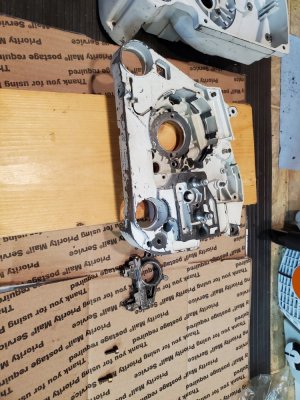
I recently got my project ms460 together. Started and ran good, but then started acting like it had an air leak after a little bit. I pressure tested it, and found the PTO side seal wasn't sealing right - the outer lip was slightly over the groove where the oiler snap ring rides, and was leaking. I tapped it in some more to get the lip to seal. It pressure tested fine.

Ran it again, and after a little while, started acting funny again. Pressure tested again, and the seal wasn't sealing. Popped the seal out, and found that the inside lip had been rubbing against the inner bearing race from being tapped in too much, and had started to fall apart. Good thing I caught it before the spring had time to come apart in the crankcase.

Tapped in a new seal, and I went too far in again. I could see the rubber bulging out because it had again bottomed out on the PTO bearing inner race.

I'm beginning to think that I messed up on this one. I used the Wolf Creek Saw Shop kit with SKF/New West bearings. I'm wondering if the PTO bearing dimensions are different, causing there to be not enough room for the seal to seat perfectly between the oiler snap ring channel and the inner bearing race.

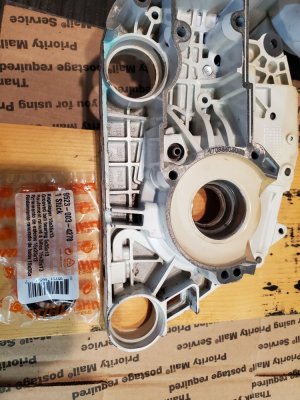
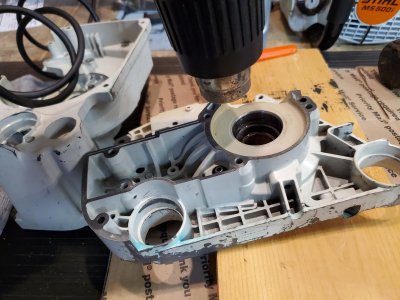
Does anyone else have this experience? Can anyone share pictures up close of their PTO side seal riding on the crankshaft? I'm curious about how close the factory outer seal lip is to the snap ring groove.

I have a feeling that I'm going to have to split cases again...
 

FederalQ

Super OPE Member
GoldMember
Local time
6:28 PM
User ID
3210
Joined
May 17, 2017
Messages
270
Reaction score
902
Location
NE Wisconsin
Country flag
Isn’t there a tool of some sort to put over the crankshaft to slide the seal over to prevent rolling the inner diameter edge over? I thought I saw something in the pdf service manual from this site.
 

jacob j.

Lord of Cargo Pants
GoldMember
Local time
4:28 PM
User ID
232
Joined
Dec 24, 2015
Messages
9,197
Reaction score
63,885
Location
Coastal Oregon
Country flag
Does the kit include an OEM PTO side bearing or Chinese? I've never had a problem with the OEM bearing and seal on the PTO side of any 046/460. I've heard from several guys who've had trouble with the Chinese seals and bearings though.
 

jacktheripper

Papa Squat
GoldMember
Local time
5:28 PM
User ID
28875
Joined
Apr 5, 2024
Messages
213
Reaction score
480
Location
Wyoming
Country flag
Isn’t there a tool of some sort to put over the crankshaft to slide the seal over to prevent rolling the inner diameter edge over? I thought I saw something in the pdf service manual from this site.
That is not my issue. Seal lip is on the crank surface evenly.
 

jacktheripper

Papa Squat
GoldMember
Local time
5:28 PM
User ID
28875
Joined
Apr 5, 2024
Messages
213
Reaction score
480
Location
Wyoming
Country flag
Does the kit include an OEM PTO side bearing or Chinese? I've never had a problem with the OEM bearing and seal on the PTO side of any 046/460. I've heard from several guys who've had trouble with the Chinese seals and bearings though.
It was a New West Products bearing. Not sure country of origin, but have heard good things about that company.
 

jacob j.

Lord of Cargo Pants
GoldMember
Local time
4:28 PM
User ID
232
Joined
Dec 24, 2015
Messages
9,197
Reaction score
63,885
Location
Coastal Oregon
Country flag
It was a New West Products bearing. Not sure country of origin, but have heard good things about that company.

Typically how I set the seal on those is with the metal side of the seal just flush with the outer edge of the bearing. A lot of guys set the bearing depth using the oil pump - I set mine where the lower outer step of the bearing is even with the edge of the bearing pocket in the case. I don't like to use the oil pump body because I've seen variations in the how closely or not the oil pump body sits to the top of the bearing pocket.
 

jacktheripper

Papa Squat
GoldMember
Local time
5:28 PM
User ID
28875
Joined
Apr 5, 2024
Messages
213
Reaction score
480
Location
Wyoming
Country flag
Typically how I set the seal on those is with the metal side of the seal just flush with the edge of the bearing. A lot of guys set the bearing depth using the oil pump - I set mine where the lower outer step of the bearing is even with the edge of the bearing pocket in the case. I don't like to use the oil pump body because I've seen variations in the how closely or not the oil pump body sits to the top of the bearing pocket.
Yep, that's how I did it. It might just be that I've got to get the seal just right there... Do you or anyone else have a picture of a 046/460 with the seal installed, oil pump removed? How close is the outer lip to the snap ring groove?
 

Woodwackr

Pinnacle OPE Member
GoldMember
Local time
5:28 PM
User ID
28333
Joined
Jan 18, 2024
Messages
2,019
Reaction score
8,909
Location
ID
Country flag
Yep, that's how I did it. It might just be that I've got to get the seal just right there... Do you or anyone else have a picture of a 046/460 with the seal installed, oil pump removed? How close is the outer lip to the snap ring groove?
is the seal too tall? OE or aftermarket of some sort?
 

redline4

I'm huge in Japan
Local time
6:28 PM
User ID
5593
Joined
Mar 12, 2018
Messages
12,485
Reaction score
104,467
Location
Rosholt Wisconsin
Country flag
You can scroll through my build thread. I took pics of pretty much every step.


jacktheripper

Papa Squat
GoldMember
Local time
5:28 PM
User ID
28875
Joined
Apr 5, 2024
Messages
213
Reaction score
480
Location
Wyoming
Country flag
You can scroll through my build thread. I took pics of pretty much every step.

This is the thread that I've been looking for. I read it a while back. I feel a little less crazy too, because your PTO side looks just like mine does. I just think I'm messing up the install on my end. I ordered some new crank seals and I'll give it a shot after Thanksgiving
 

drf256

Dr. Richard Cranium
GoldMember
Local time
7:28 PM
User ID
319
Joined
Dec 29, 2015
Messages
9,506
Reaction score
62,227
Location
Strong Island NY
Country flag
I cheat and use the factory installation tools. There is generally a piece with the tool sets that sits over the crank threads and will cover ant lip/step on the crank. When I’ve taken a short cut and haven’t used them, I’ve had a few issues where the inner lip got caught in a groove, or the step in the crank caused the inner lip to prolapse out, causing the seal to fail. When you don’t have that part available, it helps to oil the seal very well and rotate it over any lip or ridge slightly cocked, making sure you don’t flip the lip. AM seals are particularly more prone to this than OEM seals.
 

redline4

I'm huge in Japan
Local time
6:28 PM
User ID
5593
Joined
Mar 12, 2018
Messages
12,485
Reaction score
104,467
Location
Rosholt Wisconsin
Country flag
This is the thread that I've been looking for. I read it a while back. I feel a little less crazy too, because your PTO side looks just like mine does. I just think I'm messing up the install on my end. I ordered some new crank seals and I'll give it a shot after Thanksgiving

You can use this plastic from some type of packaging rolled into a cone so that it fits around the crank shoulder to use as a guide for the seal over that lip as a home made tool. I've done that. I also slobbed some mix oil on it to help the seal go on.
 

Squareground3691

Here For The Long Haul!
Local time
7:28 PM
User ID
16376
Joined
May 1, 2021
Messages
2,800
Reaction score
13,013
Location
New England
Country flag
You can use this plastic from some type of packaging rolled into a cone so that it fits around the crank shoulder to use as a guide for the seal over that lip as a home made tool. I've done that. I also slobbed some mix oil on it to help the seal go on.
Standard procedure for me , or get the OEM sleeve ,
 

jacktheripper

Papa Squat
GoldMember
Local time
5:28 PM
User ID
28875
Joined
Apr 5, 2024
Messages
213
Reaction score
480
Location
Wyoming
Country flag
I definitely understand the concern with getting the seal seated. I feel confident that the seal was not prolapsed from not being able to slip over ridges/shoulders on the crank. The main concern is depth. If the seal is pushed in too deep, the inside rubber ring (that the inner spring fits around) will contact the inner PTO bearing race. If the seal is not deeply tapped in enough, the outer seal lip will ride inside the snap ring groove and not seal. It just seems there isn't much room for error with seal depth on this saw.
 

Sloughfoot

Super OPE Member
Local time
4:28 PM
User ID
26879
Joined
Jun 7, 2023
Messages
333
Reaction score
691
Location
Norcal
Country flag
Fundamental seal install methods isn't the issue, apparently. Makes it above my pay grade. Takes me a try or three with easy ones.
 

Brad Button

Well-Known OPE Member
Local time
4:28 PM
User ID
4979
Joined
Jan 6, 2018
Messages
81
Reaction score
159
Location
Angels Camp,Ca.
Country flag
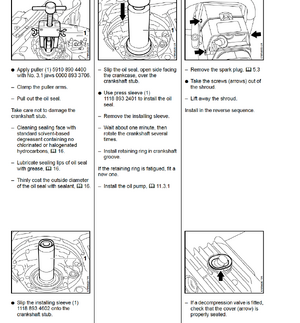
I usually use a socket the right size to install the seals, but on some, the press sleeve works better to get the seal to the right depth along with a light coating of Dirko.
 

Attachments

  • Screenshot 2024-11-26 at 9.41.35 AM.png
    Screenshot 2024-11-26 at 9.41.35 AM.png
    409.2 KB · Views: 10

huskihl

Muh fingers look really big
GoldMember
Local time
7:28 PM
User ID
360
Joined
Dec 31, 2015
Messages
22,879
Reaction score
145,984
Location
East Jordan, MI
Country flag
I definitely understand the concern with getting the seal seated. I feel confident that the seal was not prolapsed from not being able to slip over ridges/shoulders on the crank. The main concern is depth. If the seal is pushed in too deep, the inside rubber ring (that the inner spring fits around) will contact the inner PTO bearing race. If the seal is not deeply tapped in enough, the outer seal lip will ride inside the snap ring groove and not seal. It just seems there isn't much room for error with seal depth on this saw.
The only other thing that comes to mind is the position of the crank inside the case being too far to the left
 
Top