High Quality Chainsaw Bars Husqvarna Toys Hockfire Saws

Dyno

Ronie

Here For The Long Haul!
Local time
9:48 AM
User ID
5495
Joined
Mar 2, 2018
Messages
2,668
Reaction score
8,990
Location
NC
Country flag
I tune on the dyno. As the bar/chain/sprockets all add some load on the saw.

I just tune like I would if going to the wood pile. Make a few pulls and adjust from that.

Need to develop a running procedure for your setup that is easy to repeat from saw to saw and day to day.
Thanks for the help.
 

wcorey

Pinnacle OPE Member
Local time
9:48 AM
User ID
29
Joined
Dec 11, 2015
Messages
1,078
Reaction score
4,663
Location
ma usa
Country flag
Coming along nicely.

You may want to consider adding a lovejoy type coupler to connect the pump/driveshaft, it's very difficult to get perfect shaft alignment and rubberized couplers alleviate a multitude of sins.
 
Last edited:

Ronie

Here For The Long Haul!
Local time
9:48 AM
User ID
5495
Joined
Mar 2, 2018
Messages
2,668
Reaction score
8,990
Location
NC
Country flag
Coming along nicely.

You may want to consider adding a lovejoy type connector to couple the pump/driveshaft, it's very difficult to get perfect shaft alignment and rubberized couplers alleviate a multitude of sins.
Thanks for the tip, I have one for it and will probable end up using it.

KIMG3357.JPG
 

Ronie

Here For The Long Haul!
Local time
9:48 AM
User ID
5495
Joined
Mar 2, 2018
Messages
2,668
Reaction score
8,990
Location
NC
Country flag
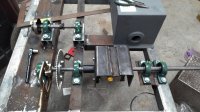
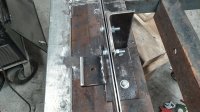
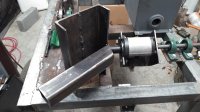
I got the bar almost finished and the mount for tacked on, there's a slight bump where the two bar halves come together on top and I'll smooth that out and I'll open up the slot so I can mount a Stihl on it. I'm going to try and get the arm and mount for the scale, oil tank mounted, castors, some other small things done so I get it painted this weekend.

KIMG3358.JPG KIMG3359.JPG
 

wcorey

Pinnacle OPE Member
Local time
9:48 AM
User ID
29
Joined
Dec 11, 2015
Messages
1,078
Reaction score
4,663
Location
ma usa
Country flag
Wow, you're moving right along, major progress every day.
Rare thing in build threads of any kind here.

Guess you were one step ahead of me on the coupler, another additional reason for using it is that it may help tone down the inevitable and annoying 'scale jitter' a bit (that it looks like you'll soon be experiencing)...

With the very jittery disc brake dyno I went crazy trying to isolate the load cell (scale) to provide some measure of damping, much of it helped but still not enough. After that (and a bunch of software filters) is when I finally gave up on it and switched to hydraulic.
 

Ronie

Here For The Long Haul!
Local time
9:48 AM
User ID
5495
Joined
Mar 2, 2018
Messages
2,668
Reaction score
8,990
Location
NC
Country flag
Wow, you're moving right along, major progress every day.
Rare thing in build threads of any kind here.

Guess you were one step ahead of me on the coupler, another additional reason for using it is that it may help tone down the inevitable and annoying 'scale jitter' a bit (that it looks like you'll soon be experiencing)...

With the very jittery disc brake dyno I went crazy trying to isolate the load cell (scale) to provide some measure of damping, much of it helped but still not enough. After that (and a bunch of software filters) is when I finally gave up on it and switched to hydraulic.
Is there a good way to isolate the scale, I've thought about it a little, like putting rubber under the plate I'm going to put the scale on but then I figured once the arm puts pressure on the scale and compresses the rubber the vibrations would still transfer.
 

Ronie

Here For The Long Haul!
Local time
9:48 AM
User ID
5495
Joined
Mar 2, 2018
Messages
2,668
Reaction score
8,990
Location
NC
Country flag
Wow, you're moving right along, major progress every day.
Rare thing in build threads of any kind here.

Guess you were one step ahead of me on the coupler, another additional reason for using it is that it may help tone down the inevitable and annoying 'scale jitter' a bit (that it looks like you'll soon be experiencing)...

With the very jittery disc brake dyno I went crazy trying to isolate the load cell (scale) to provide some measure of damping, much of it helped but still not enough. After that (and a bunch of software filters) is when I finally gave up on it and switched to hydraulic.
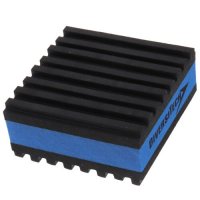
Maybe something like this under the scale would help.

mp-2e-3.jpg

EVA (Extreme Vibration Attenuation) is the latest generation in vibration dampening technology. In the most severe vibration extremes, testing shows the EVA pad outperforms cork and rubber by greater than 3:1 and outperforms competitor's "waffle" pad by greater than 8:1! The enhanced performance comes from the special composite foam center which is structurally more sound than cork. EVA is not affected by oils or chemicals that can break down cork and is much more effective at vibration dampening than solid rubber. Designed to withstand 50 psi. Choose EVA to get the best of both worlds!
 

Red97

Mastermind Approved!
GoldMember
Local time
9:48 AM
User ID
385
Joined
Jan 2, 2016
Messages
7,494
Reaction score
54,119
Location
MI
Country flag
My load cell is mounted in rubber, and the whole stand is isolated too. Some saws will still shake the snot out of it.
 

wcorey

Pinnacle OPE Member
Local time
9:48 AM
User ID
29
Joined
Dec 11, 2015
Messages
1,078
Reaction score
4,663
Location
ma usa
Country flag
I guess it depends on what type of scale you’re using and how it mounts, flat, hanging, push or pull, etc. The durometer/hardness of the damping material used is dependent on the force applied to it, too hard and it doesn’t do much, too soft and it squishes down until it’s hard (and doesn’t do much). That and surface area, small bumpers need to be harder than a large pad. On a hanging pull scale all that might be needed is a bungee that it either hangs from or goes between the scale and torque arm. A floor type scale being pushed on can sit on a pad or feet/ bumpers and also have rubber between it and the torque arm.
Seemingly endless options with how to go about the whole deal, my MO is usually to work with what I have on hand first.

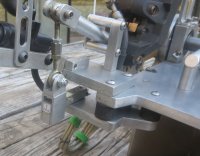
On the brake dyno I was pulling up on the load cell so made a stirrup/cradle type rig that I could insert various little rubber squares of tire tube, rubber bands, foam rubber, etc between it and the lc.
Then mounted the lc on a sub chassis attached to the main chassis with isolation dampers similar to those 2 series husqvarna anti vibe rubbers with the threaded stud on either end.

LC damping.JPG

So that likely doesn’t help your particular situation but gives you some idea, I’ll try to find a pic.
 
Last edited:

Red97

Mastermind Approved!
GoldMember
Local time
9:48 AM
User ID
385
Joined
Jan 2, 2016
Messages
7,494
Reaction score
54,119
Location
MI
Country flag
Depending on how sensitive your scale is. A longer/shorter tq arm may help "smooth" the readings.

What is your overall gear ratio going to be ?
 

Dieselshawn

Pinnacle OPE Member
Local time
9:48 AM
User ID
804
Joined
Feb 6, 2016
Messages
541
Reaction score
2,998
Location
Southern Ontario, canada
Country flag
I have no vibration isolation materials put in.

Sometimes having too much vibration isolation does the opposite of what we want.

I have no issues getting readings from the scale.

Some saws do vibrate more than others.
 

Ronie

Here For The Long Haul!
Local time
9:48 AM
User ID
5495
Joined
Mar 2, 2018
Messages
2,668
Reaction score
8,990
Location
NC
Country flag
Depending on how sensitive your scale is. A longer/shorter tq arm may help "smooth" the readings.

What is your overall gear ratio going to be ?
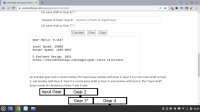
It's going to be .1167

Does most of the vibration come from the saw or does the pump vibrate a lot? I was thinking about putting some rubber dampers on the saw bar to reduce vibrations.

Screenshot from 2022-06-25 09-10-08.png

Screenshot from 2022-06-25 08-54-40.png
 
Last edited:

Ronie

Here For The Long Haul!
Local time
9:48 AM
User ID
5495
Joined
Mar 2, 2018
Messages
2,668
Reaction score
8,990
Location
NC
Country flag
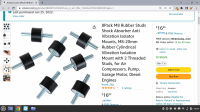
I've been thinking about this all morning, I'm going to mount some vibration dampers on the bottom of the saw bar mount where it meets the table and on the bottom of the plate the scale rest on, I'll also put some rubber under the scale and see how it does. These are the dampers I'm going to use.

Screenshot from 2022-06-25 10-17-40.png
 

Ronie

Here For The Long Haul!
Local time
9:48 AM
User ID
5495
Joined
Mar 2, 2018
Messages
2,668
Reaction score
8,990
Location
NC
Country flag
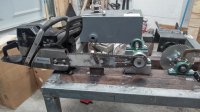
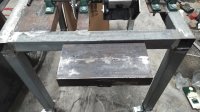
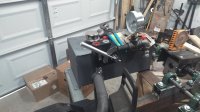
Not much done today, I got the casters tacked on, tank ready to mount and redid the bar mount so I could put 3 vibration dampers under it.

KIMG3361.JPG
 

Ronie

Here For The Long Haul!
Local time
9:48 AM
User ID
5495
Joined
Mar 2, 2018
Messages
2,668
Reaction score
8,990
Location
NC
Country flag
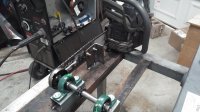
Did the plate for the scale this afternoon, the buffers will go on the plate and I'm going to bolt them to a piece of plywood for the scale to set on. I made it so I could remove it when I'm not using it, like a trailer hitch except two bolts will press up against it to keep it from moving around. I'm a little behind the schedule I set for myself so it looks like it's going to take me another week or more to get it all welded up, panted and put together. I wish my welds didn't look like crap, I just can't see the puddle or even what I'm welding once arc starts and what makes it worse is that I've got a year of welding school and was pretty good welder years ago.

KIMG3362.JPG KIMG3363.JPG
 

wcorey

Pinnacle OPE Member
Local time
9:48 AM
User ID
29
Joined
Dec 11, 2015
Messages
1,078
Reaction score
4,663
Location
ma usa
Country flag
I just can't see the puddle or even what I'm welding once arc starts

Make sure every layer you're looking through on the shield is as clean as possible, even a little film or smudge that's hardly noticeable in regular light can cause a lot of glare when looking through at the arc.

I noticed a huge improvement when I bought a long overdue new helmet, and also these days I notice it helps to use low power readers/magnifiers.
 

Ronie

Here For The Long Haul!
Local time
9:48 AM
User ID
5495
Joined
Mar 2, 2018
Messages
2,668
Reaction score
8,990
Location
NC
Country flag
Make sure every layer you're looking through on the shield is as clean as possible, even a little film or smudge that's hardly noticeable in regular light can cause a lot of glare when looking through at the arc.

I noticed a huge improvement when I bought a long overdue new helmet, and also these days I notice it helps to use low power readers/magnifiers.
I've tried everything, Lincoln viking, and Esab helmets, standard Lincoln non auto darkening helmet, with and without readers, nothing helps. It's the bright light, once the ark starts my won't come back into focus. I use to like welding and had a few good welders like an Esab and a couple of Powcon welders and a few others but sold them all except for my ark welder and this Matco mig I'm using, just don't enjoy it anymore and only do it when I have to.
 

Ronie

Here For The Long Haul!
Local time
9:48 AM
User ID
5495
Joined
Mar 2, 2018
Messages
2,668
Reaction score
8,990
Location
NC
Country flag
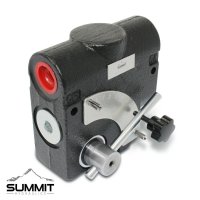
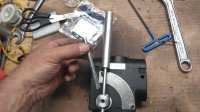
s-l1600 (1).jpg After lunch today I made a longer lever for the flow control valve, this is how it's going to be set up. That red cap on top of the valve is the excess flow and I'll put a plug in it.

KIMG3364.JPG KIMG3365.JPG
 

Ronie

Here For The Long Haul!
Local time
9:48 AM
User ID
5495
Joined
Mar 2, 2018
Messages
2,668
Reaction score
8,990
Location
NC
Country flag
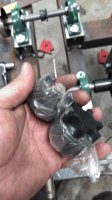
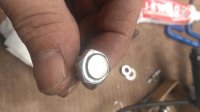
The magnet bolt I ordered for the pump tach got lost in the mail so I cut the center out of a bolt about half the thickness of the magnet that came with the tach and JB welded it to the bolt, hopefully that will keep it from flying off the sprocket.

KIMG3369.JPG
 
Top