earlthegoat2
Super OPE Member
- Local time
- 10:14 PM
- User ID
- 2438
- Joined
- Jan 7, 2017
- Messages
- 98
- Reaction score
- 270
- Location
- Savannah, GA
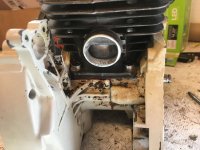
Over the next few days I will be posting some pictures and commentary about my hybrid build. There seems to be precious little on the net about this. I did not find it to be an overly complicated project but a few instructions could really go a long way. This was my first build of this type and I may have missed a few steps or did not clearance something where I should have.
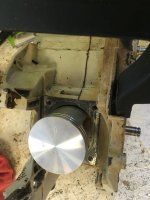
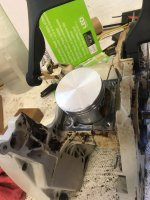
Truthfully I'm not too sure of the longevity of the build. I got a little bit too far into it before I realized there may be a problem with the cylinder and small end on the rod. That is what prompts me to use a few aftermarket parts including a Meteor piston and some Hyway and Cross branded products.
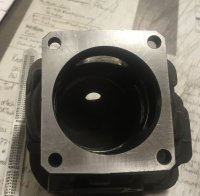
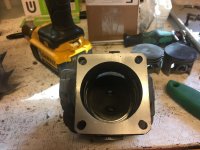
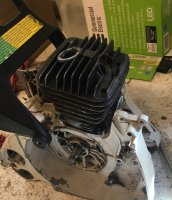
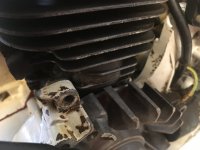
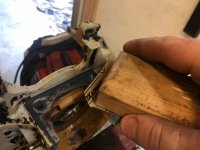
For a bit of a teaser, here is when I enlarged the cylinder holes from M5x0.8 to M6x1.00.
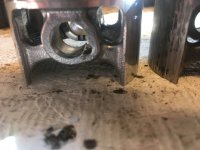
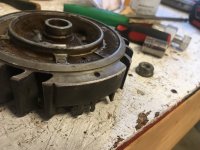
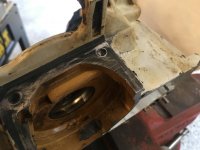
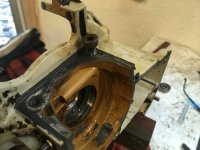
One case half vised up, drilled, tapped, and dressed down by hand with 220 grit paper.


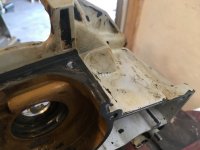
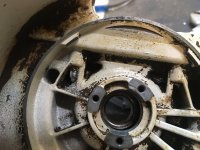
The cylinder holes are through holes too. They are not blind. The last picture below shows what I am talking about. You can see the tap protruding in the upper left area of where the flywheel would be.
Truthfully I'm not too sure of the longevity of the build. I got a little bit too far into it before I realized there may be a problem with the cylinder and small end on the rod. That is what prompts me to use a few aftermarket parts including a Meteor piston and some Hyway and Cross branded products.
For a bit of a teaser, here is when I enlarged the cylinder holes from M5x0.8 to M6x1.00.
One case half vised up, drilled, tapped, and dressed down by hand with 220 grit paper.
The cylinder holes are through holes too. They are not blind. The last picture below shows what I am talking about. You can see the tap protruding in the upper left area of where the flywheel would be.
Attachments
Last edited: