High Quality Chainsaw Bars Husqvarna Toys

Stihl West German O24 AVS / Upgrade to 44.7 Bore

drf256

Dr. Richard Cranium
GoldMember
Local time
10:25 AM
User ID
319
Joined
Dec 29, 2015
Messages
9,334
Reaction score
61,419
Location
Strong Island NY
Country flag
Thinking a bit more on how to attack the crankcase with a die grinder/burr and not mess it up.

Planning to remove the fuel tank and brake bail arm to enable better access.

I can make up a steel plate with 3 holes:
- Two small ones to bolt it to the crankcase flange
- One large 1 .875" diameter (47.62 mm) as a guide for the burr. This would give ~ 1.5 mm/side clearance between the bottom of the piston OD and the case ID

I can mount the plate and put a depth stop on the mill to prevent going below the desired depth. The plate will prevent the burr moving beyond the desired circumference.

Would 1.5 mm/side clearance be enough to prevent piston contact at high revs? Or should I go more? A 2" (50.8 mm) hole in the center of the plate would provide ~ 3 mm (0.125") clearance per side.
Unforeseen issue. I’ve never put a 44.7 on an 024 chassis, 44mm certainly fit and have ample side clearance (as do 44.7 on 44mm cases-gotta wonder if that’s why they didn’t go to 45mm).

Assuming consistency in cases, that would mean that there is .35mm of clearance around that piston skirt when the 44mm is added. That’s around 14 thousands.

You don’t have to worry about adding too much case volume. You already have a mismatch there. I’d leave around .020 around that skirt, but that’s just for insurance in case the jug shifts a bit when you bolt it down. If you take too much you can cut through and render the case useless.

It gets tight there. You are effectively doing a hybrid, akin to an 044/046. Many times with the 044/046 hybrid one can have the same issue you are having if the base holes in the jug aren’t relieved correctly.
 

Paul Fithian

Super OPE Member
GoldMember
Local time
9:25 AM
User ID
25442
Joined
Nov 16, 2022
Messages
249
Reaction score
907
Location
Long Beach, IN
Country flag
For sure this is a new learning for all of us. Maybe I'll end up with the biggest displacement 024? Any one have a late vintage 026 /260/261 case that can measure the crankcase ID? Likely it was increased at some point, as I don't recall postings of issues with 44.7 mm P/C kits on 026 saws.

Lennox also makes a 46 mm (1 13/16") hole saw. Using this size would provide 0.026" clearance per side between the piston bottom and the crankcase ID. Would this be a better option than the 1 7/8 hole saw providing 0.060" each side?

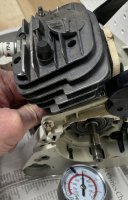
I also looked at the depth needed for the cut, 3/16" // 0.1875" // 5 mm:
Crankcase depth measure.jpg

One other option I thought of is to make up a thin plywood template, bolt it to the crankcase flange, and use it as a guide for the hole saw without the center pilot bit, plunging it 5 mm into the case from the flange top. By mounting the case in a fixture on my drill press, it would be easier to control depth and provide a perfectly round hole in the crankcase flange vs freehand with a burr.
 
Last edited:

huskihl

Muh fingers look really big
GoldMember
Local time
10:25 AM
User ID
360
Joined
Dec 31, 2015
Messages
22,455
Reaction score
143,000
Location
East Jordan, MI
Country flag
Can you mark the piston on the case at bottom dead center with a sharpie and grind it out with a Dremel/Foredom and carbide burr?
 

drf256

Dr. Richard Cranium
GoldMember
Local time
10:25 AM
User ID
319
Joined
Dec 29, 2015
Messages
9,334
Reaction score
61,419
Location
Strong Island NY
Country flag
For sure this is a new learning for all of us. Maybe I'll end up with the biggest displacement 024? Any one have a late vintage 026 /260/261 case that can measure the crankcase ID? Likely it was increased at some point, as I don't recall postings of issues with 44.7 mm P/C kits on 026 saws.

Lennox also makes a 46 mm (1 13/16") hole saw. Using this size would provide 0.026" clearance per side between the piston bottom and the crankcase ID. Would this be a better option than the 1 7/8 hole saw providing 0.060" each side?

I also looked at the depth needed for the cut, 3/16" // 0.1875" // 5 mm:
View attachment 357620

One other option I thought of is to make up a thin plywood template, bolt it to the crankcase flange, and use it as a guide for the hole saw without the center pilot bit, plunging it 5 mm into the case from the flange top. By mounting the case in a fixture on my drill press, it would be easier to control depth and provide a perfectly round hole in the crankcase flange vs freehand with a burr.
I think you’re over complicating things.

Use a sharpie marker and scribe a line, grind to line. You can draw the line with the piston at BDC as a guide to keep the line straight. Check clearance and done. You can also use the old base gasket as a template, I bet it’s bigger than the current case bore.

Biggest issue is keeping case clean from the grindings. Check for clearance afterwards and be done.

I’d personally stuff paper towel into case, grind, blow all clean w compressed air after grinding and then pull the towels out. Then you can put mineral spirits in the case, rotate case and dump. Repeat until no more grindings seen.

Ideally one would split and rebearing the case after the clearance work.

Mag grindings won’t do anything bad to a saw. Nikasil or steel grindings certainly will.
 

Paul Fithian

Super OPE Member
GoldMember
Local time
9:25 AM
User ID
25442
Joined
Nov 16, 2022
Messages
249
Reaction score
907
Location
Long Beach, IN
Country flag
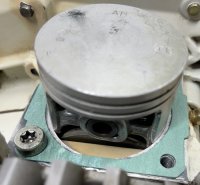
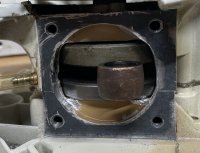
Sound advice from Doc, this wasn't that hard. Used the gasket to scribe a line, then went for it with a die grinder and burr.
Gasket-piston clearance.jpg
Case clearance grind.jpg

We have clearance, rotates freely with no contact. Assembly in the next few days.
 

Paul Fithian

Super OPE Member
GoldMember
Local time
9:25 AM
User ID
25442
Joined
Nov 16, 2022
Messages
249
Reaction score
907
Location
Long Beach, IN
Country flag
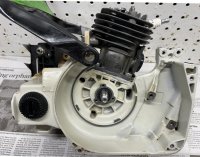
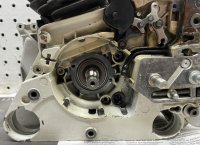
Completed P/C assembly and removed components from both sides to clean and make sure the seals were good:
Cleaned flywheel side.jpg
Cleaned clutch side.jpg

Passed vac test, it held -15" Hg for as long as I cared to:
Vac Test Pass.jpg

All back together, waiting on a flywheel key. I'll check assembled squish and compression before first start.

Thanks again to all, especially Doc, to help to make this saw better and back to OEM piston/cylinder setup.
 
Last edited:

Paul Fithian

Super OPE Member
GoldMember
Local time
9:25 AM
User ID
25442
Joined
Nov 16, 2022
Messages
249
Reaction score
907
Location
Long Beach, IN
Country flag
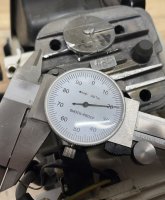
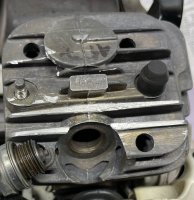
Installed flywheel and measured assembled squish
Assembled Squish.jpg

Compression tests showed > 200 PSI. Gauge was leaking down, couldn't get a good picture of it.

Fired right up on the 4th pull. I'll fine tune high speed mixture and make some test cuts, possibly this evening
 
Last edited:

drf256

Dr. Richard Cranium
GoldMember
Local time
10:25 AM
User ID
319
Joined
Dec 29, 2015
Messages
9,334
Reaction score
61,419
Location
Strong Island NY
Country flag
Looks good. Make sure it’s fat enough and lay it in some wood asap. Gotta seat those rings into the bore.
 

lehman live edge slab

Live Action
Local time
9:25 AM
User ID
3953
Joined
Sep 2, 2017
Messages
3,371
Reaction score
11,647
Location
Mn
Country flag
Just thinking that if you’re planning to run a 20” bar and asking the saw to do a little harder work then it has in the past you might want to consider adding a second bar stud.
That’s strange the 3 024’s I dealt with all had two
 

Paul Fithian

Super OPE Member
GoldMember
Local time
9:25 AM
User ID
25442
Joined
Nov 16, 2022
Messages
249
Reaction score
907
Location
Long Beach, IN
Country flag
Thanks Doc, I did that last night.

Got 13,000 RPM with 1.25 turns out on the high speed screw. Made 4 cuts in 16” red oak at full throttle. Here’s what the plug looks like after these cuts:

F4A9B272-F9FF-4B80-8E36-42EFD18605C4.jpeg

This 024/6 AVS Pro runs perfect and cuts way faster than before. Like I got a new saw for Christmas!
D46DC16E-40F0-46AB-93E4-F0CCEC4BBF2A.jpeg
 
Last edited:

lehman live edge slab

Live Action
Local time
9:25 AM
User ID
3953
Joined
Sep 2, 2017
Messages
3,371
Reaction score
11,647
Location
Mn
Country flag
Did you kill the ridge out of the squish when using no gasket? Might be wrong but I thought doc told me I either needed to cut the ring out of the band or use a gasket so I didn’t make a head slapper. Unless that’s a pre ported doc special than what I said for sure won’t apply
 

Paul Fithian

Super OPE Member
GoldMember
Local time
9:25 AM
User ID
25442
Joined
Nov 16, 2022
Messages
249
Reaction score
907
Location
Long Beach, IN
Country flag
I did not do anything inside the cylinder Doc sent.

Only outside when I milled down the two rear fins to fit the 024 top cover.
 

lehman live edge slab

Live Action
Local time
9:25 AM
User ID
3953
Joined
Sep 2, 2017
Messages
3,371
Reaction score
11,647
Location
Mn
Country flag
I did not do anything inside the cylinder Doc sent.

Only outside when I milled down the two rear fins to fit the 024 top cover.
Ok and maybe not all have the ridge right above the plating on the squish band or doc already removed it, either way doc wouldn’t steer you wrong on his specialty saw.
 

Paul Fithian

Super OPE Member
GoldMember
Local time
9:25 AM
User ID
25442
Joined
Nov 16, 2022
Messages
249
Reaction score
907
Location
Long Beach, IN
Country flag
I was able to compare how this upgraded saw cuts vs. my SIL's recent vintage stock MS251.

The new 44.7 mm P/C, base gasket delete, and muffler mods make this 024/6 AVS Pro a much faster saw!

 
Last edited:

drf256

Dr. Richard Cranium
GoldMember
Local time
10:25 AM
User ID
319
Joined
Dec 29, 2015
Messages
9,334
Reaction score
61,419
Location
Strong Island NY
Country flag
Did you kill the ridge out of the squish when using no gasket? Might be wrong but I thought doc told me I either needed to cut the ring out of the band or use a gasket so I didn’t make a head slapper. Unless that’s a pre ported doc special than what I said for sure won’t apply
44.7 or 44?
 

lehman live edge slab

Live Action
Local time
9:25 AM
User ID
3953
Joined
Sep 2, 2017
Messages
3,371
Reaction score
11,647
Location
Mn
Country flag
44.7 or 44?
I was working on an 026 and getting some guidance from you and just remember you telling me the 026’s had a ridge in the squish so you can just do a base delete. But mine was a 44mm I’ve never had a 44.7 so didn’t know if any difference as far as base delete.
 

drf256

Dr. Richard Cranium
GoldMember
Local time
10:25 AM
User ID
319
Joined
Dec 29, 2015
Messages
9,334
Reaction score
61,419
Location
Strong Island NY
Country flag
I was working on an 026 and getting some guidance from you and just remember you telling me the 026’s had a ridge in the squish so you can just do a base delete. But mine was a 44mm I’ve never had a 44.7 so didn’t know if any difference as far as base delete.
Yeah Pal. The 44’s are head slappers without a gasket. The 44.7 are not. That’s in general, YMMV.
 

lehman live edge slab

Live Action
Local time
9:25 AM
User ID
3953
Joined
Sep 2, 2017
Messages
3,371
Reaction score
11,647
Location
Mn
Country flag
Yeah Pal. The 44’s are head slappers without a gasket. The 44.7 are not. That’s in general, YMMV.
Thank you I wasn’t sure but now I know. Maybe I’ll end up with a 260 sometime should be getting a 261c soon.
 

KcChiefs2019

Well-Known OPE Member
Local time
9:25 AM
User ID
10451
Joined
Sep 13, 2019
Messages
43
Reaction score
63
Location
Illinois
Country flag
Good thread! I got a 024 super AV, with only 1 bar stud. It has a second threaded hole. I will be borrowing a bar stud from a 026. It’s them simple things tht get past ya. Make me feel a bit stupid when they do to.
 

Paul Fithian

Super OPE Member
GoldMember
Local time
9:25 AM
User ID
25442
Joined
Nov 16, 2022
Messages
249
Reaction score
907
Location
Long Beach, IN
Country flag
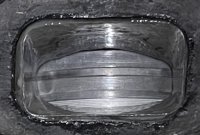
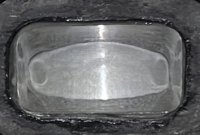
Pulled the muffler to have a look at the piston and rings, all good, no marks at all. What I could see on the inside of the cylinder looked perfect:
1st run exhaust view piston rings2.JPG

1st run exhaust view piston.JPG

Found one of the muffler to cylinder bolts loose inside the muffler. Used Hot-Lock on all 4 muffler bolts to prevent them from coming out prematurely in the future
 
Last edited:
Top