dustinwilt68
Wilt Built Work Saws
- Local time
- 9:54 AM
- User ID
- 1007
- Joined
- Mar 8, 2016
- Messages
- 5,933
- Reaction score
- 26,241
- Location
- Southwest PA
I dnt like as the 288 throws some serious chips.
That's exactly what I was thinking Dustin. Especially with the low top filter being notorious for not doing a very good job. Thanks man.I dnt like as the 288 throws some serious chips.

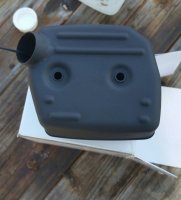
So on to MM thoughts. I'm thinking I will just cut away the baffle underneath the screen and call it good. It seems like that would let the muffler flow quite a bit better. Had the thought of pointing the deflector forward also but I'll see how I like it with just that baffle removed. I'm not inclined to put another port on the left side of the muffler because I don't wanna cut my cover.
Nice! A possible glimpse into my future
Sounds damn goodNice! A possible glimpse into my future
Thanks man. My box of parts is scheduled to arrive tomorrow morning and if all goes well I'll be posting assembly pics tomorrow evening. The only variable being that I might have to work until 7:00 tomorrow nightHey the project is coming along very nicely.
I have a spark oil pump that I mount on the case half heat and seat the bearing against the oil pump or that's how I do itSo @RIDE-RED 350r and I were pondering over the best method of installing the clutch side crank bearing. Both of us are used to dealing with cases that have a shoulder that the bearing seats against, and as you guys with experience know there is no shoulder on the clutch side and the seal is in the pump housing not the crank case.
We had 2 ideas, first was to install the pump and press the bearing until it seats against it. The difficulty in this is that there is no flat surface to set the case on while pressing the bearing in place. A little heat would help but I don't want to damage the o-ring on the pump housing either.
Second idea was to press the bearing in from the outside but then we're left with finding the correct seating depth by feel based on where the old bearing was. I have that 281 case split for reference but to me this is still not ideal.
Can anyone share their method for pressing the clutch side crank bearing to the correct depth? Sorry for the long winded post and I hope I've illustrated what we're thinking clearly enough so you guys know what I'm thinking on this. Thanks!
Why didn't I think of that! I have a another pump housing too! I also just had the thought to remove the oring, install the housing and then use some propane heat to loosen the the case a bit to ease the install. Thanks rattler! For sharing your method and getting my dang brain firing on all cylinders. LolI have a spark oil pump that I mount on the case half heat and seat the bearing against the oil pump or that's how I do it
Sent from my SM-G935V using Tapatalk


