PogoInTheWoods
Pinnacle OPE Member
- Local time
- 10:09 PM
- User ID
- 1190
- Joined
- Apr 23, 2016
- Messages
- 1,957
- Reaction score
- 3,908
- Location
- Ohio
I think Randy just used a hack saw with a nail. You can buy the small split mandrels cheap. Having several loaded with different grit abrasives is handy. I still find myself going the larger route in most cases for a variety of reasons. The main one is probably the ability to span (usually) the ports and transfers during the process along with having the torque and basic mass to apply greater surface pressure when it seems to be required. There's also the flexibility factor for using thicker and wider abrasive paper with the larger flapper method -- not to mention the extended reach.

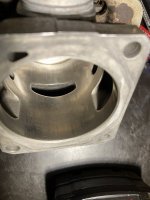
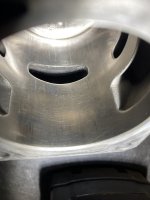
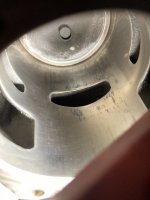
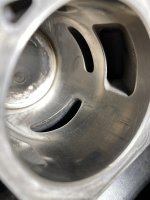
So this is the second cylinder cleanup post of mine this week and I forgot to include a very important aspect in both of them, which is the cleaning of the cylinder after everything else is done. Everyone has their preferred method. Mine is to start with a well-oiled paper towel to wipe down the surface(s). The oil will pick up residual aluminum residue better than you may think. I do a couple passes. Then I do a hosing with brake clean (just becaus)e before another wipe down with a clean paper towel. Then it's a plain ol' Dawn and hot water soak before a final rinse and dry with water. May seem excessive, but is guaranteed to be white glove clean.
One other thing I see mentioned occasionally is guys using WD40 or other penetrating oils/lubricants for 'wet sanding' aluminum transfer. Never could understand why you would lubricate something you were trying to scrape off unless the process involved excessive heat. Seems like using wet and slippery abrasive paper trying to remove wet and slippery aluminum transfer is just defeating the whole purpose of using an abrasive in the first place.
Ok. I'll go now. LOL
Last edited: