High Quality Chainsaw Bars Husqvarna Toys

Stihl MS 261 rebuild questions

heavy_oil_saw

Well-Known OPE Member
Local time
9:08 AM
User ID
11623
Joined
Feb 2, 2020
Messages
37
Reaction score
116
Location
Colchester
Buy the time I’d started building the saw, I discovered the crankshaft problem. Lots of ideas, 1)incorrect surface hardness of crank so the bearing which is harder eats the crank, 2)incorrectly aligned crankcases at factory, causing throw out at the end, then wearing out the stub end, 3)lack of greasing of the bearing, these are the main 3 beliefs I’ve found (non are concrete though).
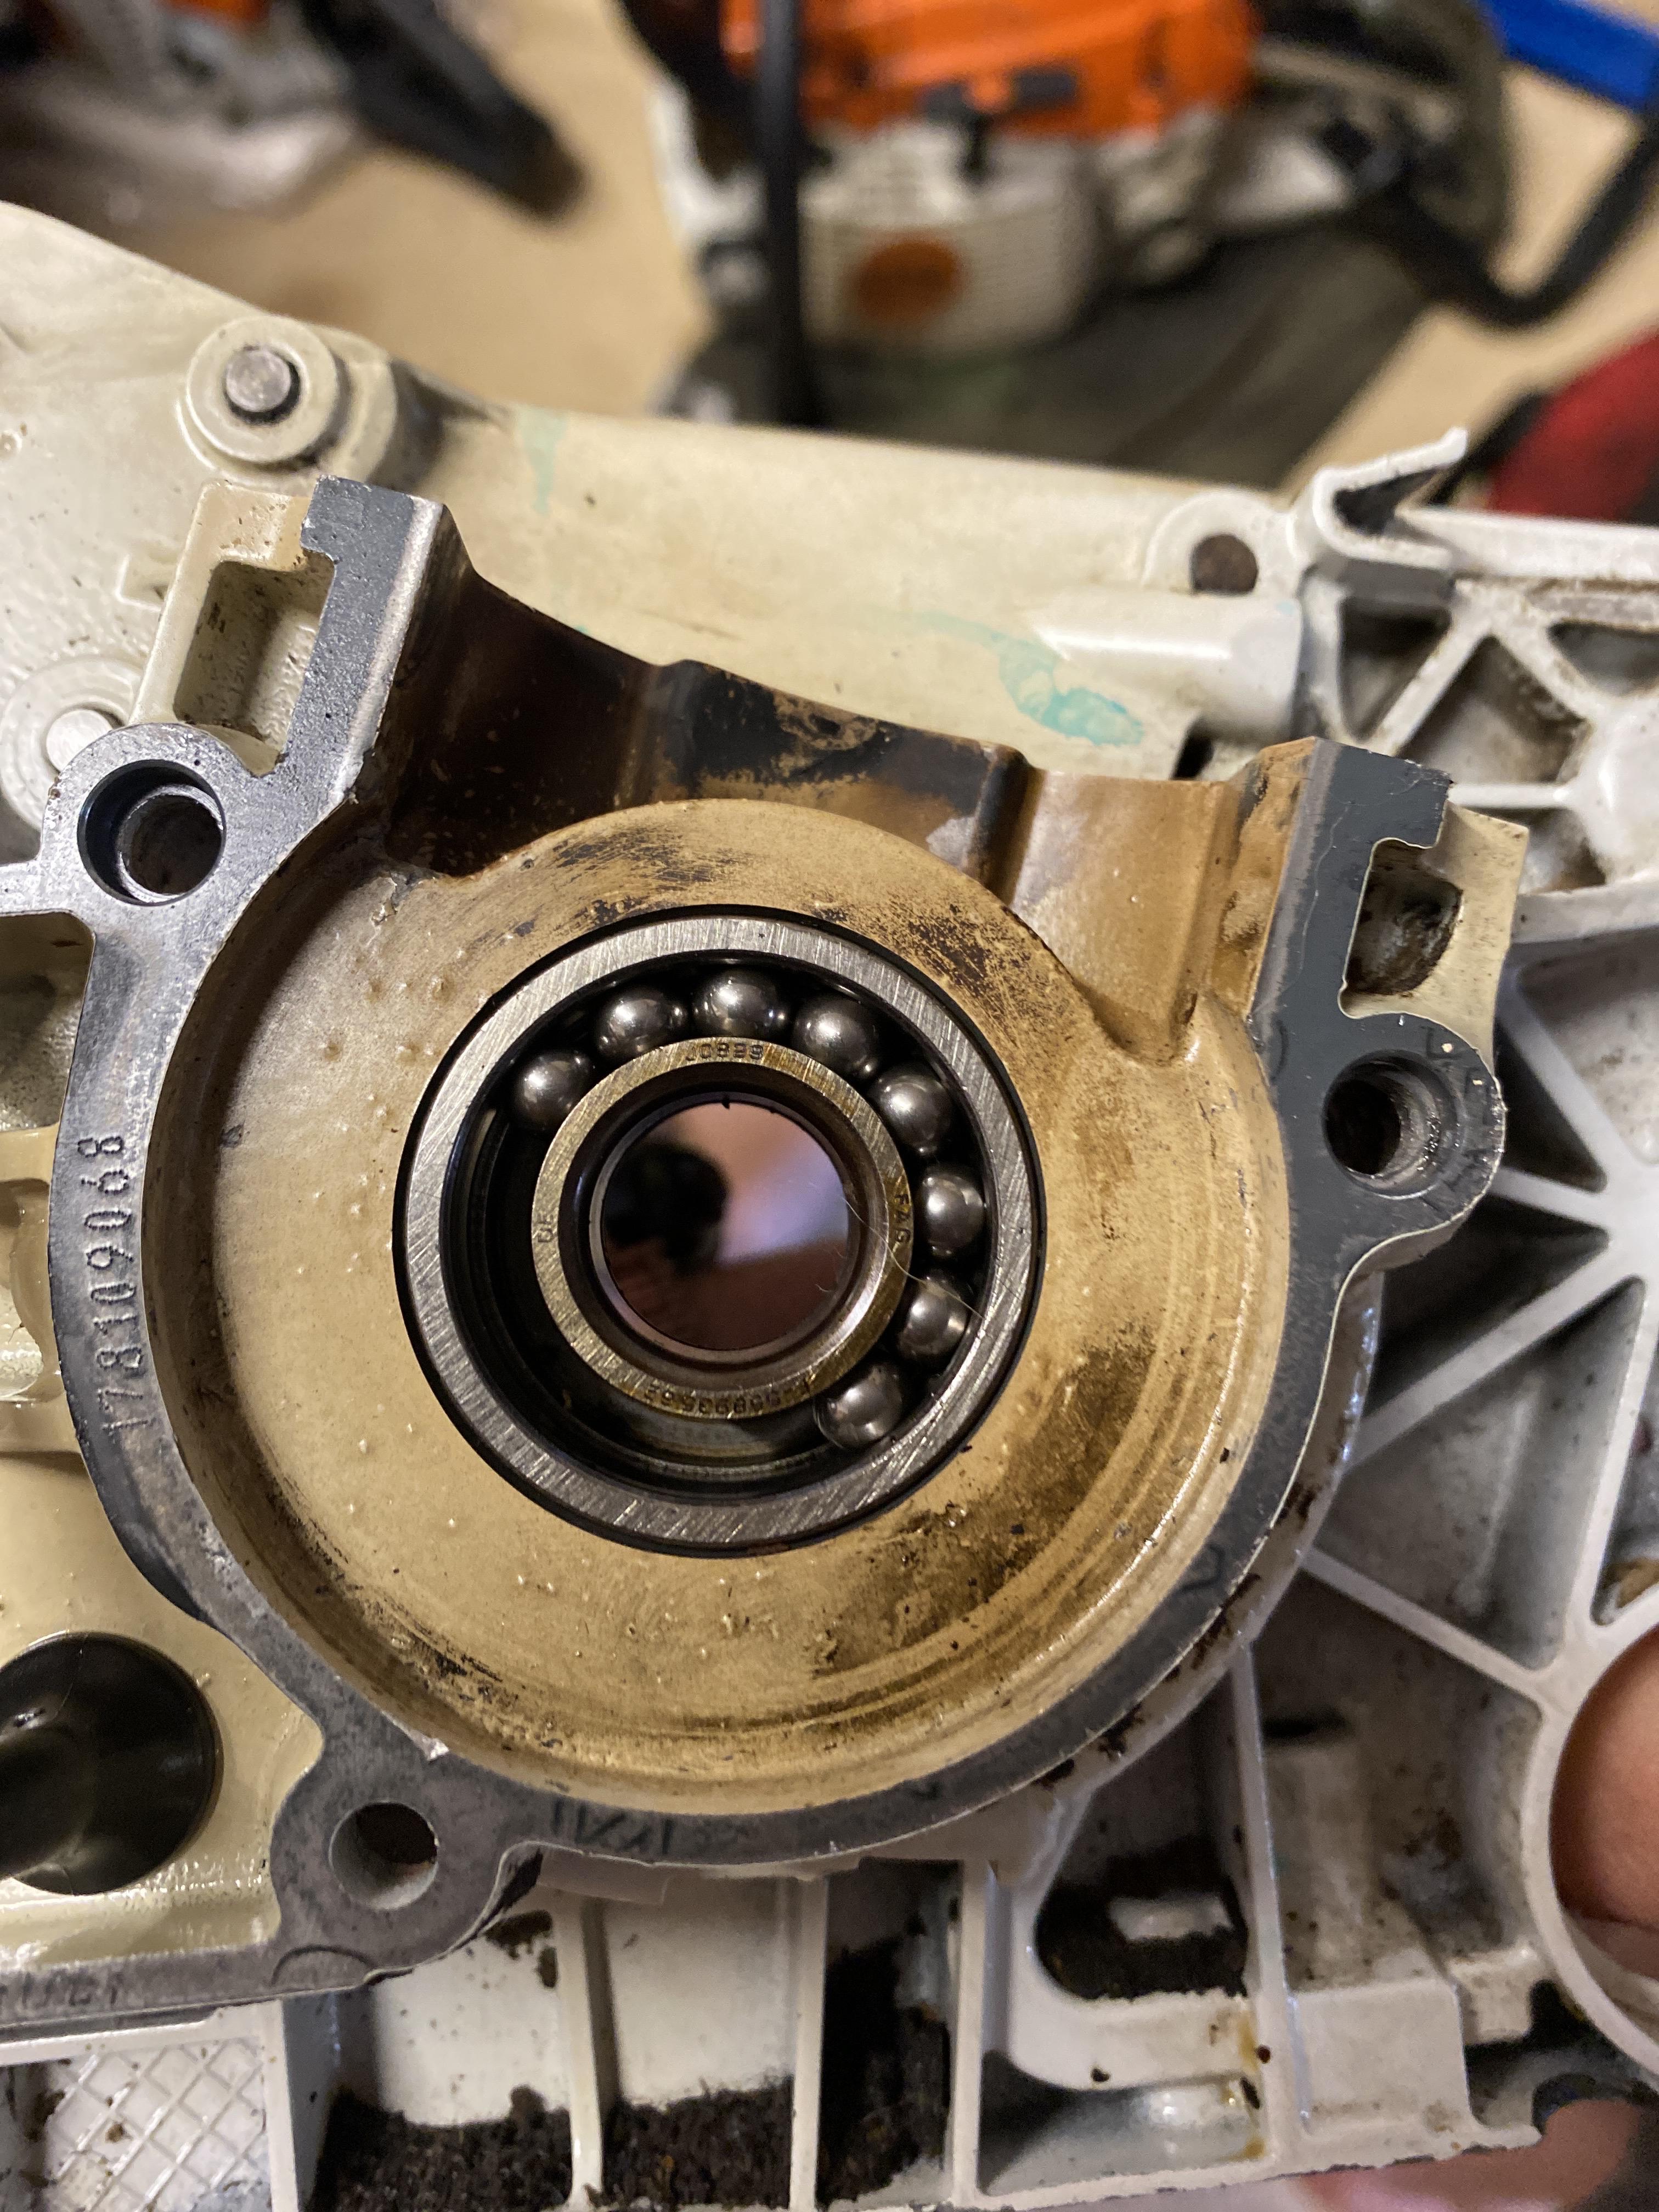
On the other hand, common believe is MT cranks are fine and no reports of wear, though I bought a MT crank case and the crank was shot big time, the flywheel had smashed the crank case, eaten the oil pump and destroyed the oil pump side crank case bearing.
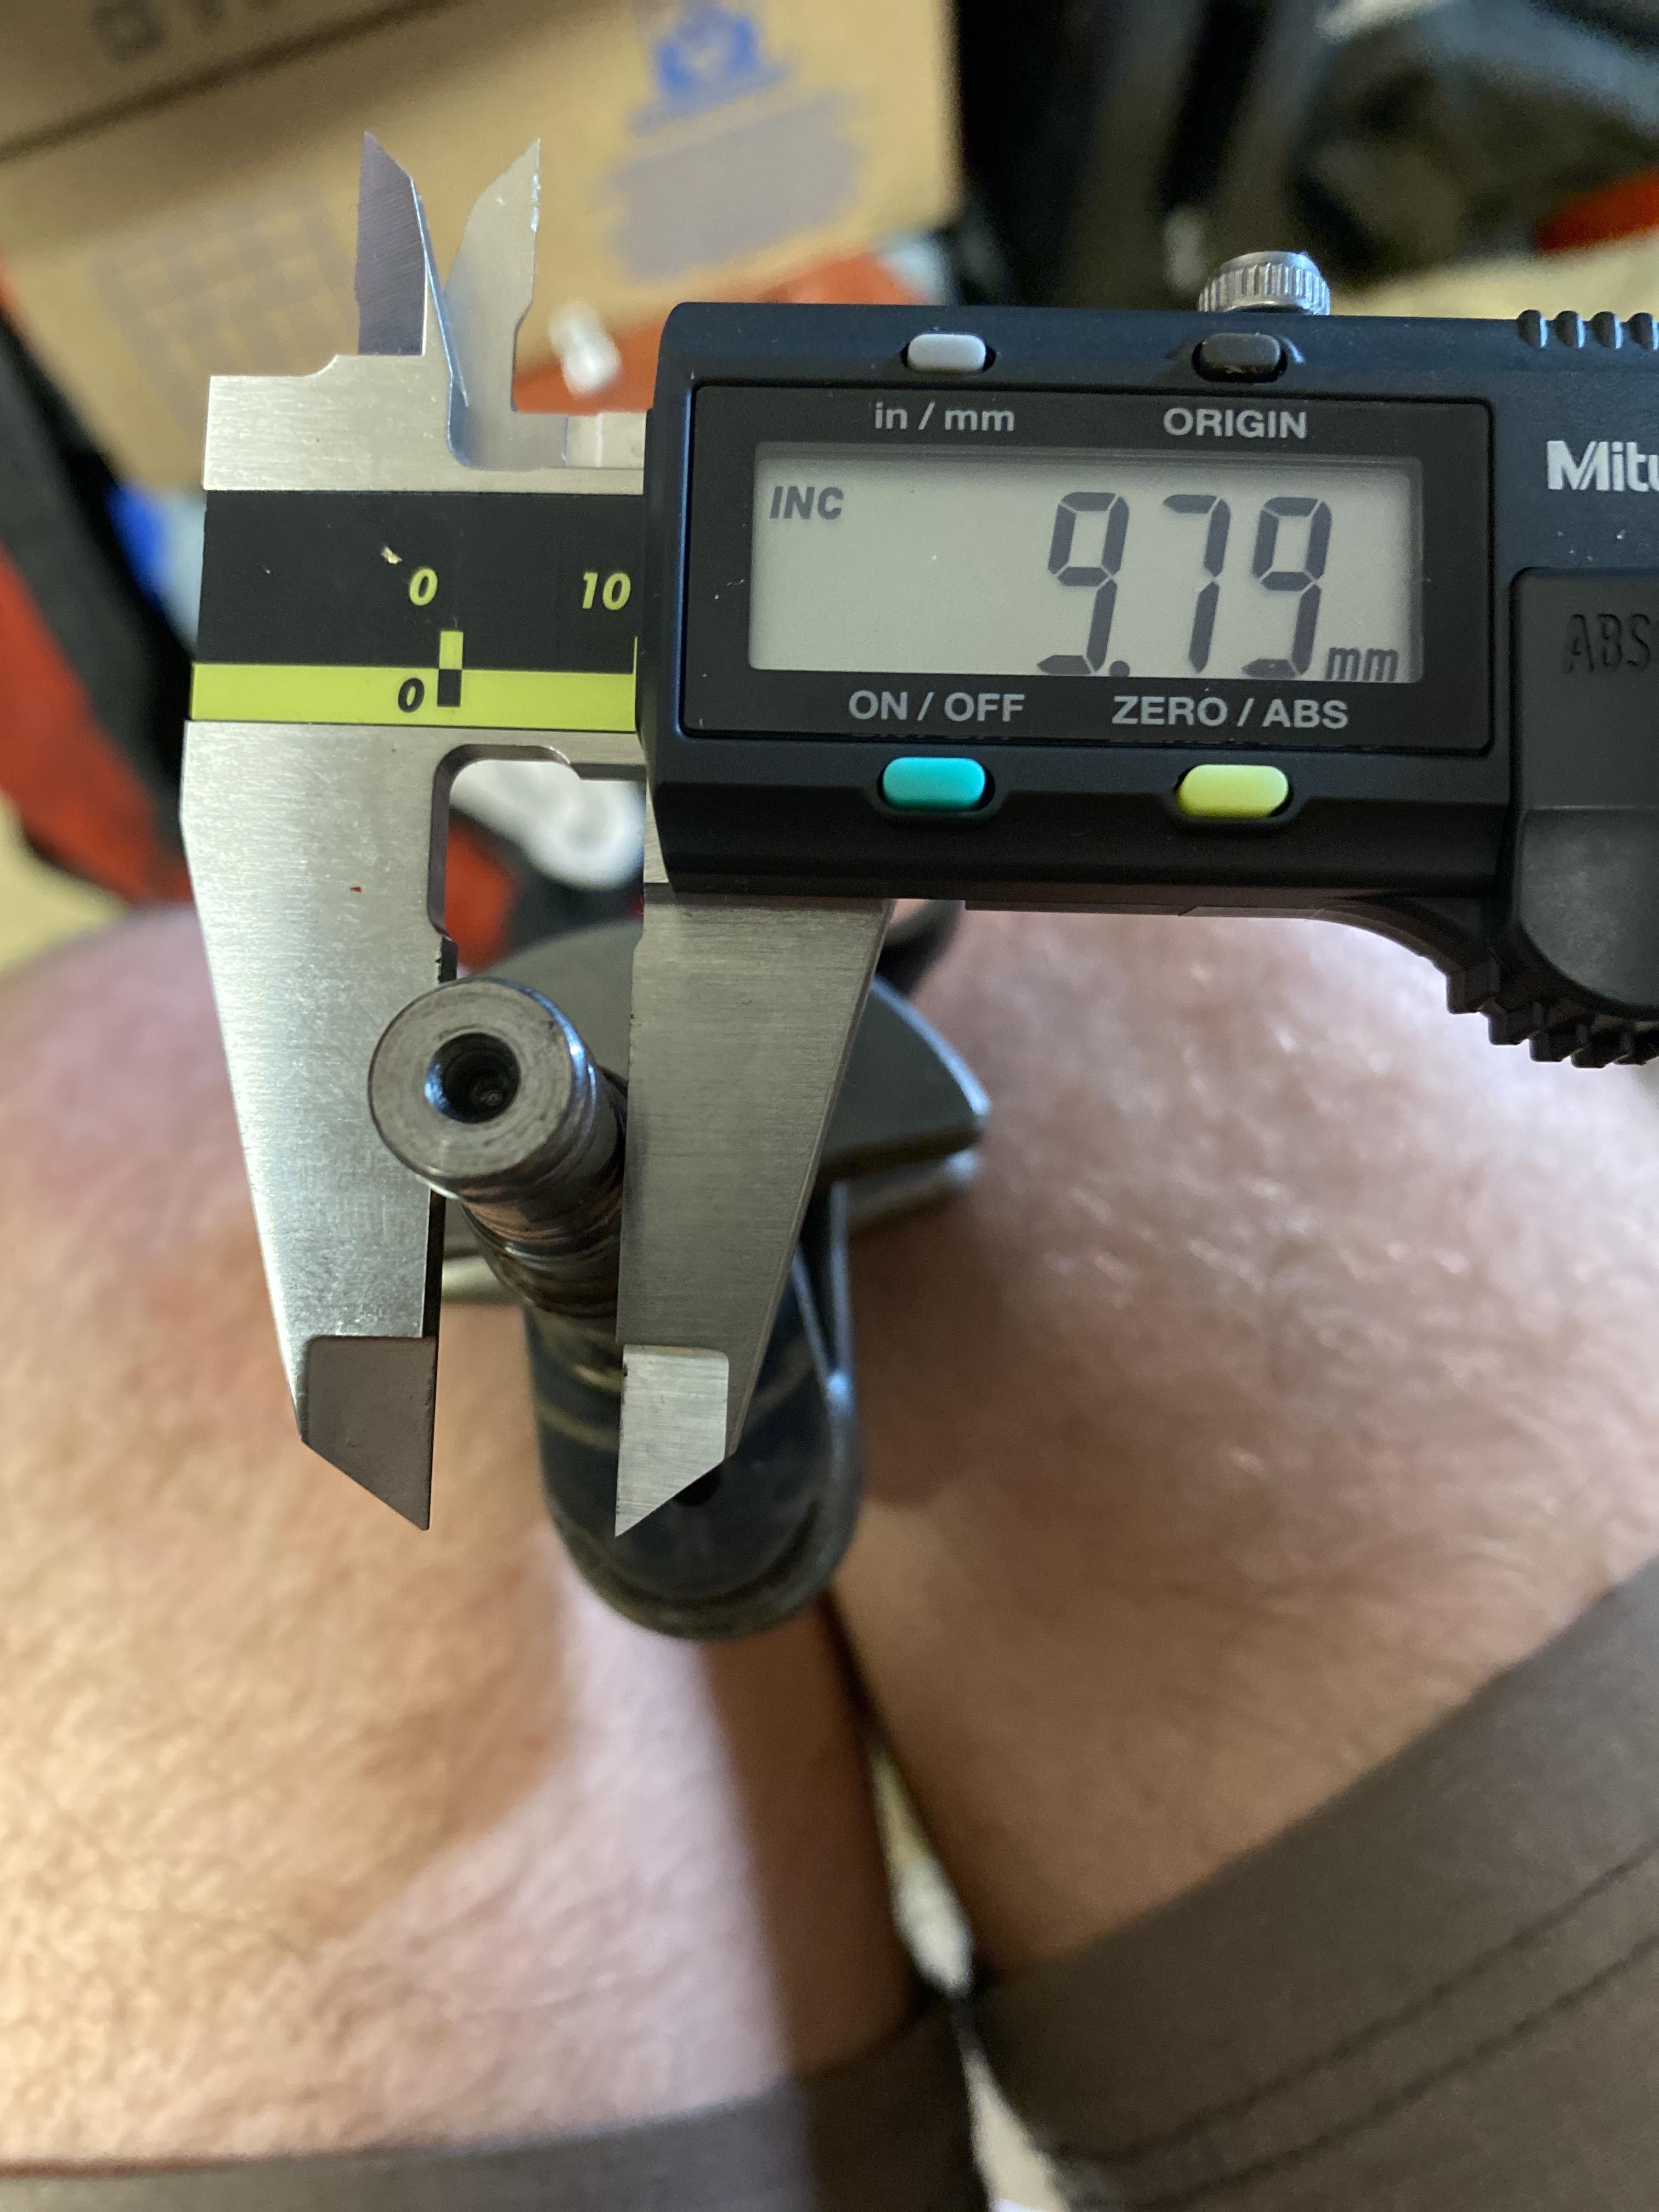
Standard measurement is 10mm, once you get below that by a couple of thou and the crank is on a downwards spiral to destruction.
9f4775a9dfb06eb8e01c67ad484fc2ba.jpg

ed68192525bc56c6e398d12c03aa69bb.jpg

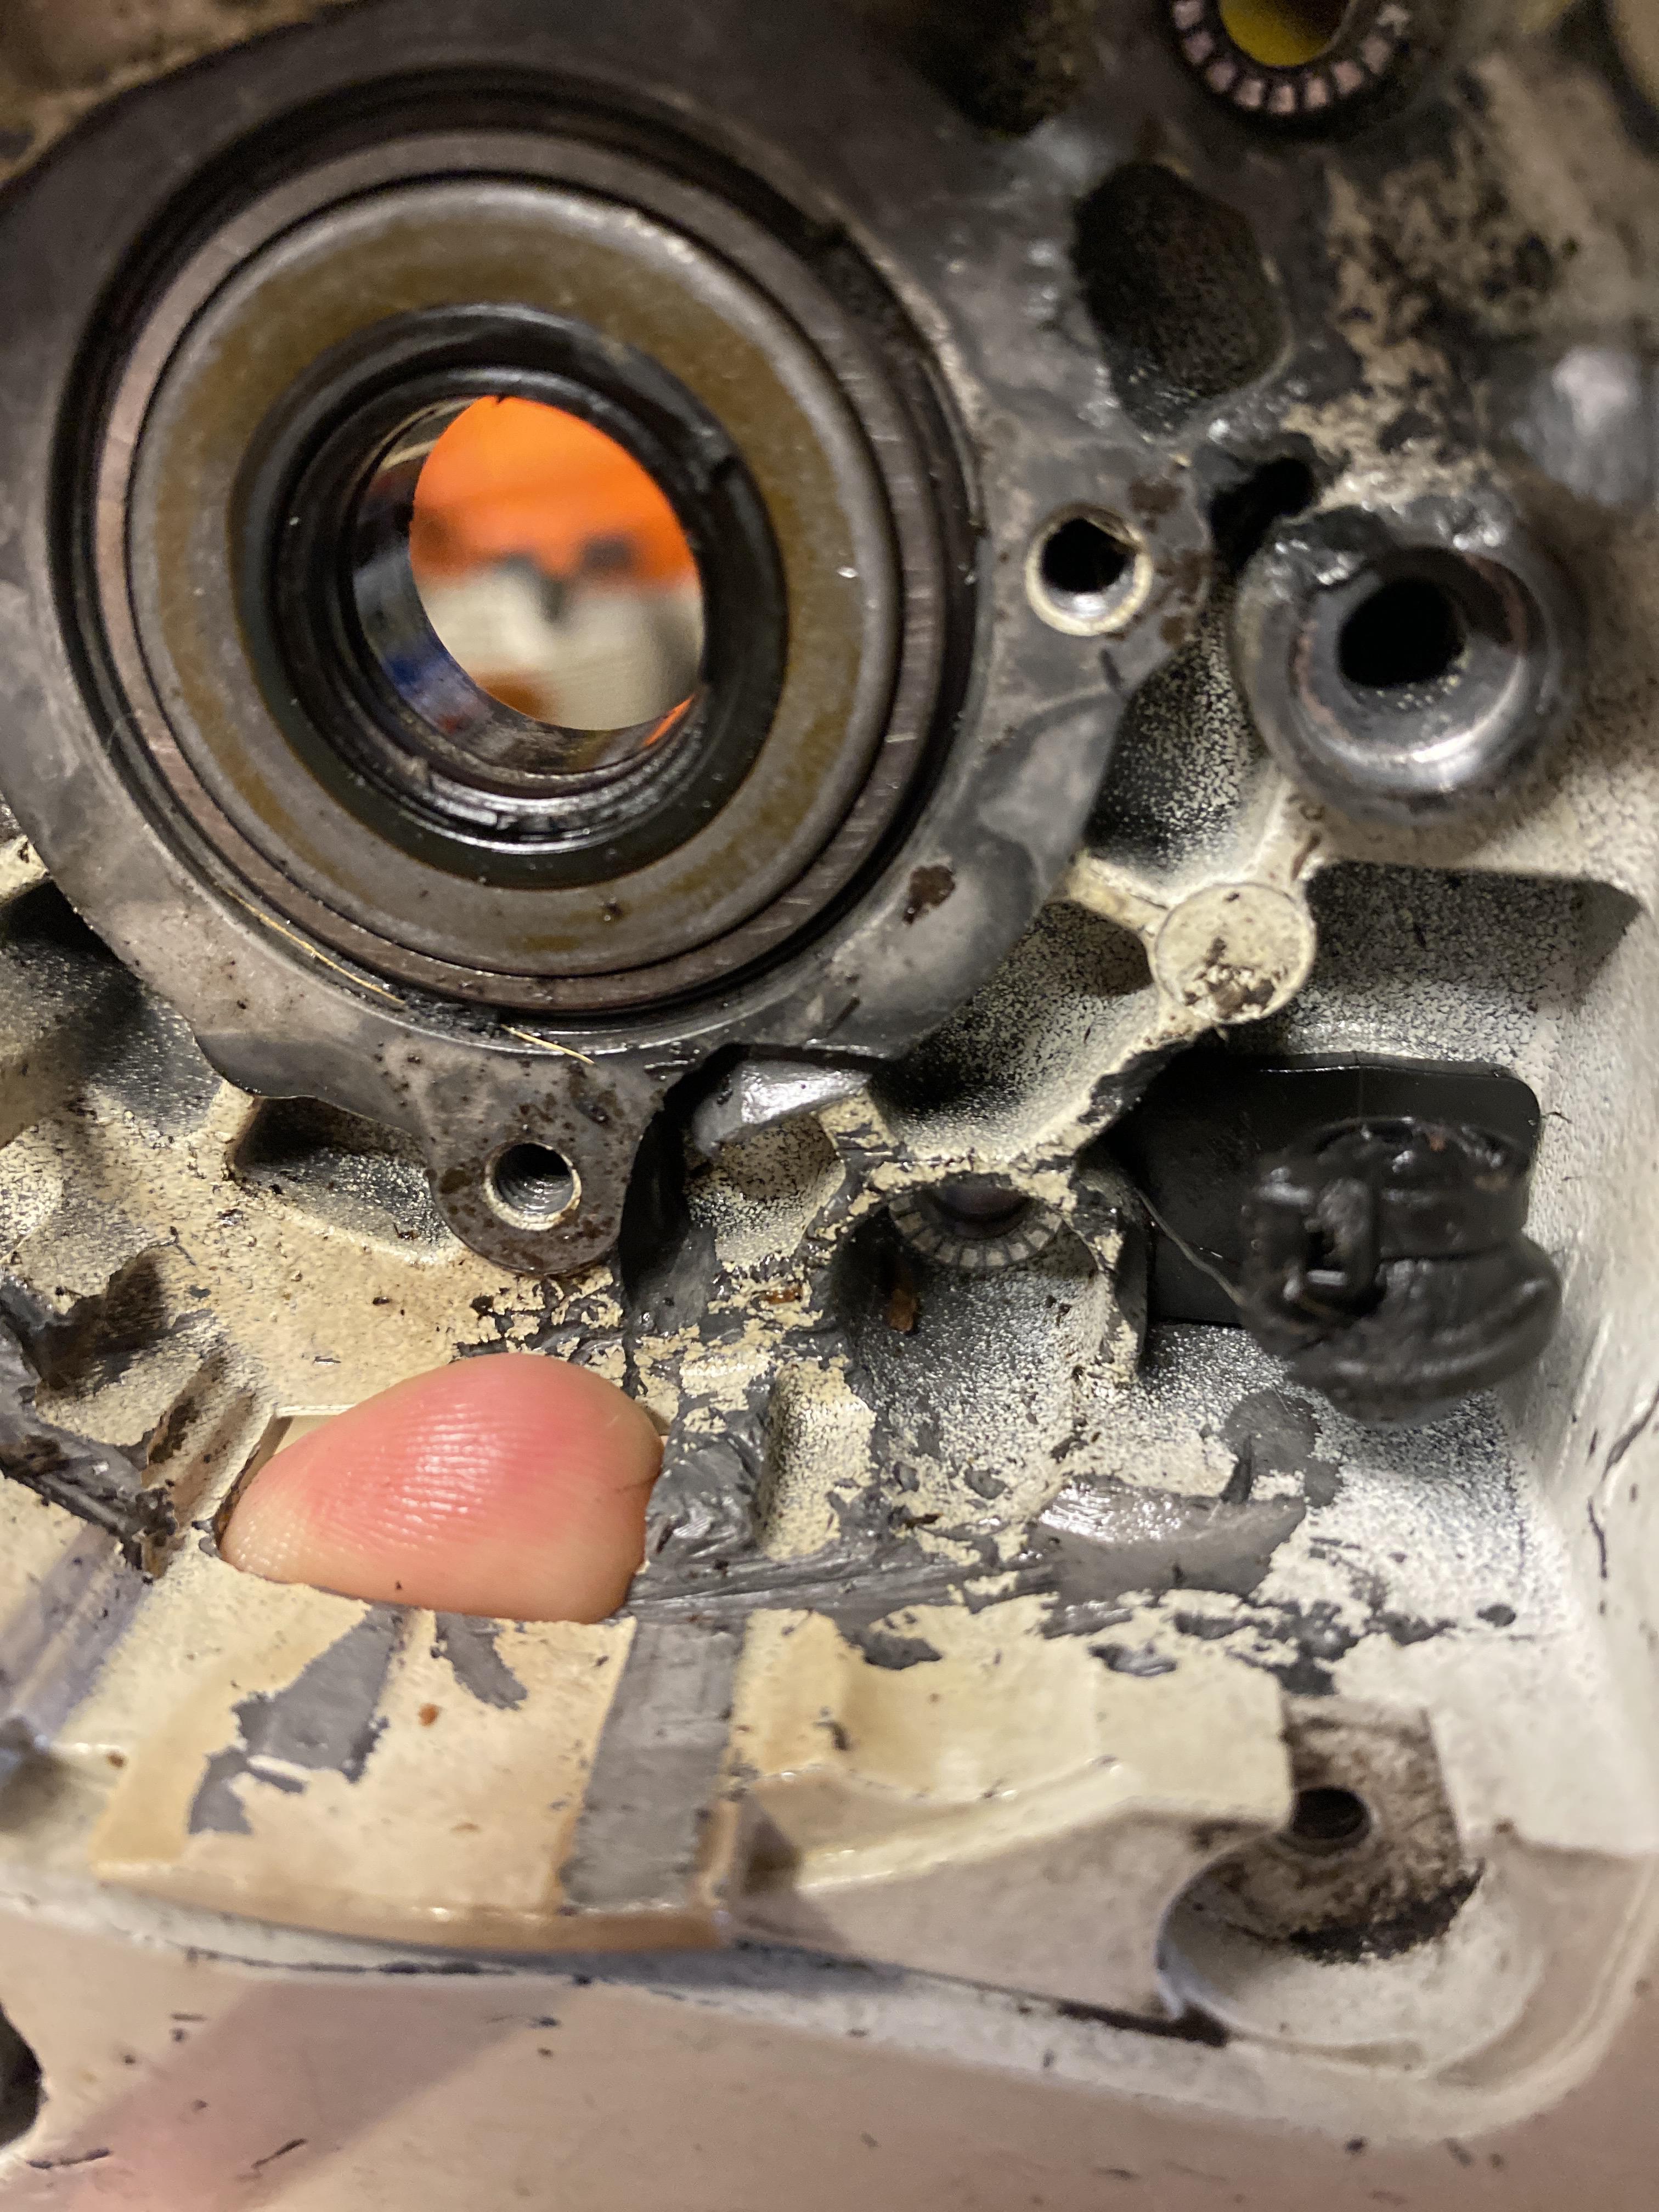
Finger for reference.
05380bfac7219b8e3f3532e699c196f7.jpg

Real problem is, there is no hard or fast rule, some carb models, no problem at all, run hard, little or no maint and the crank is A OK, some out the box and babyfied, crank dead in no time, some MT versions obviously suffer from this crank problem as well. Luck of the draw, and Stihl ain’t saying a thing.


Sent from my iPhone using Tapatalk
 
Last edited:

heavy_oil_saw

Well-Known OPE Member
Local time
9:08 AM
User ID
11623
Joined
Feb 2, 2020
Messages
37
Reaction score
116
Location
Colchester
@heavy_oil_saw that's not the prettiest set up I've ever seen but it looks 100% effective and you're pics do a great job getting the idea across. The only thing I would add is make sure to rotate and push and pull on the crank some while it's under vacuum.

I slightly rotated the crank in both directions, (naughty I know, only spin the engine in the direction of travel, as I was always told as an apprentice), and gave it a little jiggle (who doesn’t like a little jiggle?). Sorry to of missed that out, I was just trying to get across the build really.


Sent from my iPhone using Tapatalk
 

MustangMike

Mastermind Approved!
Local time
9:08 AM
User ID
338
Joined
Dec 30, 2015
Messages
11,433
Reaction score
35,921
Location
Brewster, NY
Country flag
If your saw has an impulse line, it is a lot easier to use that than modifying a spark plug.

I would test it with the spark plug and decomp valve you plan on using.
 

fossil

Pinnacle OPE Member
Local time
9:08 AM
User ID
374
Joined
Jan 1, 2016
Messages
1,744
Reaction score
7,633
Location
Ontario, Canada
Country flag
Looking on sawagain.com they must have pulled their video How-To's on the saw rebuild process. Could really use some resources.
I can't even figure out how my dealer got the muffler off....how do you get to the screws inside the muffler that screw into the exhaust port? (Need a service manual!!)

@deraeler ,

@ray benson can get you a manual for your 261 C-M
 

deraeler

New OPE Member
Local time
9:08 AM
User ID
12936
Joined
Jun 22, 2020
Messages
12
Reaction score
15
Location
14004
MY saw dealer pulled the muffler side (hot do you get to those bolts inside the muffler - those rotary clips must come off somehow, but they didn't replace them, they don't even look disturbed. Mystery to me.??). From that side looking into the cylinder I can see black scoring on the piston - not what I would describe as scratches, more like scorch marks. I'll see if I can upload a pic. I took it to a second dealer and he took one look in there and said "yah that's shot".

I"ll see if I can cobble together the materials you used to form the plates etc....not sure I could pull off the spark plug mod....if you know what tool part numbers these are feel free to refer them to me - if they are in the Service Manual I could find them by part number there, or if not go to the web.
 

MustangMike

Mastermind Approved!
Local time
9:08 AM
User ID
338
Joined
Dec 30, 2015
Messages
11,433
Reaction score
35,921
Location
Brewster, NY
Country flag
A dealer will NOT clean a cylinder, they throw away good cylinders all the time!

If I listened to dealers my 044 would have been in the trash heap a decade ago!
 

huskihl

Muh fingers look really big
GoldMember
Local time
9:08 AM
User ID
360
Joined
Dec 31, 2015
Messages
22,536
Reaction score
143,439
Location
East Jordan, MI
Country flag
You can use duct tape or rubber strips to seal off between the muffler and carburetor. And then bolt the muffler and carburetor back on. There’s no need to buy a bunch of block off plates for one job. There is a plastic insert on the outlet side of the carburetor that will need to come out before you seal that up. Also, remove the exhaust gasket first before you pressure/vacuum test
 

heavy_oil_saw

Well-Known OPE Member
Local time
9:08 AM
User ID
11623
Joined
Feb 2, 2020
Messages
37
Reaction score
116
Location
Colchester
That piston is toast, I’m optimistic about the cylinder though. Not a saw pro by any means. Tear that saw down. Have you checked the clutch side of the crank for wear/play yet? Before going too deep with diagnosing the cylinder, take off the bar and chain and wobble the drum, see how much “free” play is there.


Sent from my iPhone using Tapatalk
 

RI Chevy

Mastermind Approved!
Local time
9:08 AM
User ID
1254
Joined
May 7, 2016
Messages
27,002
Reaction score
67,761
Location
earth
Country flag
Gotta figure out why the piston got scored first. Straight gas? Air leak? Etc...pull the cylinder and have a look see. See if it can be cleaned up
 

deraeler

New OPE Member
Local time
9:08 AM
User ID
12936
Joined
Jun 22, 2020
Messages
12
Reaction score
15
Location
14004
I watched Randy's video - nice work. However, since the rebuild kits (that I've seen) include a cylinder, and you have to tear it all the way down anyway, why not just install the new cylinder? Are you recommending buying just a piston somewhere if the cylinder isn't scored? And even though you're only sanding down 1000's using the sandpaper and scotch-brite, doesn't this 'boring out" of the cylinder mean your rings will not seal well?

I also watched this guy's MS260 rebuild video -
which is excellent, though intimidating - he speeds over many details of the rebuild, but I get it, he's trying to focus just on the cylinder/crank elements. Do you have to remove/disassemble the whole clutch side? I presume so, since you need to get to both ends of the crankshaft to replace the crank seals, right? Further I presume you wouldn't replace the piston WITHOUT replacing the crank seals. My saw isn't that old, but this sounds like one of those things you just do because you're in there. I'm not sure I trust myself to tap out those crank seals as he did. And that clutch side looks like a nightmare, very easy to miss something in the re-assembly.
 

heavy_oil_saw

Well-Known OPE Member
Local time
9:08 AM
User ID
11623
Joined
Feb 2, 2020
Messages
37
Reaction score
116
Location
Colchester
I’ve wet sanded each 2nd hand cylinder I’ve bought, removes the hone from the last set of rings and piston. I use 240 grit and 2 Stoke oil as the wet, and the whiff off a touch, I’m pretty ham handed, so go light, it really cleans up the bore.
Never having worked on small engines, I was quite worried, everything is small and fiddley, but I took my time (money and shipping not included in the build), took about a day for the rebuild.
I indulged in a case splitting tool, bearing punch and seal installers, all genuine Stihl. The case splitting tool wasn’t really required, as heat is all you need, so a heat gun and copper faced mallet at a push.
The seal installers and bearing punch were a great help.


Sent from my iPhone using Tapatalk
 

heavy_oil_saw

Well-Known OPE Member
Local time
9:08 AM
User ID
11623
Joined
Feb 2, 2020
Messages
37
Reaction score
116
Location
Colchester
Most of the time the cylinders can be saved by the scotchgard method. Just need a new piston and set of rings. Meteor uses Caber Rings. The best.

That’s what I built in mine, got the piston from the Greek seller. They are available in the USA, but I’m in the UK.
Here’s the part numbers for the tools I mentioned
Stihl PN 1141 893 2400 A - Seal tool
Stihl PN 1141 893 4600 A - Seal tool
Stihl PN 1118 893 7200 - Bearing tool
435c057a971bf4435eae5778e4a0f4cc.jpg


Hope they help.


Sent from my iPhone using Tapatalk
 

heavy_oil_saw

Well-Known OPE Member
Local time
9:08 AM
User ID
11623
Joined
Feb 2, 2020
Messages
37
Reaction score
116
Location
Colchester
The clutch is easy, once you have the “E” clip is off, washer, drum come off and bearing, lock the piston, I used nylon rope (some frown upon this), 19mm spanner or socket & bar, spin the clutch the opposite as you’d think (clutch is marked with off direction), and then the oil pump drive arm out, x3 T27 screws for the oil pump, disconnect the oil pick up line, remove pump, there’s a O ring behind the pump outlet (it is tiny) and finally there’s a C clip on the crank itself to remove. I installed all those, then forgot the clip, it was sitting there right in front of me, nearly launched it all.


Sent from my iPhone using Tapatalk
 

MustangMike

Mastermind Approved!
Local time
9:08 AM
User ID
338
Joined
Dec 30, 2015
Messages
11,433
Reaction score
35,921
Location
Brewster, NY
Country flag
Like Jeff said, just buy a Meteor piston and clean up the OEM cylinder. Most of the AM cylinders need lots of work to be OK.
 
Top