High Quality Chainsaw Bars Husqvarna Toys Hockfire Saws

Real talk about saw porting theory (no arguments)

Backtroller

Here For The Long Haul!
Local time
5:52 AM
User ID
349
Joined
Dec 31, 2015
Messages
2,794
Reaction score
11,348
Location
Land of Badgers
Country flag
When I got that jug @drf256 I stared at it for hours. I couldn't believe or imagine the amount of work that went into it. It was so over my head that I decided to find the best people for the job. I wasn't going to be able to replicate what porters do. I also don't have the proper tools and the cash outlay for that is too high for me to even attempt to play Porter.
 

mdavlee

Hillbilly grinder
Local time
6:52 AM
User ID
279
Joined
Dec 28, 2015
Messages
14,194
Reaction score
64,625
Location
TN
Country flag
You get intake down around 88-90 it gets sluggish and spitback is horrible.

Transfers are the key to power and where the power is. Shape, size, and height all come into play.
 

wigglesworth

Knocker of midget farts......
Local time
5:52 AM
User ID
500
Joined
Jan 10, 2016
Messages
184
Reaction score
1,107
Location
In a van, down by the river...
Country flag
Cool thread.

The best advice I can give is to buy a good quality degree wheel, learn to set it up, and learn to read it. Make lots of notes. In fact write down everything. Double and triple check everything.

Once you understand the timing aspect, the rest is quite simple.

Oh and read the "Two Stroke Tuners Handbook". In fact read it two or theee times.

And get an 90* hand piece.

That's all I got...
 

Iron.and.bark

Eats trees & drinks dinosaur juice
Local time
6:52 PM
User ID
949
Joined
Feb 26, 2016
Messages
696
Reaction score
1,752
Location
Australia
Not sure what you guys wanna hear next. Stop me at any time, or interject with questions or corrections.

Exhaust roof height. Another highly debatable point to argue.

Compression and amount of swept volume are in part determined by the roof height of the exhaust. It's generally accepted that a lower roof height (I'm gonna talk physically, because a lower roof is a higher numerical degree number) creates more torque because there's more time for the combustion pressure to exert force on the piston crown. The issue is when does the pressure fall to a point where the pressure it exerts isn't worth the lower roof.

A lower roof means the blowdown, or degree difference between exhaust and upper transfer opening, can be slightly less than a higher roof-but not a tremendous amount.

So if you go with 15* of blowdown on a 105 exhaust, your transfers will open at 120. So now you've only got 120* of crank rotation to fill the larger swept volume you've created by the lower roof. You can't raise them to have more time to fill because the pressure from combustion pressure won't be vented enough to prevent backfilling them with exhaust. Again, a balance exists and exceptions occur.

Some guys like high exhausts and some (like me) like lower exhausts. The truth is they both work and there are trade offs to both.

Good stuff, should be working on a couple off my work saws at present but I will chime in with my 2c worth here.

On exhaust roof height and the power stroke. This is where you also hit duration of the power stroke, which is effected by both the stroke off the crank and the length of the conrod. How saws with sames "numbers" can have vastly different physical characteristics within the cylinder design.

This is also an additional benefit off cutting the squish band or just a base gasket delete. You increase the duration because by reducing the total "height/length" (or whatever descriptor you want to use) you change the ratio off the opening times.

Sort of lost track of the point I was trying to make here..

On the exhaust shape side off things, I was taught (dirt bike) that having a curved/cresent shaped roof reduced the required blowdown. Seems very much to have been the desired design feature off alot of my favorite vintage saws :)

Not that I am even remotely close to being a minor expert. For myself, I like low exhausts because I like my saws to pull bigger sprockets under max load ;) just how I use saws.

Another thing, if I can port anyone can. It is more about patience and knowing your limits. Can gain a fantastic amount by simply deleting a base gasket, muff mod and if you are feeling confident simplely looking through intake to exhaust and grinding enough to aline them. Sure you aren't producing saw pron to youtube with, but even 10% gain can help put that bigger smile on your face.
 

MustangMike

Mastermind Approved!
Local time
6:52 AM
User ID
338
Joined
Dec 30, 2015
Messages
11,524
Reaction score
36,361
Location
Brewster, NY
Country flag
Thanks guys, really appreciate the info, fascinating stuff.

I watched Al port my 046-D jug for my 460. Don't under estimate what these guys know and do, it is very impressive, and that saw runs very strong, but I hear he may have an even better procedure now, it is all very fascinating!
 

drf256

Dr. Richard Cranium
GoldMember
Local time
6:52 AM
User ID
319
Joined
Dec 29, 2015
Messages
9,601
Reaction score
63,240
Location
Strong Island NY
Country flag
Up and brain working again, somewhat. Let's talk transfers, remembering that everything has to work together.

Transfers transfer charge from the case to the cylinder for combustion.

There different types and we will limit our discussion to loop scavenged piston ported engines here.

Basically there are open and closed transfers.

Open transfers are open all the way to the crankcase with no plating between them and the piston at any point after the roof opens. An MS290/390 would be a typical example.

Closed transfers have a defined opening in the cylinder wall.

Cylinder fed transfers have a lower opening in the jug wall and usually a windowed piston for the charge to flow through.

Case fed lowers feed from, well, the case. They are fed by holes outside the cylinder wall.

Then, in any of the above configurations, their are single/double/triple transfers in a jug.

Closed transfers are generally regarded as being better for performance.
 

drf256

Dr. Richard Cranium
GoldMember
Local time
6:52 AM
User ID
319
Joined
Dec 29, 2015
Messages
9,601
Reaction score
63,240
Location
Strong Island NY
Country flag
I'm still gonna stick with the 360. Sometimes it's easier to understand things by an example.

So the 360 is a dual port cylinder fed closed transfer loop scavenged 2 stroke engine.

Let's do the combustion sequence.

The piston is at TDC and combustion occurs in milliseconds. The pressure, not an explosion, of combusted gasses exerts force on the piston crown and drives the piston downward.

So the exhaust roof will open first and vent the combustion pressure. The time between this opening and the upper transfer opening is blowdown. It's said that 90% of exhaust pressure (but not volume) is vented in the first 10* of exhaust opening.

At the same time or before the exhaust is opening, the piston skirt is closing or has closed the intake port and is compressing the charge it has already pulled into the case.

Then the roof of the transfers open and there is a sudden flow of charge into the cylinder. As the exhaust is heading towards the front of the motor, the charge is forced towards the rear of the motor which creates a "loop" of gasses.
 

drf256

Dr. Richard Cranium
GoldMember
Local time
6:52 AM
User ID
319
Joined
Dec 29, 2015
Messages
9,601
Reaction score
63,240
Location
Strong Island NY
Country flag
So one can change the time and area of the transfer opening.

Let's say the exhaust is at 103 and I open the uppers at 113. That gives the transfers a lot of time to fill the cylinder with charge. But it also opens them very early and they won't flow, or will flow backwards, until the pressure in them exceeds exhaust pressure.

Stihl used this to their advantage on saws, I believe it was the 461, as a poor man's strato. The first part of the charge loop was actually burnt exhaust gasses that was "backstuffed" into the transfers. So instead of some raw charge going out the muffler, the beginning/lost part of the loop was actually burnt gasses.

So let's say I open the uppers at 130. Now the pressure is low enough and the case has compressed charge enough for the transfers to flow really well. But..., there's less time for them to fill the cylinder with charge.

So what's optimal? Too high and they backfill, to low and they don't fill enough. That's the $50k question and also where trail and error come into play. That's also why there are some good "recipes". Numbers are a part of the equation, and as @jmssaws pointed out earlier, two saws with different numbers can run the same or two saws with the same numbers can run differently.

Case volume, number of transfers, placement in cylinder, direction, intake closing, shape, tunnel volume ,etc... all play a role in what's gonna work.

So when guys like @Mastermind are offering you numbers, they are really doing you a huge favor. They are telling you what has worked for them after sometimes years of experimentation with certain models. You may not be able to grind like they do, but they cut a ton of the work out for you.

Another thing to always remember is that we think of the porting and ports as a function of one cycle at a time. These events are occurring so fast that they become fluid. Inertia starts to play a role, so at higher rpm, there's already pressure waiting at the transfer opening before the piston is coming down. Some will argue that I'm wrong about this and Blair did show some negative pressure in the transfers in his book, but I've got my own thoughts on that.
 

drf256

Dr. Richard Cranium
GoldMember
Local time
6:52 AM
User ID
319
Joined
Dec 29, 2015
Messages
9,601
Reaction score
63,240
Location
Strong Island NY
Country flag
Some guys widen uppers for more flow, some keep them small. Some open the exhaust side of dual port uppers first/some flat/some intake first.

On the MS360/036, I've opened them exhaust first, flat and intake first and they all ran the same more or less.

@Jeff Lary MS360 opens 4* earlier on the intake side. That's where the factory opened them so I copied it.
IMG_2467.JPG

Here's the saw on the Dyno
IMG_0194.PNG
 

drf256

Dr. Richard Cranium
GoldMember
Local time
6:52 AM
User ID
319
Joined
Dec 29, 2015
Messages
9,601
Reaction score
63,240
Location
Strong Island NY
Country flag
So now you've got a rudimentary explanation of the ports and how we change them for porting. I'm gonna summarize how I go through an MS360 again for you.

This is how I port a saw. It's not the only way and not necessarily the correct way. Randy cuts card stock for his heights. I do it this way and prefer to grind one saw at a time.
 
Last edited:

drf256

Dr. Richard Cranium
GoldMember
Local time
6:52 AM
User ID
319
Joined
Dec 29, 2015
Messages
9,601
Reaction score
63,240
Location
Strong Island NY
Country flag
MS360

Check compression, which is around 160 stock.

Take squish stock with or without gasket-depending on how I want to run in the end. Let's say its 14.

Trace the exhaust port floor on the piston at TDC.

Calculalate how much I want out of the band. Let's say I wanna take .040 from the band. So if I were to take 40, that would leave me at .054 with no base cut.

Measure line drawn on piston at TDC to exhaust skirt bottom distance. For arguments sake, let's say it's .050.

So if I take 40 from the band, I'll need to take 34 from the base to wind up at .020 leftover squish. Can I drop the jug that much without freeporting the piston skirt in the exhaust port at TDC? Yes I can, because I have 50 left at TDC until I hit the skirt bevel.

Put the jug on the lathe and remove .034 from the base. Chamfer the plating at the base opening after the cut.

Now cut the chamber until the piston in my case can rotate freely. Watch out for a ridge.

Once I can rotate freely, clamp the jug down and check squish. Keep cutting and sanding till I'm at .020.

So now I'm at .034 off base and .040 from squish band.
 

drf256

Dr. Richard Cranium
GoldMember
Local time
6:52 AM
User ID
319
Joined
Dec 29, 2015
Messages
9,601
Reaction score
63,240
Location
Strong Island NY
Country flag
Now that parts over. Take the piston off the saw for the next part. It helps to have a spare for this part.

Draw the exhaust port again at TDC on the piston.

Wipe the bore clean with acetone.

Put the piston back in the bore and line up the drawing of the port. Mark the skirt edges. All 4 of them. Remove piston and draw your lines down from base to band.

Reinstall piston. Make another mark with the width you wanna take the ports to. Keep a marking that you feel is safe. Pull piston again and draw this line as well. Keep in mind max width for bore and where the ring pins are. These become second nature when you've done enough of the model.

Mount your degree wheel. True it up to TDC. Put a ring in the bore with the gap not riding over any port. Turn the piston to BDC. Push the jug over the piston and after it's flush to the base, turn the degree wheel to 103*. Rotate the wheel back a few degrees and pull the jug off.

Now your ring bottom is at 103*. Mark the bottom of the ring with a sharpie in the bore. Remove ring.

Now you've got your exhaust port lines. You won't be touching the floor, but sometimes it helps to mark the floor as well.

Widen the port edges and then slowly raise the roof of the port going back and forth to keep an arc. Keep checking over and over again.

You want a nice arc. How much is arguable. I will take longevity over performance all the time. I like to build work saws. Race saws are different of course. So I pretty much take nothing to its limits.
 

Al Smith

Here For The Long Haul!
Local time
6:52 AM
User ID
537
Joined
Jan 14, 2016
Messages
6,591
Reaction score
14,638
Location
North western Ohio
Country flag
About my only 2 cents worth are port time area open and gas transfer .The faster it runs it boils down to the more port size you need .However if you go too much you lower the pressures which might not be a good idea because the whole thing works on differential of pressures .

You have to work back asswards from the exhaust because if it can't get out it can't get in short of a supercharger which does not work on a 2 cycle .
Now domed pistons commonly called pop ups .I go that way not to raise compression but to change or modify the transfer flow over the top of the piston in attempts to purge the spent exhaust gasses from the area above the intake port.Some prefer to use finger ports to help,I prefer sweeps myself .

It depends on what you want the engine to do ,hard puller normally use a long power stroke .Cookie cutter a little higher on the ex port .but too high kills the torque .once the port is exposed the power climb ceases for all intents .

In a nut shell I'm not sure there is a right way or a wrong way based on design of how to modify an engine as long as the end results are good .It's more a matter of preference .My self I tend to be somewhat "old school " .no surprise I'm that way about most things .If it worked 40 years ago on kart engines it will still work today .Plus the fact it's only a hobby for me with one person to please---me .
 

drf256

Dr. Richard Cranium
GoldMember
Local time
6:52 AM
User ID
319
Joined
Dec 29, 2015
Messages
9,601
Reaction score
63,240
Location
Strong Island NY
Country flag
Intake port is next. I'm gonna show @dustinwilt68 10mm 044 port for illustrative purposes because the 036/360 port is a bit more difficult to grind on.

This is case where a builder case is super helpful, because you can view an intake port on an assembled saw. You can pull the carb and see the closing point, but you can't mark it. You can pull the tank, bit that's extra work.

The third option is to use the computer software to calculate the intake floor. @David Young posted a program named "torquesoft" which is pretty accurate. I used it for this on a few occasions and it was on the money.
 

drf256

Dr. Richard Cranium
GoldMember
Local time
6:52 AM
User ID
319
Joined
Dec 29, 2015
Messages
9,601
Reaction score
63,240
Location
Strong Island NY
Country flag
So here's where an extra piston helps to square the ring in the bore. Keep in mind where your pins are. Like I said before, on the MS 360 the bottom pin falls onto the left side of the intake roof as you look towards the chamber. I keep this side a bit rounder. Most intake flow occurs on the floor anyway.

Draw a line on the intake skirt at the degree you want. On the 360 I want 78*. So turn the wheel to 78 and mark the skirt.

Measure your difference between the line and skirt.

Mark that difference from the center of your intake floor towards the base. It's best to make that amount smaller and sneak up on the degree you want. You can always take more out, but you can't put it back in.

Put a ring in and draw your lines for your roof and floor. Write which side the bottom pin is on in the bore. Be careful there.

Grind your port. Take the center of the bottom first. Double check the degree you're at. When you've got it right, finish the port.

Smooth the port towards the opening. Be careful not to grind through the area where the neck meets the jug or any threaded intake holes, like the husky 262. The Stihl 046 has a notoriously thin flywheel side neck. I mark it with sharpie first so I rember not to touch it while blending.

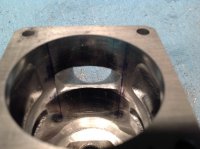
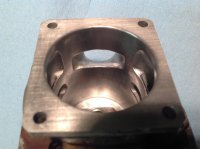
Here's a stock 044 10mm, then a roughed in port, then a finished chamfered one.

IMG_1341.JPG IMG_1343.JPG IMG_1358.JPG
 
Top