High Quality Chainsaw Bars Husqvarna Toys Hockfire Saws

Husqvarna 359 Porting

XP_Slinger

They’re Just Saws
Local time
11:14 AM
User ID
845
Joined
Feb 9, 2016
Messages
6,089
Reaction score
27,553
Location
Central NY
Country flag
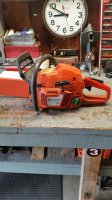
I've been given the chance to port a very clean and cared for 359. I bought this saw for my father in law in 08' for giving us a place to live for a month after I separated from active duty. In light of my recent success with porting my own saws (and a little bit of heckling;)) he gave me the green light to get into it.

Here's my plan:

1) degree the ports with the base gasket installed. I've always been curious how much .020 changes port timing.

2) delete the gasket, then raise the transfers back to pre-delete height. Also remove excess (restrictive) material from the transfer runners.

3) raise the exhaust 3 to 5° and widen to 65% of bore. Target blowdown 16 - 20°.

4) square up the intake and time it to between 73 and 77°. Again, this will vary based on what I find the port to be at after the gasket is gone. I usually go another 3° from where it is after the gasket delete.

5) advance ignition timing by 1/4 width of the key. I have done this to every saw I have ported and I like how the throttle response improves.

6) replace the EPA muffler with a 'Murica muffler, muffler mod and port match the muffler, gasket and exhaust passage.

I'm excited to get into this saw as I always hear how well they respond to porting. Just hope I still like my ported 357xp after I get this one done...lol! I'll be getting started tomorrow evening. What do you guys think?20160821_184743.jpg
 

Chainsaw Jim

Con Artist LLC
Local time
8:14 AM
User ID
836
Joined
Feb 8, 2016
Messages
4,014
Reaction score
91
Location
Springfield Oregon
You might consider some JB weld in place of the gasket for the transfer covers after grinding the bottom to match the case because it'll be too thin for the gasket to stay put. That wing thing used as a divider on the transfer cover can be ground out smooth too.
 

XP_Slinger

They’re Just Saws
Local time
11:14 AM
User ID
845
Joined
Feb 9, 2016
Messages
6,089
Reaction score
27,553
Location
Central NY
Country flag
You might consider some JB weld in place of the gasket for the transfer covers after grinding the bottom to match the case because it'll be too thin for the gasket to stay put. That wing thing used as a divider on the transfer cover can be ground out smooth too.

Thanks for the info Jim. I was thinking 1194 for the transfer covers. Do you use JB Weld because it needs more structural strength? This will be my first attempt at porting this model and your suggestions are appreciated.
 

RIDE-RED 350r

Here For The Long Haul!
Local time
11:14 AM
User ID
839
Joined
Feb 8, 2016
Messages
3,228
Reaction score
12,766
Location
Blossvale NY
And now it's official, I don't wanna go to Water Safari with the kids tomorrow dammit! Not when theres going to be saw surgery happening at the Braapp Shack!

Oh......subbed
 

XP_Slinger

They’re Just Saws
Local time
11:14 AM
User ID
845
Joined
Feb 9, 2016
Messages
6,089
Reaction score
27,553
Location
Central NY
Country flag
And now it's official, I don't wanna go to Water Safari with the kids tomorrow dammit! Not when theres going to be saw surgery happening at the Braapp Shack!

Oh......subbed

Tell you what big bro, I'll just do the cleaning and tear down tomorrow and wait to grind until Tuesday evening. But I may be picking up a certain Cummins powered grocery getter Tuesday...lol
 

RIDE-RED 350r

Here For The Long Haul!
Local time
11:14 AM
User ID
839
Joined
Feb 8, 2016
Messages
3,228
Reaction score
12,766
Location
Blossvale NY
I have to go to court in Verona Tuesday....and before anyone breaks my chops, I was subpoenaed as a witness...

So anyway, don't let my schedule dictate when it gets done...grind away
 

Chainsaw Jim

Con Artist LLC
Local time
8:14 AM
User ID
836
Joined
Feb 8, 2016
Messages
4,014
Reaction score
91
Location
Springfield Oregon
Thanks for the info Jim. I was thinking 1194 for the transfer covers. Do you use JB Weld because it needs more structural strength? This will be my first attempt at porting this model and your suggestions are appreciated.


It's just that the bottoms of the cover plates get real thin where they meet up so you need to fill in the entire gap between the bottom of the plate and the cylinder with whatever you trust. Honestly one would be making a good move to get the transfers exactly how they want them and then aluminum braze them together permanently.
 

XP_Slinger

They’re Just Saws
Local time
11:14 AM
User ID
845
Joined
Feb 9, 2016
Messages
6,089
Reaction score
27,553
Location
Central NY
Country flag
It's just that the bottoms of the cover plates get real thin where they meet up so you need to fill in the entire gap between the bottom of the plate and the cylinder with whatever you trust. Honestly one would be making a good move to get the transfers exactly how they want them and then aluminum braze them together permanently.

I'll keep that in mind as I work my way through the transfers. Thanks
 

drf256

Dr. Richard Cranium
GoldMember
Local time
11:14 AM
User ID
319
Joined
Dec 29, 2015
Messages
9,598
Reaction score
63,196
Location
Strong Island NY
Country flag
Not familiar with the model, but I'll share my worthless opinion nonetheless.

Don't touch any port until you time the entire thing.

Don't raise the exhaust until you know where it is. I'd likely leave it completely alone in terms of height. Widen it, yes. If you wanna make a firewood slug that's got lots of rpm and cuts pine cookies fast, then raise it. You want the torque.

Don't raise the factory uppers, you're likely to make the saw run worse. Remember, the factory timed the saw with the restrictive exhaust. You want less transfer time, not more, when you uncork the exhaust. Otherwise you will over scavenge and waste fuel. Keeping the transfers physically lower allows some more intake with an equal amount of case compression.

Again, not familiar with the model. Other than a bit of sanding smooth, don't reshape the "restrictive" parts of the tunnels. Most of the time, they are there for a reason. Reshaping those is an art in and of itself and isn't a porting 101 job. That part gets very advanced and if you do it wrong, you'll likely make the saw worse.

I applaud your efforts and zeal attacking the saw. It's sad to admit but with porting, many times, less is more. Try to exersize some restraint and you'll get a better result.
 

XP_Slinger

They’re Just Saws
Local time
11:14 AM
User ID
845
Joined
Feb 9, 2016
Messages
6,089
Reaction score
27,553
Location
Central NY
Country flag
Not familiar with the model, but I'll share my worthless opinion nonetheless.

Don't touch any port until you time the entire thing.

Don't raise the exhaust until you know where it is. I'd likely leave it completely alone in terms of height. Widen it, yes. If you wanna make a firewood slug that's got lots of rpm and cuts pine cookies fast, then raise it. You want the torque.

Don't raise the factory uppers, you're likely to make the saw run worse. Remember, the factory timed the saw with the restrictive exhaust. You want less transfer time, not more, when you uncork the exhaust. Otherwise you will over scavenge and waste fuel. Keeping the transfers physically lower allows some more intake with an equal amount of case compression.

Again, not familiar with the model. Other than a bit of sanding smooth, don't reshape the "restrictive" parts of the tunnels. Most of the time, they are there for a reason. Reshaping those is an art in and of itself and isn't a porting 101 job. That part gets very advanced and if you do it wrong, you'll likely make the saw worse.

I applaud your efforts and zeal attacking the saw. It's sad to admit but with porting, many times, less is more. Try to exersize some restraint and you'll get a better result.

Worthless opinion? I think not! Good advice, and rest easy my friend. I have no intention of trying to make his saw a cookie cutting screamer. I haven't tried to port a saw that way yet because all of my saws are work saws and I wouldn't attempt that for the first time on someone else's saw. I'm going at this saw with the intent of making it a more robust firewood saw much like I did on my 357xp which impressed the heck out of me. If you red my post, I do intend on timing the ports before I even delete the gasket so I know where they're at. Slow and steady as she goes and rest assured I won't be raising ports blindly hoping that it runs good. I'll likely do the work over a period of 2 tear downs. Port it, run it and decide if it needs something else.
 

XP_Slinger

They’re Just Saws
Local time
11:14 AM
User ID
845
Joined
Feb 9, 2016
Messages
6,089
Reaction score
27,553
Location
Central NY
Country flag
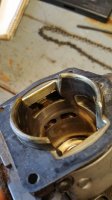
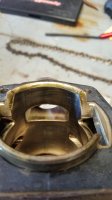
The slag seen in this pic is what I was referring to as far as cleaning up the lower transfers. I'll also put a nice smooth bevel on the bridge of the lowers. A sharp corner doesn't make sense to me right there. The intake looks pretty "square" from the factory, I may not widen it any more to keep the skirt supported properly. I just ran the saw and I'll tell you what; I like how it feels already.
20160822_105003.jpg 20160822_105021.jpg
 

sunfish

Pinnacle OPE Member
Local time
10:14 AM
User ID
371
Joined
Jan 1, 2016
Messages
1,006
Reaction score
4,150
Location
Success Mo
Country flag
I built a 359 with mild port work for my brother a few years ago and it's impressive. Very close to my ported 357xp.
 

XP_Slinger

They’re Just Saws
Local time
11:14 AM
User ID
845
Joined
Feb 9, 2016
Messages
6,089
Reaction score
27,553
Location
Central NY
Country flag
Well guys I've done all me degree work with and without the gasket. With gasket I was at 101/121/77 and without its 103/123/79. For the intent of this saw I think I'm going to leave port heights alone and just delete the gasket, widen the exhaust, MM, clean up the lowers and advance the timing a little. Hope I'm not dissapointin anyone but I like those numbers for a firewood saw. It should have very wide torque curve for those long days on the log pile. More to follow...
 

Mycamaro_68

By guess and by golly
Local time
10:14 AM
User ID
713
Joined
Jan 28, 2016
Messages
722
Reaction score
2,177
Location
Cedar Rapids, IA
Country flag
The slag seen in this pic is what I was referring to as far as cleaning up the lower transfers. I'll also put a nice smooth bevel on the bridge of the lowers. A sharp corner doesn't make sense to me right there. The intake looks pretty "square" from the factory, I may not widen it any more to keep the skirt supported properly. I just ran the saw and I'll tell you what; I like how it feels already.
View attachment 31107 View attachment 31108
Are my eyes playing tricks on me? Or are the upper transfers totally different from one side to the other in the second picture?
 
Top