High Quality Chainsaw Bars Husqvarna Toys

044 project

MattG

Chainosaurus Rex
Local time
9:26 PM
User ID
3111
Joined
Apr 30, 2017
Messages
896
Reaction score
1,432
Location
Cambridgeshire, England
The 440 has that stupid bushing just like the 372xp....so the coke can trick applies when you are inserting the bushing. Take your time. Don't just shove it in there.
Thanks,

I was actually going to insert the bushing first, then push the seal over that. I did raise the question (i.e. bushing or seal in first) in here http://opeforum.com/threads/044-pto-crank-and-oil-spacer-bush-seal-question.7929/ a while back and mileage seemed to vary as to the "best order". The manual describes both ways, IIRC.

But thanks for the tip my friend, and if I f**k up I'll let you guys know!
 

Adamski

Plebus Splederns
Local time
9:26 PM
User ID
3128
Joined
May 3, 2017
Messages
1,120
Reaction score
2,684
Location
Essex, UK
Country flag
I was actually going to insert the bushing first, then push the seal over that.

Less chance of rolling the lip of the seal back or tearing it doing it this way. Those bush edges are sharp, or they are on a 372xp
 

MattG

Chainosaurus Rex
Local time
9:26 PM
User ID
3111
Joined
Apr 30, 2017
Messages
896
Reaction score
1,432
Location
Cambridgeshire, England
Less chance of rolling the lip of the seal back or tearing it doing it this way. Those bush edges are sharp, or they are on a 372xp
I just had a think about how stihl intended the design to pan out, and it seems (to me at least) clear that they intend the bushing to rotate in sync with the crankshaft (??), and therefore it seemed to make sense to have this stupid bush on the shaft first prior to the introduction of the seal. And also, all the oil seal arrangements I've seen in the past have it so that the seal lips are pushing out from the casing. This method of fitting seems to prefer that MO.

And if anyone think I'm obsessing too much about this, I'll just add "I don't care" :p
 

Adamski

Plebus Splederns
Local time
9:26 PM
User ID
3128
Joined
May 3, 2017
Messages
1,120
Reaction score
2,684
Location
Essex, UK
Country flag
I just had a think about how stihl intended the design to pan out, and it seems (to me at least) clear that they intend the bushing to rotate in sync with the crankshaft (??), and therefore it seemed to make sense to have this stupid bush on the shaft first prior to the introduction of the seal. And also, all the oil seal arrangements I've seen in the past have it so that the seal lips are pushing out from the casing. This method of fitting seems to prefer that MO.

And if anyone think I'm obsessing too much about this, I'll just add "I don't care" :p
What I did with my 372xp was put a nice coat of loc n seal on the inside of the bush prior to fitting. I found that the sealant just pushed out when pushing the bush onto the shaft. Then put another small amount around the top of the bush and left it to seep down between bush and crank. Left that overnight to cure then slipped the seal over the top. The way any seal wants to go on. And yes the bush should stay moving with the shaft else there would be serious heat/friction issues.

Well this is how my head sees it and it cannot see any other way.. haha.. Also this was tried and tested as OK.
 

Basher

Pinnacle OPE Member
Local time
5:26 PM
User ID
552
Joined
Jan 16, 2016
Messages
1,299
Reaction score
4,254
Location
Canada
Country flag
I just had a think about how stihl intended the design to pan out, and it seems (to me at least) clear that they intend the bushing to rotate in sync with the crankshaft (??), and therefore it seemed to make sense to have this stupid bush on the shaft first prior to the introduction of the seal. And also, all the oil seal arrangements I've seen in the past have it so that the seal lips are pushing out from the casing. This method of fitting seems to prefer that MO.

And if anyone think I'm obsessing too much about this, I'll just add "I don't care" :p

The bushing will rotate with the crank once the clutch is tightened down, installing the seal can be done either way just as successful. Coat the crankshaft with some hard grease before final install of the bushing, helps stop a very slow air leak we all find after assembly on this model.
 

MattG

Chainosaurus Rex
Local time
9:26 PM
User ID
3111
Joined
Apr 30, 2017
Messages
896
Reaction score
1,432
Location
Cambridgeshire, England
The bushing will rotate with the crank once the clutch is tightened down, installing the seal can be done either way just as successful. Coat the crankshaft with some hard grease before final install of the bushing, helps stop a very slow air leak we all find after assembly on this model.
What kind of air leak do you mean, i.e. how long to leak down from 0.5 to 0.3 bar? Say 5 minutes or so?
 

Mattyo

Youtube speciawist
GoldMember
Local time
4:26 PM
User ID
441
Joined
Jan 8, 2016
Messages
4,282
Reaction score
10,906
Location
Farmington, CT
Country flag
Thanks,

I was actually going to insert the bushing first, then push the seal over that. I did raise the question (i.e. bushing or seal in first) in here http://opeforum.com/threads/044-pto-crank-and-oil-spacer-bush-seal-question.7929/ a while back and mileage seemed to vary as to the "best order". The manual describes both ways, IIRC.

But thanks for the tip my friend, and if I f**k up I'll let you guys know!

I've tried this multiple times, both ways. Came to the conclusion its better to put the seal in by itself, get it positioned right, then put the bushing in with the coke can method. I can prove (in the 394 vid above) that you don't roll the seal using a coke can piece. So, get the seal right, then work on getting the bushing in.

On the 372, there is a TINY oring that prevents leaks. I built a dozen saws without that stupid o-ring and even made an apology video because I had missed it for so long. there is no such o ring in the 044, though the design idea is basically identical, so some sealant on the crank inside the bushing wouldn't be a bad thing.

like Brad says, yes sealant on the outside of the seal (metal on metal). I like to brake clean the surfaces first. then loctite 518 goes on the surfaces. .... only need a VERY thin layer
 

MustangMike

Mastermind Approved!
Local time
4:26 PM
User ID
338
Joined
Dec 30, 2015
Messages
11,433
Reaction score
35,921
Location
Brewster, NY
Country flag
Matt, the early 044s did have an O ring, it has been discussed by Brian (Junkman).

Even w/o the O ring, they do not all leak, but I did change seals on my 044 once (in 25 years).
 

MattG

Chainosaurus Rex
Local time
9:26 PM
User ID
3111
Joined
Apr 30, 2017
Messages
896
Reaction score
1,432
Location
Cambridgeshire, England
Matt, the early 044s did have an O ring, it has been discussed by Brian (Junkman).

Even w/o the O ring, they do not all leak, but I did change seals on my 044 once (in 25 years).
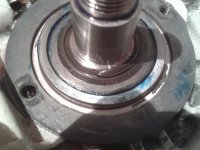
And I indeed have found myself such a candidate O ring...... I shall be using the "Junkman" technique.
 

MattG

Chainosaurus Rex
Local time
9:26 PM
User ID
3111
Joined
Apr 30, 2017
Messages
896
Reaction score
1,432
Location
Cambridgeshire, England
Believe it or not, yes I am still on this project. So many other things happened over here, but still doing a few things now and again. Got the seals finished the other week. Actually found a technique similar to @Mattyo s was best for me for the output seal. The first one I done, I put the bushing down first, then tried doing the seal. I was a tad stressed after work (thats my excuse) and I f**ked it up. The lips ended up being puckered (I think that spring got dislodged). Here's the embarrassment piccie:
2017-10-11 17.02.39.jpg
So for my next try, I put in the seal first, and liberally greased the inner lips and the bushing. I placed the bushing down and kinda slowly turned it on the shaft maintaining gentle pressure. Went in without any drama at all.

After fitting the oiler and belting down the clutch I done a P+V test.
2017-10-20 17.30.42.jpg
So I agree with @Basher . It's possible to get a slight leakdown on these saws, despite new seals. But mine took a good 2 minutes to lose 33% of the test pressure/vacuum, so as far as I'm concerned I'm all inside of spec.

Tomorrow I might have a play with setting up the squish clearance. Probably aim for 0.55-0.60 mm.
 

BuckthornBonnie

Pinnacle OPE Member
Local time
4:26 PM
User ID
1725
Joined
Aug 22, 2016
Messages
956
Reaction score
1,639
Location
Penn Yan, NY
Country flag
Again, thinking of Stihl’s engineering here— why would they require the seal to be removed when servicing the oil pump system and the bushing? My logic is that they didn’t, and that the seal goes in first, then the bushing is slowly worked into the seal lips as described.
 

MattG

Chainosaurus Rex
Local time
9:26 PM
User ID
3111
Joined
Apr 30, 2017
Messages
896
Reaction score
1,432
Location
Cambridgeshire, England
Again, thinking of Stihl’s engineering here— why would they require the seal to be removed when servicing the oil pump system and the bushing? My logic is that they didn’t, and that the seal goes in first, then the bushing is slowly worked into the seal lips as described.
You can leave the bushing in though and still service the oiler I think though. I can't remember quite how I stripped mine down, but it should be possible, with the clearances etc..

However, you make an interesting point BTB. I've wondered over exact arrangement of the 044/440 lately. I believe it's done how it is so that Stihl could fit the biggest, sturdiest crank bearings possible on the smallest/lightest casings. Just think of how the output bearing hangs out so's that the "space between the race" receives the seal. Then they need a thinner sidewalled seal (and it has larger ID), since one with a bigger sidewall would be weaker. Which means they needed that mad bushing, else they'd have needed a thicker crank stub, which would be have been heavier and compromised the sizes of the bearing balls.

So whilst the design seemed a bit crazy to me at first, I think there's a damn good reason for it. Probably excellent crank/bearing life and overall lightness.
 

BuckthornBonnie

Pinnacle OPE Member
Local time
4:26 PM
User ID
1725
Joined
Aug 22, 2016
Messages
956
Reaction score
1,639
Location
Penn Yan, NY
Country flag
True, the pump can be serviced but the spacer may get worn over time and cause issues with the worm gear function.
 

MustangMike

Mastermind Approved!
Local time
4:26 PM
User ID
338
Joined
Dec 30, 2015
Messages
11,433
Reaction score
35,921
Location
Brewster, NY
Country flag
I recently had a scare with my 044. Less than a week before the PA GTG the saws gets hard to start (I'm talking over 15 pulls on choke) and idles erratically! I'm sure it is an air leak, and dreading the seals I installed a few years ago are bad.

But a vac/pressure test showed the saw was just fine, so I replaced the fuel filter (no change) then replaced the carb, and the problems were over! The diaphragm must of gotten stiff on the ZAMA C3M. I may rebuild it, but it seems to be running well with the HD-11 I put on it.

My saw is one of those that had a solid (not open) insert to plug the snorkel, which allows it to run carb either with or w/o a snorkel. Debating if I should drill it to let the "intelli carb" function work?
 

Adirondackstihl

Vert Da Furk........Bork Bork Bork
Local time
4:26 PM
User ID
17
Joined
Dec 4, 2015
Messages
5,917
Reaction score
25,618
Location
Upstate NY
Country flag
Install that bushing AFTER you install the seal.

FWIW.....
I ordered the seal press sleeves for an 026 I recently rebuilt for my boss. If you’ve never used the OEM press sleeves, you don’t know what you’re missing.
 

MattG

Chainosaurus Rex
Local time
9:26 PM
User ID
3111
Joined
Apr 30, 2017
Messages
896
Reaction score
1,432
Location
Cambridgeshire, England
Install that bushing AFTER you install the seal.
Yeah, on the 044 it certainly was better that way.

I ordered the seal press sleeves for an 026 I recently rebuilt for my boss. If you’ve never used the OEM press sleeves, you don’t know what you’re missing.
10-4 on the press sleeves.......but then again I can f**k something up even with the right tools!
 

MattG

Chainosaurus Rex
Local time
9:26 PM
User ID
3111
Joined
Apr 30, 2017
Messages
896
Reaction score
1,432
Location
Cambridgeshire, England
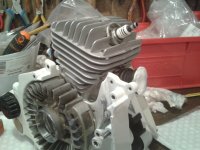
I'm done with the squish clearance setting. After dispensing with the BG the clearance I had remaining was ~0.3mm. After hand machining it (P80 grit paper glued to a piston on a stick etc.) its at about 0.6mm (whats that like 24 thou?).

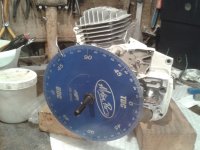
Now I'm degree wheeling it. First time for me on any kind of engine. Took a while to get certain where TDC is...I actually made markings on the ignition side when I did the squish....i.e. where I felt maximum resistance.

2017-10-24 17.42.14.jpg

So here goes, this being *almost* stock. That is, with the jug lowered by 0.4mm by virtue of loosing the BG.

exhaust opens at 113* after TDC
transfers opens at 121* after TDC
inlet at 74*.

Before I go any further I'll just point that don't want the saw to be *too* high revving. The 044 is quoted in the manual as having max engine speed of 14k, so if this engine ends up getting to about 14.2 then I'll be more than happy. I also don't want to touch the transfers - even if I had the confidence - I don't have the equipment.

So what do people e.g. @drf256 reckon? My first thought is to raise the exhaust port - since loosing the BG will have lowered it by 0.4mm - I'd thought by raising by an equivalent amount would be a good move.

I'm also thinking that I saw a @Mastermind post once where he makes the roof of the inlet match with the bottom of piston skirt at TDC - or at least that's what I think he was doing.

Anyway, I'd be interested in yer thoughts.
 
Top