High Quality Chainsaw Bars Husqvarna Toys

394XP - Work Saw Rebuild

XP_Slinger

They’re Just Saws
Local time
8:15 PM
User ID
845
Joined
Feb 9, 2016
Messages
6,089
Reaction score
27,523
Location
Central NY
Country flag
Bought this 394 as a project saw last year. Had a bad carbon smear on the piston and cracked flywheel side crank case. It ran good so I cleaned the carbon off the piston and ran it for a year.

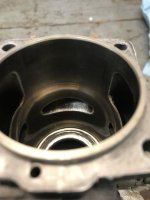
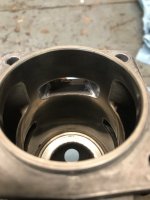
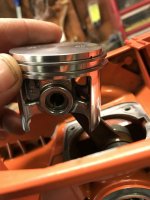
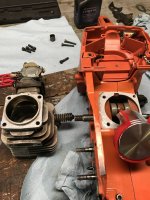
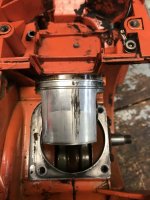
Well, the carbon smear returned and looked much worse. Looked like it was starting to transfer, time for a rebuild. Note the polish and port shadow on the exhaust skirt, piston is well worn and long overdue for replacement. This isn’t going to be a PSP shelf queen rebuild, if it’s not broke I’m not fixing it, if it’s ugly I don’t care. This saw is going to work.
BFAAD31C-2F1F-45DD-8392-03F3843C38C1.jpeg

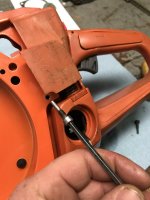
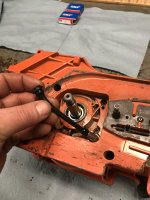
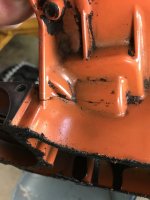
Here’s the crack in the case. Saw passed Pressure and Vacuum test, but who likes cracked cases...time to swap it out.
0ECA5861-DDEB-4D1A-AEBC-75B1309D75B2.jpeg

Edit: photos don’t illustrate the order in which I assembled the saw, was waiting on some small parts til late in the day.
 
Last edited:

XP_Slinger

They’re Just Saws
Local time
8:15 PM
User ID
845
Joined
Feb 9, 2016
Messages
6,089
Reaction score
27,523
Location
Central NY
Country flag
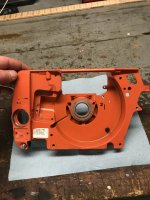
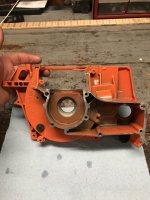
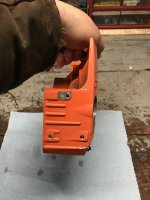
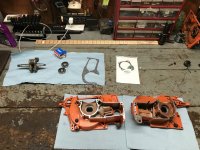
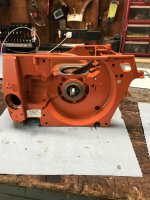
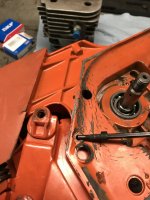
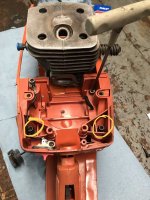
In my search for a mechanically sound crank case half I stumbled across this one on eBay. As it turns out, this thing is so nice it meets PSP standards. No cracks, no corrosion and barely any noticeable chips in the finish. Couldn’t be happier with this for my saw.

BAA31766-F88A-4A51-9142-D43B51E44613.jpeg
9CE1F50C-113E-4F19-9CA2-E26295C3C759.jpeg
5913C672-9884-40D6-8B20-F75134B09094.jpeg

After conversing via email I found out the seller is a member here with a solid reputation as a good dude. Check him out if you need some parts, you won’t be disappointed. Thanks again @Duke Thieroff

59280A81-3717-4FF9-AED5-4720076390BC.jpeg
 

XP_Slinger

They’re Just Saws
Local time
8:15 PM
User ID
845
Joined
Feb 9, 2016
Messages
6,089
Reaction score
27,523
Location
Central NY
Country flag
I’m no Onan18 at articulating these assembly threads but I’ll do my best to lay it all out in order to help those that aren’t giant saw nerds like some of us:D.

So let’s get started. Using SKF 6203 C3 bearings and OEM gaskets.

1598F91E-046D-4BDA-AF15-C13B251490B4.jpeg

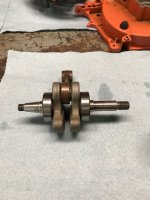
After the crank was thoroughly cleaned I used a propane torch to heat the inner race of the bearings. Don’t put the flame directly on the race, center the flame so it passes through without hitting the metal of the bearing. 5 seconds after the condensation evaporates off of the inner race edge its ready to drop into place on the crank shaft. I’ve used this method on every saw I’ve built and haven’t had any problems at all. Be cautious of overheating the bearing race, if you see a faint gold color beginning to appear stop heating, its still safe but I wouldn’t heat it any more.

Bearings installed.

4C7F835C-3D63-4827-9FD1-5EA3F63A2FAA.jpeg

Let the bearings cool for about 5 minutes then use a propane torch to heat the bearing pockets in the crank case. Keep the torch moving, don’t linger or you’ll burn the finish and uniform expansion of the pocket is key to the bearing seating completely. Hold the case as far from the bearing pocket as you can, when you feel it getting warm where you’re holding onto it you’re ready to drop the crank into place. I install the crank in the clutch side first, set the gasket in place then heat and install the flywheel side. Don’t think it matters, just my routine.

Crank installed, 7 case bolts tightened. I let cases cool for 15 minutes.

BCAE2A17-2D73-4C34-958E-CF8D05D288FD.jpeg

First and most importantly, do the following check BEFORE installing the crank seals. Drag caused by the seals makes it nearly impossible to detect and fix bearing tension problems.

If the crank binds AT ALL once the case bolts are tight you have to relieve that tension on the bearings. I do this with a brass drift and hammer. Pick a side (flywheel or clutch) of the crank, deliver a sharp but not Herculean strike to the crank end with the drift. Rotate the crank, if the bind has lessened but is still present give it another smack. If it gets worse or doesn’t change try hitting the other end. Rotate between every strike to verify it’s helping or hurting drag free crank rotation.

Finally after the crank turns freely I retorque the crank case bolts one more time. Spin the crank to ensure it’s still free and it’s done.

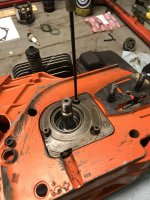
Here’s how the crank should rotate after equalizing with a brass drift to unload bearing tension.

 
Last edited:
LOMartin

Pinnacle OPE Member
GoldMember
Local time
8:15 PM
User ID
7603
Joined
Oct 16, 2018
Messages
607
Reaction score
3,840
Location
Savannah, GA
Country flag
This story doesn’t have enough tape and spray paint. :thumbup:

Great walkthrough. Very helpful for newbs like myself, still not experienced enough to crack these things open. Thank you.
 

XP_Slinger

They’re Just Saws
Local time
8:15 PM
User ID
845
Joined
Feb 9, 2016
Messages
6,089
Reaction score
27,523
Location
Central NY
Country flag
This story doesn’t have enough tape and spray paint. :thumbup:

Great walkthrough. Very helpful for newbs like myself, still not experienced enough to crack these things open. Thank you.
Glad to help bud. Crack one open, we got your back. Yeah my 288 had a lot of body work if that’s what you’re referring too...lol!
 
Last edited:
XP_Slinger

They’re Just Saws
Local time
8:15 PM
User ID
845
Joined
Feb 9, 2016
Messages
6,089
Reaction score
27,523
Location
Central NY
Country flag
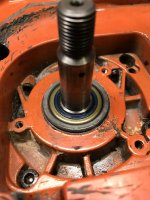
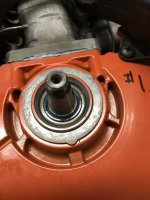
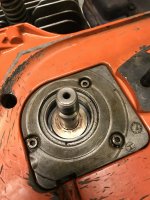
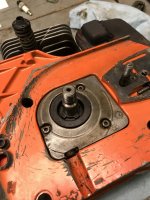
Next up is the crank seals. I use a deep well socket of appropriate diameter to drive them in slowly. I learned something on these today and that is that you can’t always just drive them to the depth of the old seals that were removed. Pay close attention to the shoulders on the crank shaft, the seal must ride slightly, and I mean slightly below those shoulders. If you look at depth at the outer diameter of the seal only, you might get caught with a leaking or damaged seal after some run time. On this model saw, if the seal rides above the shoulder the flywheel will chew it up or the worm gear washer will burn the seal on the clutch side. Sorry for the book on a simple task but sometimes a guy just has to tell a story.

Lubricate the bearings with 2-stroke oil before installing the seals.

Seals installed.

Clutch side...

8623EFA5-1B61-4422-AD34-ED4518C7812B.jpeg

Flywheel side...

A6A92024-4473-4379-B23E-E03C322D07A9.jpeg
 
Last edited:
XP_Slinger

They’re Just Saws
Local time
8:15 PM
User ID
845
Joined
Feb 9, 2016
Messages
6,089
Reaction score
27,523
Location
Central NY
Country flag
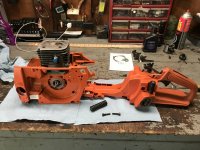
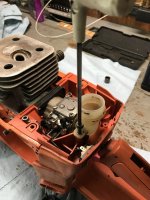
Next up is the fuel tank. I temporarily installed the cylinder to keep debris out of the crank case. Was waiting on my seals at the time.

27C1BD83-0626-44F6-BD8A-91502EABCB21.jpeg

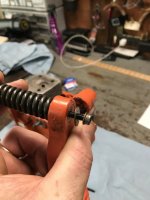
Make sure the washer is on the lower mount bolt for the front AV spring. The bolt will chew a hole in the plastic if the washer is missing.

2EBFE545-B106-43AE-9AA4-219C071DD222.jpeg

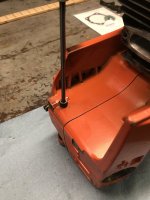
Maneuver the tank into position under the crank case then tighten the upper front AV mount screw.

6348CA62-21E5-4347-A341-65C676F03D88.jpeg

Last things for now are the flex limiter screws.

One on the flywheel side...

B41CCA95-6368-451E-BC6E-077026892D8F.jpeg

And one on the clutch side...

90003CEC-804E-4B59-B289-EEBB43B3BF96.jpeg
 
Last edited:
XP_Slinger

They’re Just Saws
Local time
8:15 PM
User ID
845
Joined
Feb 9, 2016
Messages
6,089
Reaction score
27,523
Location
Central NY
Country flag
With the fuel tank in place I moved on to the carb box.

Push the fuel line and throttle cable through the floor then tighten 4 mount fasteners. The fasteners circled also secure the rear AV mounts on the fuel tank.

4342C94F-C162-44D5-A30E-6E22F7BB30E1.jpeg

Once the carb box is mounted, I always double check to make sure the fuel line isn’t kinked or twisted. Good to go.

9317C209-ADC9-4C5E-8AE4-D283F57E2115.jpeg
 

XP_Slinger

They’re Just Saws
Local time
8:15 PM
User ID
845
Joined
Feb 9, 2016
Messages
6,089
Reaction score
27,523
Location
Central NY
Country flag
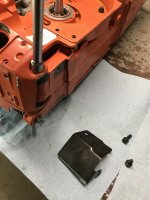
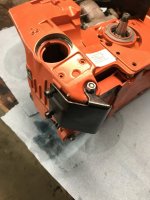
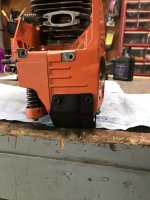
A case guard is a simple but necessary add on for a 394 in my opinion. These saws get big chunks knocked out of the front of the case a lot, this is cheap insurance.

Remove the nut on the buffer mount stud.

6AB05371-D723-43EA-A56A-16850EDA0944.jpeg

Put the case guard on the stud and install the 2 front mount bolts, tighten the stud nut last. Easy peasy....

0B72E233-94DB-4D59-A51C-339EB6098203.jpeg
9B6A98FC-9D5B-4CFF-AE89-9B9330E3C5FF.jpeg

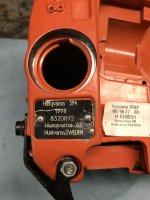
While I was in the area I attached the ID tag from my original case half. Retaining rivets just drive in with a punch. To remove a tag without destroying it simply rotate the fasteners counter clockwise with a chisel and hammer. Don’t bother trying to drill them, they’re hard as wood pecker lips.

7C84B014-9B32-4D1D-83FC-EBA4F8864173.jpeg

406A1096-1D1B-431E-A4AA-9EB84184DE58.jpeg
 

XP_Slinger

They’re Just Saws
Local time
8:15 PM
User ID
845
Joined
Feb 9, 2016
Messages
6,089
Reaction score
27,523
Location
Central NY
Country flag
Great thread Josh. As someone new to Huskies, I appreciate it. The next time I have to tear into my 395 I'll have to check in here for a refresher.
Glad it’s helpful Ryan. You’ve certainly helped me plenty in other things and I’m glad I could return the favor. Don’t know if I’ll finish this tonight, getting tired but I’ll try to keep plugging along...lol
 

XP_Slinger

They’re Just Saws
Local time
8:15 PM
User ID
845
Joined
Feb 9, 2016
Messages
6,089
Reaction score
27,523
Location
Central NY
Country flag
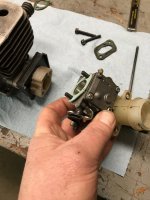
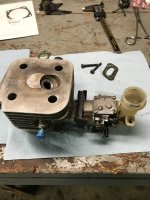
Now it’s time to prep the cylinder for installation. I attach the carb to the cylinder for install but you don’t have to.

New gasket between intake/cylinder and new gasket between intake/carb. 2 fasteners hold intake to cylinder and another 2 secure carb to intake. Always inspect intake block for visible cracks.

46B82851-45BF-4773-B5F7-711A3E62184D.jpeg

Assembly ready for install.

E3061FD9-5C9C-4C38-B5A7-7007AF8B25D5.jpeg

Cylinder didn’t sustain any damage from the bad piston. I adjusted the ports when I first got the saw, she runs nice.

47A4FF66-8510-4761-A687-8014B27F5173.jpeg
50CA8582-00C5-450E-AF20-512E5253AD4B.jpeg

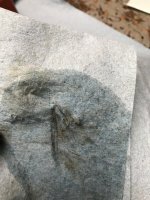
New part doesn’t mean it’s a clean ready to install part. The gray line seen here is what came off of 1 of the new piston rings. Same stuff came off the wrist pin. Clean your internal engine parts before assembly.

84CA7CDA-E884-4422-AE06-4505B7FAD581.jpeg
 

XP_Slinger

They’re Just Saws
Local time
8:15 PM
User ID
845
Joined
Feb 9, 2016
Messages
6,089
Reaction score
27,523
Location
Central NY
Country flag
Piston cleaned and installed, wrist pin bearing, cylinder walls and lower rod bearing lubricated with 2-stroke oil so they’re not dry on start up. Don’t ask me what kind of oilo_O lol!

5C76B966-6B06-4EFB-98EE-EBAD97FE750F.jpeg

No base gasket for this big dog. I’m using 1184, I apply a thin coat on both surfaces after a thorough degreasing with brake clean on paper towel. Don’t use so much that the impulse passage gets blocked.

90035D80-C6A6-42D7-A9E7-603EED1DD071.jpeg

Once it’s in place, tighten the 4 cylinder bolts then 2 air filter elbow fasteners last.

745FFF3C-366E-4F97-A1B1-4E2F5B548F4F.jpeg
 

XP_Slinger

They’re Just Saws
Local time
8:15 PM
User ID
845
Joined
Feb 9, 2016
Messages
6,089
Reaction score
27,523
Location
Central NY
Country flag
Morning fellers, lets get this rolling again. If anyone wants to chime in with some knowledge like Dustin did please feel free, will make this thread better than I can make it on my own.

Time to install the oil pump.

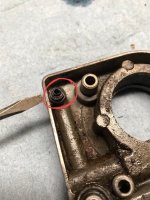
Install the pickup tube in the case.

1A126FDA-40A7-40F4-B8EC-98782A0BF7F9.jpeg

Install the ring on the back of the pump. If this is missing the oil won’t reach the bar, bad news.

8A99535C-4423-477C-9BD8-1975688FDBE3.jpeg

Set pump in place on the crank case and tighten down 3 fasteners...Done

DBB74AD5-6CB3-416D-B571-3D803531334A.jpeg
 

XP_Slinger

They’re Just Saws
Local time
8:15 PM
User ID
845
Joined
Feb 9, 2016
Messages
6,089
Reaction score
27,523
Location
Central NY
Country flag
Moving on to the oil pump drive gear and clutch assembly.

Install washer on the crank first. This is the one that will burn the seal if the seal is not seated far enough in the case.

8FC4155C-F15D-4A49-8A9E-F35A29C90542.jpeg

Then the oil pump drive gear. Commonly referred to as the worm gear.

33D41B0E-5DA9-4EE5-B6FD-69F95D8167DF.jpeg

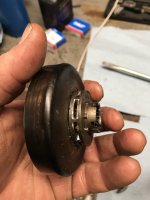
Slip the rim sprocket onto the spline on the clutch drum. I also installed the clutch bearing in the drum at this point.

F1E8FB17-BD33-4DC7-A86F-C9A99F98DE03.jpeg

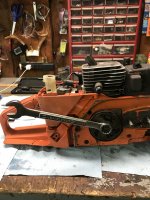
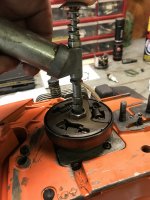
Piston stop installed, with a 19 mm wrench tighten clutch. Reverse threads so tight is counter clockwise.

A1003563-977B-4E39-A7ED-C3EBC4C39F72.jpeg

2 pumps of grease to lubricate the clutch bearing.

60CFD3E9-C2EC-4502-AED7-25B634B28E2F.jpeg
 
Top