High Quality Chainsaw Bars Husqvarna Toys

Husqvarna 359XP build with porting

MAF143

Super OPE Member
Local time
6:20 AM
User ID
16099
Joined
Mar 30, 2021
Messages
133
Reaction score
462
Location
North Central Ohio
Country flag
Preface: I am a rookie learning about warming up saws for fun. I've done several muffler mods and have cleaned up and flowed a few saws.
I do not have a lathe.
I have a rotary tool with carbide bits, but no 90* tip.
I do have 357XP that I ported myself last year that runs well, but probably could use the upper transfers raised but that is out of my capabilities so I'll live with it.

My neighbor's brother was over cutting wood with us earlier this winter, he's also a co-worker I've known for years. I was cutting up some 20" Honey Locust and he pulls out his 359 and says, can you make it run like your 357?

I made a test cut with his 359 and raised out of the cut wot and NO 4-stroking, just trying to rev to the moon... The high jet was against the stop already so I told him to put it in my truck and I'd work on it for him. Seemed dangerously lean to me and thought it needed work before using it again.

One thing has lead to another and this is turning into a full porting job (he didn't have to twist my arm)...

So far...
The plug verified it was running lean.
Leaking gas line.
Crack by the chain catcher AV point under the oil tank. Shouldn't affect running. I'll JB Weld it and have him keep an eye on it.
Base gasket was broken at case seam at the pulse line port below the intake. Looked like it was sucking air at that point.
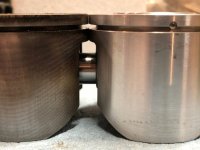
He wanted a pop-up piston, I couldn't say NO... LOL

I was wandering about pulling the external x-fer port covers off.

Is there anything special I need to do when removing them?
Are there gaskets that can get torn?
Can sealant be used when putting them back on or must gaskets be used?

I have lots of pix, but I keep getting errors when I try to upload them. Never had that problem before, any tips???

Numbers with the pop-up piston in and no base gasket are:
exhaust: 103* for 154* duration
blowdown: 18*
intake duration: 153*
squish is .038 but without a lathe there's not much I can do about that.

My thoughts were to:
Raise exhaust 2* targeting 158* duration, widen it to 60%. That should take the blowdown to 20*
Square off the intake some and lower floor 2*
Not really touch the uppers but there is a lot of carbon built up in them (clean them by removing cover).
Open up the lower x-fers to get rid of the angular choke points and match cylinder to case for smoother flow.
Gut an aftermarket muffler and add gills at the front. This is usually loud but he likes the bark... Match heat shield to port, then muffler and gasket to shield.
Bump the ignition timing up 6* on the flywheel key.
New bearings and seals, pressure and vac test.
Clean the carb.
Replace the plastic intake clamp, gas and pulse lines, and boot if it has any cracks, haven't looked at it yet.

Really light touch on everything but the lower transfers look like they could use some flow.

Being a rookie, does this plan sound OK or am I going down a bad path?
 
Last edited:

huskihl

Muh fingers look really big
GoldMember
Local time
6:20 AM
User ID
360
Joined
Dec 31, 2015
Messages
22,535
Reaction score
143,436
Location
East Jordan, MI
Country flag
You’ll get plenty of added RPMs if you just widen the exhaust and flatten the roof a little bit without raising it in the center. Without the ability to add torque, I would be leery of raising it. Raising the primary transfers a little bit would move the RPM range up as well
 

MAF143

Super OPE Member
Local time
6:20 AM
User ID
16099
Joined
Mar 30, 2021
Messages
133
Reaction score
462
Location
North Central Ohio
Country flag
I cut the cylinder and checked it and here's where I ended up.

exhaust: 102* for 156* duration
blowdown is 20*
intake is 156* duration
squish ended up at .036
pop-up piston has a .020 bump

I didn't open the transfer tunnels yet till I understand what Kevin @huskihl meant by raising the primary x-fer would raise the RPM.

Is that meaning no-load RPM and it would lose a little torque?
OR
Is it meaning that it will raise the RPM in the cut?

Dave (the owner of the saw) wants it to rev well, but watching him cut wood, he's more of a "dig in the dogs and ratchet through that cut" kinda guy. I'm thinking torque would suit him best although he wants it to "scream"...

I'm thinking to leave the uppers alone for now and see how he likes it and if he wants a little more "scream" I'll raise the primary if I'm understanding this correctly???

I still have to split the case and put new bearings and seals in. It is an '02 although the bottom end felt OK. I have a set of SKF bearings here for it.
 

MAF143

Super OPE Member
Local time
6:20 AM
User ID
16099
Joined
Mar 30, 2021
Messages
133
Reaction score
462
Location
North Central Ohio
Country flag
I have a bunch of pix, but I can't get any to upload. I've tried on both chrome and edge, what am I doing wrong?
 

farminkarman

I like the red & black ones
GoldMember
Local time
5:20 AM
User ID
13535
Joined
Aug 17, 2020
Messages
3,631
Reaction score
20,466
Location
Neenah Wisconsin
Country flag
I have a bunch of pix, but I can't get any to upload. I've tried on both chrome and edge, what am I doing wrong?
Have you just tried uploading one picture to see if it will work?
 

Ronie

Here For The Long Haul!
Local time
6:20 AM
User ID
5495
Joined
Mar 2, 2018
Messages
2,658
Reaction score
8,950
Location
NC
Country flag
I have a bunch of pix, but I can't get any to upload. I've tried on both chrome and edge, what am I doing wrong?
Try dragging them from your folder and doping them in your text, that's the only way I can get mine to upload to the site.
 

huskihl

Muh fingers look really big
GoldMember
Local time
6:20 AM
User ID
360
Joined
Dec 31, 2015
Messages
22,535
Reaction score
143,436
Location
East Jordan, MI
Country flag
I didn't open the transfer tunnels yet till I understand what Kevin @huskihl meant by raising the primary x-fer would raise the RPM.

Is that meaning no-load RPM and it would lose a little torque?
OR
Is it meaning that it will raise the RPM in the cut?

It’ll raise both
 

farminkarman

I like the red & black ones
GoldMember
Local time
5:20 AM
User ID
13535
Joined
Aug 17, 2020
Messages
3,631
Reaction score
20,466
Location
Neenah Wisconsin
Country flag
@MAF143 FWIW, I did a 359 a few months back just before I got my lathe up and running. When I checked the jug with no gasket, I got the following numbers:
Ex: 105
Tr: 124
In: 80
Squish: 0.022”

I didn’t raise the exhaust at all but I raised the primaries to 121 and secondaries to 123. I did widen the exhaust and I squared up the intake floor. I also did some minimal lower transfer work trying to unshroud the entry. The saw ran really well and pulled much harder than it did stock. Had I had my lathe up and running, I would have cut the squish and base to get a compression bump, but I probably would have shot for the same numbers by adding epoxy to the intake floor.
 

farminkarman

I like the red & black ones
GoldMember
Local time
5:20 AM
User ID
13535
Joined
Aug 17, 2020
Messages
3,631
Reaction score
20,466
Location
Neenah Wisconsin
Country flag
If your squish with the pop up was .038”, what was the squish with the stock piston? Oem should only be about .020” without the base gasket
If the squish with OEM piston is close to 0.020” like it was with mine, I would for sure ditch the pop-up piston.
 

huskihl

Muh fingers look really big
GoldMember
Local time
6:20 AM
User ID
360
Joined
Dec 31, 2015
Messages
22,535
Reaction score
143,436
Location
East Jordan, MI
Country flag
@MAF143 FWIW, I did a 359 a few months back just before I got my lathe up and running. When I checked the jug with no gasket, I got the following numbers:
Ex: 105
Tr: 124
In: 80
Squish: 0.022”

I didn’t raise the exhaust at all but I raised the primaries to 121 and secondaries to 123. I did widen the exhaust and I squared up the intake floor. I also did some minimal lower transfer work trying to unshroud the entry. The saw ran really well and pulled much harder than it did stock. Had I had my lathe up and running, I would have cut the squish and base to get a compression bump, but I probably would have shot for the same numbers by adding epoxy to the intake floor.
What you did is close to what I did on the last one, but I cut the base and squish also. I think I ended with the exhaust at 105, transfers at 121-24, and the intake wherever it landed
 

huskihl

Muh fingers look really big
GoldMember
Local time
6:20 AM
User ID
360
Joined
Dec 31, 2015
Messages
22,535
Reaction score
143,436
Location
East Jordan, MI
Country flag
If the squish with OEM piston is close to 0.020” like it was with mine, I would for sure ditch the pop-up piston.
That’s where I was going. A pop up from a stock piston without lowering the cylinder is kinda like running with the decomp pushed in
 

MAF143

Super OPE Member
Local time
6:20 AM
User ID
16099
Joined
Mar 30, 2021
Messages
133
Reaction score
462
Location
North Central Ohio
Country flag
I didn't measure squish with the stock piston, but I compared the wrist pin hole to the top edge of the piston and they were with .003 of each other so I assumed the squish would be close to the same.

I've got the bottom end split and waiting for a gasket or I'd throw in the stock piston and check it. I'll do that before assembling it. If it's around .o20 with the stocker, I'll for sure use it instead.

Thanks for keeping me on track guys.

-----
I have been trying just one pic at a time with the upload file button next to the Post reply button. It comes back with an error every time. I'll try the drop thing...

dropped a couple in here and it thought about it and then nothing happened... I never had any problems before with loading pix... now today I'm a moron... I've re-booted and tried different browsers, but if there's one thing I'm more of a rookie at than porting... it's computers...
 

MAF143

Super OPE Member
Local time
6:20 AM
User ID
16099
Joined
Mar 30, 2021
Messages
133
Reaction score
462
Location
North Central Ohio
Country flag
I put a wrist pin in both the stock piston and the aftermarket pop-up piston and they are real close to the same height above the pin. The stock one is maybe a couple thousands taller, but that may just be the thickness of the carbon build up.

equal height above pin should mean equal squish.

wow, it let me put in a pic...
 

Attachments

  • Pistons.jpg
    Pistons.jpg
    162.8 KB · Views: 34
Last edited:

MAF143

Super OPE Member
Local time
6:20 AM
User ID
16099
Joined
Mar 30, 2021
Messages
133
Reaction score
462
Location
North Central Ohio
Country flag
I'll try some more pix... it would only let me load this one.

IMG_1274.JPG
Hogged out the lowers. The shiny line on the roof of the uppers isn't a chamfer. It's a little ridge of plating that will catch a screwdriver that is lightly drug out of the port. I filed these ridges away with a diamond file so the roof of the ports should allow smooth flow out of the roof. That ridge was probably a degree or so and I'll measure it when I get the case gasket so I can assemble the bottom end. I hadn't noticed a ridge on those ports on any of the other saws I've worked on. I will be looking for that in the future. I would think that would cause turbulence and drag at the "nozzle".
 

farminkarman

I like the red & black ones
GoldMember
Local time
5:20 AM
User ID
13535
Joined
Aug 17, 2020
Messages
3,631
Reaction score
20,466
Location
Neenah Wisconsin
Country flag
3F1043B8-389A-4074-9640-D80F3AB50A2E.jpeg
I'll try some more pix... it would only let me load this one.

View attachment 331271
Hogged out the lowers. The shiny line on the roof of the uppers isn't a chamfer. It's a little ridge of plating that will catch a screwdriver that is lightly drug out of the port. I filed these ridges away with a diamond file so the roof of the ports should allow smooth flow out of the roof. That ridge was probably a degree or so and I'll measure it when I get the case gasket so I can assemble the bottom end. I hadn't noticed a ridge on those ports on any of the other saws I've worked on. I will be looking for that in the future. I would think that would cause turbulence and drag at the "nozzle".
Why did you “hog out” the lower transfers? This area I circled in red should have been mostly left intact. By removing that material, the charge is no longer forced to flow outward to the transfer cap.
 

MAF143

Super OPE Member
Local time
6:20 AM
User ID
16099
Joined
Mar 30, 2021
Messages
133
Reaction score
462
Location
North Central Ohio
Country flag
Why did you “hog out” the lower transfers? This area I circled in red should have been mostly left intact. By removing that material, the charge is no longer forced to flow outward to the transfer cap.

My thoughts are that it was very squared off and angular at those points. I'm thinking a smooth transition into the port like a velocity stack may work well, so I'm trying it. Seems like less turbulence in the tunnel and smoother laminar flow would be a good thing. Just like at the upper x-fer nozzle end, the little ridge that I removed seemed to me like a burr on the rear edge of a tunnel hull boat, that burr causes swirling eddy disturbances that induce drag. Drag is to be avoided???

But I'm new at this and using my experiences from other stuff I've done in the past to guide me. It may guide me down bad paths, but that's how I learn. If I've broken a golden rule, just let me know and I'll learn from it. I missed the class for porting engines and I'm just trying to pick up as much knowledge as I can as a hobbyist. I have no plans to sell services, just getting old saws running again with hopefully a little more zip for me and my buddies I cut wood with.

Laminar flow inside a small engine at high RPMs may be very different than flow at lower speeds. Similar to the electronics world where dc and low frequencies behave very differently than VHF, UHF, and Microwave frequencies. This is a learning process for me. Just trying to relate it to stuff I understand.

Thanks for your feedback.
 

MAF143

Super OPE Member
Local time
6:20 AM
User ID
16099
Joined
Mar 30, 2021
Messages
133
Reaction score
462
Location
North Central Ohio
Country flag
I finally got bearings and seals delivered today. I put the bottom end together and measured squish on both the stock piston and the pop-up piston.

stock is .032
pop up is .038 with a 26mm diameter .026" / .066cm high pop up

if squish was equal, the pop-up would net .324cc less in the chamber at TDC.

I played with the numbers a bit and pop up only nets .064cc less in the combustion chamber at TDC than the stock piston without being able to cut the cylinder.

Slight bump in overall compression but how does the spread out volume compare to a more compact hemi head with a tighter squish?

Does the squish band at the edge of the cylinder have more significance on the flame spread or is it simply the easiest, best way to get compression with the shape of chainsaw jugs / two strokes in general?

#$%^&*, I need a lathe...
 

farminkarman

I like the red & black ones
GoldMember
Local time
5:20 AM
User ID
13535
Joined
Aug 17, 2020
Messages
3,631
Reaction score
20,466
Location
Neenah Wisconsin
Country flag
I finally got bearings and seals delivered today. I put the bottom end together and measured squish on both the stock piston and the pop-up piston.

stock is .032
pop up is .038 with a 26mm diameter .026" / .066cm high pop up

if squish was equal, the pop-up would net .324cc less in the chamber at TDC.

I played with the numbers a bit and pop up only nets .064cc less in the combustion chamber at TDC than the stock piston without being able to cut the cylinder.

Slight bump in overall compression but how does the spread out volume compare to a more compact hemi head with a tighter squish?

Does the squish band at the edge of the cylinder have more significance on the flame spread or is it simply the easiest, best way to get compression with the shape of chainsaw jugs / two strokes in general?

#$%^&*, I need a lathe...
Plenty of folks on this forum who could do machine work on that jug for you…myself included.
 
Top