High Quality Chainsaw Bars Husqvarna Toys

Hand Making Axe Handles

jehinten

Active OPE Member
Local time
3:07 AM
User ID
8107
Joined
Dec 12, 2018
Messages
44
Reaction score
46
Location
Evansville Indiana
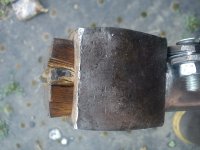
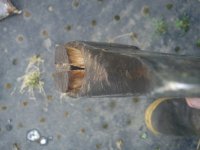
Also on a side note, I did do a little shaping with a powered sander near the head after it was set and I got onto the metal with it as you can see in a few of the pictures. Is there a way to get that bright spot back to looking like the rest, or just wait until it ages a bit?
 

leadfarmer

Hot Rod !!!
Local time
4:07 AM
User ID
300
Joined
Dec 28, 2015
Messages
10,074
Reaction score
71,164
Location
S Central PA
Country flag
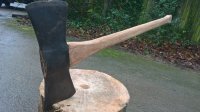
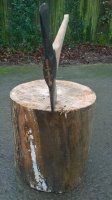
I've suddenly taken an interest in making a handle and had to buy an axe head to make it happen. I bought one off of Ebay, I choose it because it was forged in my hometown of Evansville Indiana many years ago (no idea on the date but the company is no longer open). I started with soaking the head in vinegar for 48 hours and selected a piece of Ash from my firewood logs. I wanted to use a piece of honey locust, but all of my pieces of it were full of knots or twisted grain. As this is my first handle that I have made I did make a few mistakes and could have done a little better on the fit, but I think it has turned out nice. I had every intention of making a narrow oval handle until I felt this handle as I started to shave it down, it felt good in my hands being a little square and thick so I finished shaping it how I wanted and sanded it smooth, I then gave the handle 4 coats of boiled linseed oil.

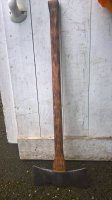
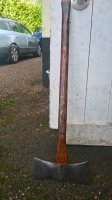
this is what I started with, it was covered in rust and I believe old dried up tar.

View attachment 159573

View attachment 159574

this is after 48 hours in white vinegar and a light scrubbing with a scouring pad

View attachment 159575
beginning to shape the handle. I used the bandsaw to get me a close to square post out of this log, I then cut one side off at an angle to get the grain orientation the direction I wanted it, and then used that edge to cut the other 3 sides off on a table saw. After tracing another handle that I used as a template I made these cuts with a bandsaw and started working it down with a draw shave.

View attachment 159577
in cutting the top of the handle down for the head, I did not take into account that the tablesaw cuts further on the bottom than the top where I could see ( I was actually thinking as I made this cut, that this would be a bad time to mess up, well...) the line on the right side is where I was supposed to stop my cut.

I was able to shorten my handle by about an inch and make it still work
Nice job. Get another one already [emoji16]
 

ajschainsaws

Axes never run out of Gas
GoldMember
Local time
9:07 AM
User ID
685
Joined
Jan 26, 2016
Messages
7,843
Reaction score
37,610
Location
South west UK
Country flag
Nice job. Get another one already [emoji16]

Agree with dis get another one on the go you done a good job
When your shaping the handle if you’ve got an eye for the job , you’ll get to that sweet spot when your hands will tell you it’s right
 

ajschainsaws

Axes never run out of Gas
GoldMember
Local time
9:07 AM
User ID
685
Joined
Jan 26, 2016
Messages
7,843
Reaction score
37,610
Location
South west UK
Country flag
Well sometimes you gotta go out on a limb ha ha

I don’t know if it will be , but it’s been there some years this old growth Douglas
It has held the weight of a decent branch for decades at right angles
So stress levels should be shaken out of it

Gotta try and I got an old beat up head so it’ll be a wall hanger if no good
 

gurwald

Pinnacle OPE Member
Local time
10:07 AM
User ID
9417
Joined
May 7, 2019
Messages
291
Reaction score
1,202
Location
Sweden
Country flag
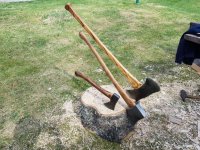
Hi first post here, made this handle out of a piece of ash couple of weeks ago, I noticed the quality was far from good too late so all the work for nothing in the end... Broke of right below the axe head. But I really liked how it turned out, nice feel and purdy to look at. :)

thumbnail_20190425_191852.jpg thumbnail_20190426_152453.jpg thumbnail_20190427_120805.jpg

The two single bit axes are just modified store bought handles.
 

ajschainsaws

Axes never run out of Gas
GoldMember
Local time
9:07 AM
User ID
685
Joined
Jan 26, 2016
Messages
7,843
Reaction score
37,610
Location
South west UK
Country flag
Hi first post here, made this handle out of a piece of ash couple of weeks ago, I noticed the quality was far from good too late so all the work for nothing in the end... Broke of right below the axe head. But I really liked how it turned out, nice feel and purdy to look at. :)

View attachment 180646 View attachment 180647 View attachment 180648

The two single bit axes are just modified store bought handles.


Welcome and that handle is a great shape you putta sweet palm swell
On that handle shame it broke , but at least you’ve got the recipe for
The next handle
 

Junk Meister

Pinnacle OPE Member
Local time
3:07 AM
User ID
1674
Joined
Aug 10, 2016
Messages
752
Reaction score
2,086
Location
Nebraska
Country flag
anyone tried making a cheap vacuum kiln? takes moisture out of the end grain an doesn't tend to discolor and etc. small scale it should be great for handles (And quick)
More thoughts on vacuum kiln.
Most people think of kilns as Heat and moving air. Be it a dehumidifier or steam or solar.. On a big scale application and environment plays a serious role. for US little guys and persnickety wood connaisseurs A small vacuum kiln fits the ticket. For axe handles a fair size pipe capped on one end and a plate and gasket on the other will work as a drying chamber. Vacuum tends to pull most of the moisture out through the end grains You can hypothetically wrap all 4 sides with saran wrap and leave the ends open ... when you start getting the high vacuum 15 to 20 plus inches the boiling point of liquids are lower.. So you will need to heat the kiln so the wood is warm then pull a vacuum and repeat this for several cycles. as you can't really heat the wood with convection or through space in a vacuum unless you use microwaves, I for one have a Klystron but have no intention of energizing it (I am bald enough) So cycles of heat and vacuum will pull the moisture from the wood as "STEAM" without researching lets say boiling at 24 inches of vacuum at 100 degrees F will literally boil the water out of the wood without shrinking the outer surface of the wood first (which is when checking, cracking and splitting will occur) The problem is when you pull so much steam/moisture out you get that cooling affect of latent heat loss through evaporation. So now your wood is cool and time to turn off the vacuum pump and reheat the vessel/kiln and the wood within and restart the vacuum pump. Some things to contemplate are
1. Moisture through the vacuum pump is abrasive so you need a way to allow moisture to "DROP" out of the air flow and save your pump.
2.Temperature and inches of vacuum are very proportionally relevant for the kiln to work
3.Wood needs to rest on something besides iron like dry wood sticks or aluminum or stainless to avoid staining
4.Pipe on a small scale will withstand vacuum pressure .. If you are going bigger best to do your research

Your wood can be dry in hours or days not months and the wood will look amazingly fresh and hopefully straight Handles in a kiln can get brittle I don't believe this to be true with vacuum drying. Do realize a steady vacuum will not work without the wood being heated as the vacuum lowers the boiling point to make the moisture BOIL out
I am more than open to interpretation and correction as this will help me with my plans AND I have had my share of the keyboard for now Time for the readers to start digesting. :bash:and me to:beer-toast1::godsdrink0nw:
 

Wilhelm

Here For The Long Haul!
GoldMember
Local time
10:07 AM
User ID
1204
Joined
Apr 28, 2016
Messages
11,531
Reaction score
43,878
Location
Croatia
Country flag
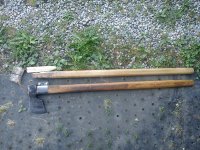
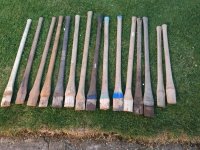
My uncle made me this handle, seasoned oak.
I'm curious how it will behave.

The old commercially made beech handle held out over a decade - broke a couple years ago but endured after I added the stainless steel clamp.

DSC01352.JPG DSC01353.JPG DSC01354.JPG
 
Top