High Quality Chainsaw Bars Husqvarna Toys

Farmertec 440 Kit Notes and Questions

colvin

Active OPE Member
Local time
6:03 AM
User ID
15621
Joined
Feb 3, 2021
Messages
6
Reaction score
10
Location
Asheville, NC, USA
First of all, hats off to Huztl/Farmertec for making it possible for me to get started wrenching and modding saws as a hobby without breaking the bank. Love or hate them, without them I would still be dreaming of working on saws instead of actually doing it. I put together a 660 kit in January 2021, and that was the first time I've ever been inside of a saw. I should give considerable credit to Matthew Olson, whose YouTube videos showed me the way.

The 660 kit pretty much slapped right together, but not quite so much with the 440. The fit and finish on the 440 is much rougher. I've made it work for the most part and the problem-solving aspect was a lot of the fun. I even did some grinding on the cylinder to clean it up after watching the porting series videos from Tinman on YouTube. It went really well.

Some notes:
- The oil pump worm gear is utter garbage (more on this later)
- Squish without base gasket was .035 for both the 50mm and a big-bore 52mm top end
- Flywheel fit on crank shaft wasn't great
- Woodruff key was a super tight fit in the slot, required a lot of coercion
- The coil in the spark plug boot is too tight and rips off of the wire every time the spark plug is removed
- The decompression valve is considerably better quality than the one in the 660 kit
- Included 50mm cylinder had lots of flashing and barely any port chamfering
- ... more, but I can't think of them right now

Port timing using the Farmertec 52mm big bore (include a grain of salt, since this is my first time timing an engine):
- Exhaust opens at 100° ATDC, 160° duration
- Intake opens at 110° ABDC, 140° duration
- Transfers open at 120° ATDC, 20° blowdown

Now to my main issue.

The oil pump worm gear was complete garbage. Out of the box the spring was too long to even fit in the case. I was able to bend the kink at the end of the spring inwards just enough to get it into the case. It runs along a groove cut into the case, and required a bit more bending to get it to seat correctly into that groove. Once the clutch drum was installed, however, it would barely engage the slot in the drum.

The biggest issue was that the worm gear would not rotate independently of the crank shaft. Once the clutch was installed, it seems like it would bind with the worm gear -- the clutch bears on the washer, the washer bears on the bearing spacer/bushing and the top of the worm gear. The worm gear rotates with the crank shaft even at idle, and the load is transferred through the spring to the clutch drum. The end result was that the clutch drum rotated at idle, and when the chain brake was tested the worm gear disintegrated. The spring's coil around the gear bent and the spring popped off (luckily wedging in the case in such a way that it didn't destroy anything) and the bottom of the worm gear's threads sheared.

I finally managed to find an OEM worm gear and spring online (getting OEM Stihl parts is difficult where I'm at), but I'm concerned about the general fitment. Is the bearing spacer / bushing supposed to rotate with the crank, or is it supposed to remain stationary? I would think the former. Is the worm gear supposed to rotate around the bushing? I would think yes. Is the washer beneath the clutch supposed to bear down directly on the bushing and not on the top of the worm gear? It doesn't make sense to me that it bears down on the worm gear.

I'm not sure how an MS440 normally works.

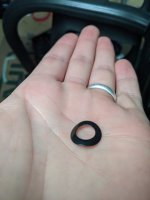
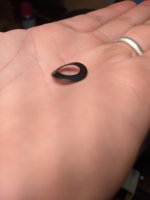
Also, there is a part that looks like an oblong washer bent into a potato-chip kind of shape. I have no idea where that goes. I can try to upload a picture later.
 

Absolution

Pinnacle OPE Member
GoldMember
Local time
6:03 AM
User ID
9566
Joined
May 24, 2019
Messages
648
Reaction score
2,066
Location
WV/NC
Country flag
The washer should cup into the clutch and spin with it. The worm gear should spin independently of the clutch.
 

colvin

Active OPE Member
Local time
6:03 AM
User ID
15621
Joined
Feb 3, 2021
Messages
6
Reaction score
10
Location
Asheville, NC, USA
That's what I thought. I wonder if I didn't have the worm gear fully seated into the pump (I really thought I had) or if the bearing spacer is a little too short? I would think that the spacer would protrude past the top of the worm gear so the washer bears directly onto it without bearing onto the top of the worm gear. As it was, I can't see any way the worm gear would spin independently.
 

Absolution

Pinnacle OPE Member
GoldMember
Local time
6:03 AM
User ID
9566
Joined
May 24, 2019
Messages
648
Reaction score
2,066
Location
WV/NC
Country flag
That's what I thought. I wonder if I didn't have the worm gear fully seated into the pump (I really thought I had) or if the bearing spacer is a little too short? I would think that the spacer would protrude past the top of the worm gear so the washer bears directly onto it without bearing onto the top of the worm gear. As it was, I can't see any way the worm gear would spin independently.

Got any photos?
 

colvin

Active OPE Member
Local time
6:03 AM
User ID
15621
Joined
Feb 3, 2021
Messages
6
Reaction score
10
Location
Asheville, NC, USA
Not yet. I'll try to get some this afternoon after work. I ordered a different aftermarket worm gear (before I found the OEM one) and it should arrive today so we'll see if I can replicate the issue and provide some photos.

Thanks for the help, I appreciate it.
 

colvin

Active OPE Member
Local time
6:03 AM
User ID
15621
Joined
Feb 3, 2021
Messages
6
Reaction score
10
Location
Asheville, NC, USA
Here's the part I can't figure out.
 

Attachments

  • PXL_20210316_170251371.jpg
    PXL_20210316_170251371.jpg
    65 KB · Views: 29
  • PXL_20210316_170305471.jpg
    PXL_20210316_170305471.jpg
    46.3 KB · Views: 29

Cooper264

Well-Known OPE Member
GoldMember
Local time
6:03 AM
User ID
15265
Joined
Jan 5, 2021
Messages
370
Reaction score
417
Location
Southern WV
Here's the part I can't figure out.

I have seen that washer somewhere. Just can't place where it goes. Something tells me some models have one of those in the starter assembly between the main nut and the plastic thing that the wings sit in.

But anyways, I had a similar experience when I did my first 660 kit. Everything was kinda wonky and didn't seem to work right. Went out and bought a pretty good looking used 660 OEM and tore it apart. Realized I was doing alot of stuff bass ackwards. May just be putting some washers and bushings in the wrong order on the clutch. Also maybe not having the worm gear completely seated. If the worm gear is binding that much with the crank then something is out of alignment. May be a bad oiler of a bad crank or a bad worm gear bushing. You can never really tell with the FT kits what the parts are going to be like. Personally if you file the brass bushing in the worm gear or even drill it out just a tiny fudge to where it isn't binding on the crank, it should be fine. It tends to ride against the pump anyways so as long as it isn't rattling around on the crank and bouncing off the case, it will be ok
 

drf256

Dr. Richard Cranium
GoldMember
Local time
6:03 AM
User ID
319
Joined
Dec 29, 2015
Messages
9,371
Reaction score
61,582
Location
Strong Island NY
Country flag
No clue where that spring washer goes on an MS440.

The 440 usually has a large washer that fits over the worm gear to protect the oil pump. IIRC, there is a small step in the crank that allows some spacing of the washer from the worm so that the worm isn’t driven by the rear face of the clutch. You may have to make something up for it.

The fit and finish of the 440 kits I’d quite terrible compared to the 660 kits. We all found the same when we did the build offs. Do yourself a favor now and file down the intake barb around 1/8”. It’s too long from FT and will intermittently bottom out against the side of the impulse line and cause the saw to not start or run correctly.

It’s also possible that your crank spacing is off inside the case. If it’s a bit too much towards the flywheel side, the clutch will sit a bit too deep and apply pressure to the worm, especially if there is no stop for it. I didn’t have this issue when I built one, but I also used an oem pump/gear/crank.
 

colvin

Active OPE Member
Local time
6:03 AM
User ID
15621
Joined
Feb 3, 2021
Messages
6
Reaction score
10
Location
Asheville, NC, USA
Thanks for the help guys. I really wish the 440 kit was higher quality. It's such a cool saw.

@drf256 Do yourself a favor now and file down the intake barb around 1/8”.
Could you explain this? I'm not familiar with the intake barb.

So I received a replacement aftermarket worm gear yesterday, not Farmertec, and got it installed. One thing I noticed is that the clutch washer has "TOP" stamped on one side so I definitely had it installed backwards. There was still some interference between the brass bushing and the bearing spacer, but much better than the FT one, and with the washer installed correctly it seemed to have a much better time rotating freely. Unfortunately the end result was that the friction was still too great and the spring disconnected from the worm gear. It now spins freely around the gear instead of driving it around the bearing spacer. I'm pretty sure it was actually glued in place. The FT one had a protrusion that stopped the spring from rotating around the gear, which seems like a good idea, but the spring wasn't sufficiently hardened so it bent and popped off of the gear entirely.

I should receive the OEM part on Friday so we'll see what happens. If the OEM part is still too tight around the bearing spacer, I'll either try to round up an OEM bearing spacer (perhaps the FT one is slightly oversized?) or I'll take advice from @Cooper264 and try to ream out the brass bushing. Would some grease or oil help? I'm assuming that once it has a little bit of run time it will naturally wear itself in, what with the brass being significantly softer than the hardened steel of the spacer, so some mitigation of the friction may help it wear in without disintegrating.

I've also ordered an OEM replacement for the gas tank vent because it leaks really bad.
 

Cooper264

Well-Known OPE Member
GoldMember
Local time
6:03 AM
User ID
15265
Joined
Jan 5, 2021
Messages
370
Reaction score
417
Location
Southern WV
Y
Thanks for the help guys. I really wish the 440 kit was higher quality. It's such a cool saw.

@drf256 Do yourself a favor now and file down the intake barb around 1/8”.
Could you explain this? I'm not familiar with the intake barb.

So I received a replacement aftermarket worm gear yesterday, not Farmertec, and got it installed. One thing I noticed is that the clutch washer has "TOP" stamped on one side so I definitely had it installed backwards. There was still some interference between the brass bushing and the bearing spacer, but much better than the FT one, and with the washer installed correctly it seemed to have a much better time rotating freely. Unfortunately the end result was that the friction was still too great and the spring disconnected from the worm gear. It now spins freely around the gear instead of driving it around the bearing spacer. I'm pretty sure it was actually glued in place. The FT one had a protrusion that stopped the spring from rotating around the gear, which seems like a good idea, but the spring wasn't sufficiently hardened so it bent and popped off of the gear entirely.

I should receive the OEM part on Friday so we'll see what happens. If the OEM part is still too tight around the bearing spacer, I'll either try to round up an OEM bearing spacer (perhaps the FT one is slightly oversized?) or I'll take advice from @Cooper264 and try to ream out the brass bushing. Would some grease or oil help? I'm assuming that once it has a little bit of run time it will naturally wear itself in, what with the brass being significantly softer than the hardened steel of the spacer, so some mitigation of the friction may help it wear in without disintegrating.

I've also ordered an OEM replacement for the gas tank vent because it leaks really bad.
Yea some sort of grease or oil may help to get it initially spinning right. Shouldn't take long to break in. Also may leave the pump just a fudge loose for a second or two to help it wear in some
 

MustangMike

Mastermind Approved!
Local time
6:03 AM
User ID
338
Joined
Dec 30, 2015
Messages
11,433
Reaction score
35,921
Location
Brewster, NY
Country flag
The barb Doc is referring to is the brass barb on the case that the impulse line goes to. It is too long, and as a result the impulse line with either kink or get blocked. Just file it down a bit, and run a pipe cleaner from inside the case out to clean out any debris.

Did you buy the kit recently? I was hoping by now they had fixed some of the issues. The Blue cover 660 kit I purchased had several improvements over the previous 660 kits.

Until the 462 came out, the 044/440 was my favorite saw!

One of the issues you may notice with the BB kits is increased vibrations due to the heavier piston in those saws. 460 pistons are heavier than 440 pistons, and AM pistons are usually heavier than OEM pistons.
 

colvin

Active OPE Member
Local time
6:03 AM
User ID
15621
Joined
Feb 3, 2021
Messages
6
Reaction score
10
Location
Asheville, NC, USA
Thanks for the followup on the impulse line. The saw was surging a bit when I last ran it, do you think that could be the issue or is that more likely something with the carb itself? Already I had to slightly adjust the choke shutter because it was binding on the bottom when the choke was engaged, so I don't have a ton of confidence in the carb.

I just bought the kit. Ordered it Jan 22 2021, received it last Friday (Mar 12). That trip across the ocean is a bear. Based on the YouTube videos I've watched (most circa 2017) the 660 kits have seen some definite improvements. I didn't have any of the issues they mentioned. Mattyo had significant trouble with the clutch side bearing and crankshaft spacing with the 440 kit but I didn't have any of those issues (thankfully).

I did a test with one of the busted worm gears, sanding out the inside brass bearing to give it a little more clearance from the spacer. A 10mm socket with some sandpaper wrapped around it fit perfectly. Hit it with 100 then 220 grit, then finished it off with some 400 grit to polish. Looks great and I think has just enough clearance from the spacer without introducing any rattle. The spacer has an OD of 15 mm when measured at the end, and the ID of the brass bushing on the worm gear was 15.10 mm. I sanded that out another ~0.05 mm. I'll probably do this on the OEM worm gear before I install it, and add some grease.
 
Top