High Quality Chainsaw Bars Husqvarna Toys

Husqvarna 576 Repair Thread.

angelo c

Coal Member
Local time
11:16 AM
User ID
362
Joined
Dec 31, 2015
Messages
2,919
Reaction score
11,552
Location
Peoples Republic of North Jersey
@RI Chevy
Joe, I was just "searching" your threads looking for a 550xp one so I could "motivate" me to attempt muh fust Husky redo.
I think this might be just good enough to get me started. (Have I mentioned the "search" function here is befuddling ? Cumbersome ? only slightly effective...but that's another subject.)

I did do a few husky 455's a few weeks ago and NOW I think I am starting to "speak" husky repair. So far the toughest thing for me to "handle" was...the "handle"...almost every repair requires the handle removed...but that is so easy even a "Stihl" guy can do it. I almost never remove the tank/handle on a Stihl because its a Biatch....Not so on a husky....

SO....im a gonna try me a few Husky redos ( wish me luck) ....I been refusing to speak "husky" for years....but im opening up to new things as I get older and the stubbornness seems to fade.

Just don't tell Jeff @RI Chevy

Now for the most important stuff.... Check yer phone...I texted you a few days ago.... :)
 

Stihl working Hard

Is it Friday yet
Local time
11:16 PM
User ID
802
Joined
Feb 6, 2016
Messages
34,308
Reaction score
109,217
Location
Perth Australia
Now onto the intake, as previously stated this is a Strato saw so there are two throttle butterflies, one for the charge and one for the clean air that purges the exhaust. That being said it is really no more complicated than an ordinary saw.

View attachment 131284
A look down the barrel.

View attachment 131286
To disconnect the throttle start by depressing the trigger.

View attachment 131287
The throttle arm will pull back like so.

View attachment 131288
Hold it open and release the trigger.

View attachment 131289
And the cable will come out.
Nice thread there joe very informative
 

huskyboy

Sorta a husqvarna guy...
Local time
11:16 AM
User ID
1352
Joined
May 30, 2016
Messages
10,025
Reaction score
43,452
Location
Ct
Country flag
@RI Chevy
Joe, I was just "searching" your threads looking for a 550xp one so I could "motivate" me to attempt muh fust Husky redo.
I think this might be just good enough to get me started. (Have I mentioned the "search" function here is befuddling ? Cumbersome ? only slightly effective...but that's another subject.)

I did do a few husky 455's a few weeks ago and NOW I think I am starting to "speak" husky repair. So far the toughest thing for me to "handle" was...the "handle"...almost every repair requires the handle removed...but that is so easy even a "Stihl" guy can do it. I almost never remove the tank/handle on a Stihl because its a Biatch....Not so on a husky....

SO....im a gonna try me a few Husky redos ( wish me luck) ....I been refusing to speak "husky" for years....but im opening up to new things as I get older and the stubbornness seems to fade.

Just don't tell Jeff @RI Chevy

Now for the most important stuff.... Check yer phone...I texted you a few days ago.... :)
The carb box will coax a few swear words the first time you do it on husky autotune, but once you do it once it’s actually pretty easy. Order of assembly is key. Walt has a good video series I learned from (562 is just the big brother to 550).
 

Onan18

OPE Sponsor
GoldMember
Local time
11:16 AM
User ID
344
Joined
Dec 30, 2015
Messages
4,444
Reaction score
24,735
Location
Georgia
Country flag
This thread isn't even half finished at this point, I still have the entire re-assembly. Just ran out if time yesterday because I was hosting a Fourth of July party and I got busy in the kitchen. More to come, stay tuned.
 

Onan18

OPE Sponsor
GoldMember
Local time
11:16 AM
User ID
344
Joined
Dec 30, 2015
Messages
4,444
Reaction score
24,735
Location
Georgia
Country flag
@RI Chevy
Joe, I was just "searching" your threads looking for a 550xp one so I could "motivate" me to attempt muh fust Husky redo.
I think this might be just good enough to get me started. (Have I mentioned the "search" function here is befuddling ? Cumbersome ? only slightly effective...but that's another subject.)

I did do a few husky 455's a few weeks ago and NOW I think I am starting to "speak" husky repair. So far the toughest thing for me to "handle" was...the "handle"...almost every repair requires the handle removed...but that is so easy even a "Stihl" guy can do it. I almost never remove the tank/handle on a Stihl because its a Biatch....Not so on a husky....

SO....im a gonna try me a few Husky redos ( wish me luck) ....I been refusing to speak "husky" for years....but im opening up to new things as I get older and the stubbornness seems to fade.

Just don't tell Jeff @RI Chevy

Now for the most important stuff.... Check yer phone...I texted you a few days ago.... :)

I did a 562 thread Angelo, 550 is identical just smaller.


http://opeforum.com/threads/husqvarna-562-repair-thread.11111/

Joe
 

Sty57

Mastermind Approved!
Local time
10:16 AM
User ID
427
Joined
Jan 6, 2016
Messages
6,883
Reaction score
45,739
Location
Land of Cheese & Beer
@RI Chevy
Joe, I was just "searching" your threads looking for a 550xp one so I could "motivate" me to attempt muh fust Husky redo.
I think this might be just good enough to get me started. (Have I mentioned the "search" function here is befuddling ? Cumbersome ? only slightly effective...but that's another subject.)

I did do a few husky 455's a few weeks ago and NOW I think I am starting to "speak" husky repair. So far the toughest thing for me to "handle" was...the "handle"...almost every repair requires the handle removed...but that is so easy even a "Stihl" guy can do it. I almost never remove the tank/handle on a Stihl because its a Biatch....Not so on a husky....

SO....im a gonna try me a few Husky redos ( wish me luck) ....I been refusing to speak "husky" for years....but im opening up to new things as I get older and the stubbornness seems to fade.

Just don't tell Jeff @RI Chevy

Now for the most important stuff.... Check yer phone...I texted you a few days ago.... :)

One thing I would suggest before starting a AT Husky. Is get the Vac/pressure test block off kit for them. It make life so much simpler to check them before and afterwards.
Case splitter and crank tools are very handy but not completely needed........but the price on all of that stuff has come down so much its kinda a nobrainer now for me.
 

Onan18

OPE Sponsor
GoldMember
Local time
11:16 AM
User ID
344
Joined
Dec 30, 2015
Messages
4,444
Reaction score
24,735
Location
Georgia
Country flag
What bearings did you use? What caused Saw to fail?


Husqvarna OEM bearings, pretty much the only option as they are proprietary. Saw died due to age and neglect, there were several things that could have caused it so a full rebuild was the safest option.
 

Onan18

OPE Sponsor
GoldMember
Local time
11:16 AM
User ID
344
Joined
Dec 30, 2015
Messages
4,444
Reaction score
24,735
Location
Georgia
Country flag
Alright, back to reassembly, as previously stated the @Mattyo crank took kit does an excellent job.

20180619_170946.jpg
Well, it is a Husky...

20180619_171509.jpg
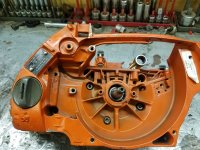
Run the case screws in and tighten them down in a cross pattern.

20180619_171839.jpg
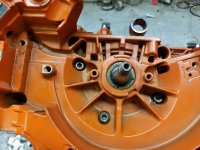
Seat the crank seal in, the PTO side seal is made into the bearing.

20180619_171913.jpg
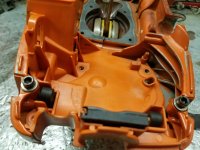
Next set the carb floor in.

20180619_172054.jpg
And install the screws.
 

Onan18

OPE Sponsor
GoldMember
Local time
11:16 AM
User ID
344
Joined
Dec 30, 2015
Messages
4,444
Reaction score
24,735
Location
Georgia
Country flag
20180619_172956.jpg
Now drop the oil lines back in and set the oiler back in place.

20180619_173042.jpg
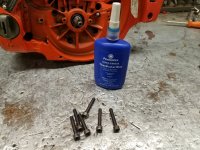
The screws that hold the oil pump on need sealant on the threads as the holes go all the way through into the crankcase.

20180619_173900.jpg
Lay the wires back into place.

20180619_173915.jpg
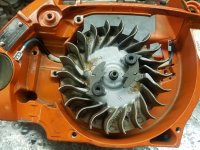
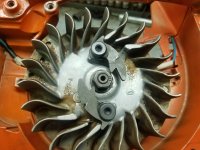
Drop the flywheel back on and seat it on the taper.

20180619_174011.jpg
And tighten the nut down.
 

Onan18

OPE Sponsor
GoldMember
Local time
11:16 AM
User ID
344
Joined
Dec 30, 2015
Messages
4,444
Reaction score
24,735
Location
Georgia
Country flag
20180619_174059.jpg
New parts. :D

20180619_174056.jpg
For reference.

20180619_174225.jpg
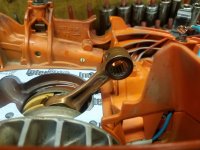
Oil up the piston pin bearing and slip it into the rod. Now is also a good time to lay the base gasket in place.

20180619_174310.jpg
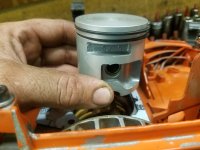
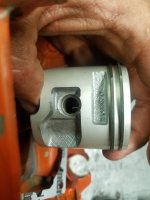
Set the piston on and push the piston pin through.

20180619_174515.jpg
And seat the circlip.
 

Onan18

OPE Sponsor
GoldMember
Local time
11:16 AM
User ID
344
Joined
Dec 30, 2015
Messages
4,444
Reaction score
24,735
Location
Georgia
Country flag
Let's start prepping the cylinder...

20180619_174601.jpg
First things first, no factory air leak.

20180619_174654.jpg
Next screw the A/V mount on.

20180619_174819.jpg
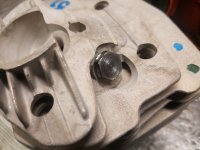
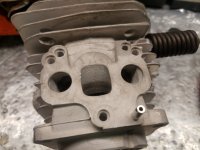
Here is how the intake side of the cylinder looks. Like most newer model Husqvarna saws the boot bolts on with a flange, in this case with three screws.

20180619_174806.jpg
One here...

20180619_174811.jpg
One here..
 
Top