High Quality Chainsaw Bars Husqvarna Toys

first build with what I have...

MG porting

Pinnacle OPE Member
Local time
1:13 PM
User ID
6543
Joined
Jun 28, 2018
Messages
2,401
Reaction score
6,837
Location
Wa
Country flag
Thanks, MG....I used the flashlight through the SPH to confirm my numbers multiple times....Why it seems low, I don't know....just the design of this particular saw???
Could be pretty rare to see the exhaust roof that low without base gasket delete and or some work to the base of the cylinder but if that's what you got then go with it do what makes you feel comfortable with your mods and if you need advice well we will be more than happy to help you out with any questions just take things slow because I'm guessing this is the only cylinder you have? So baby steps can go a long way I'm sure you will be fine so far you're doing good.:beer-toast1:
 

sonoransaw

Super OPE Member
Local time
1:13 PM
User ID
11414
Joined
Jan 7, 2020
Messages
232
Reaction score
847
Location
Arizona
So now that you have your numbers what’s the plan?

if you need advice well we will be more than happy to help you out with any questions just take things slow

Thanks....I need help, that's for sure....

So I've still been reading. Going through hundreds of forum discussions, I've copied and pasted and printed off probably 200 pages of material that I felt was useful and pertinent. And this is just the beginning.. I feel like I'm finally getting some material that actually applies to my project. As you guys well know, 99% of the discussions and builds on the internet are about anything but a 35cc poulan.

That being said, I'm getting a grasp of what I want to do....the usual stuff...widening and raising exhaust, lowering intake, widening transfers, contouring and smoothing everything for improved flow....I really want to start porting on it this weekend, and I may, but I got a lot of reading still ahead. (@Terry Syd ... I'm on your long thread right now about the strato Husqy you did). The internet is amazing and frustrating. You have so much good stuff people have written and contributed, but it gets buried. And only the real persistent ones are gonna spend the time sorting through it all and finding what they need. Most guys just want to post their questions and the guys who already spent tons of time writing the answers to those questions over the past years don't really have the time or inclination to write it all out again....I'm trying to not be "that guy".... You all took the time to post it. I can take the time to find it and read it. But I will ask questions...

One of my challenges right now is coming up with a way to document and measure the changes I make while I'm making them...a little more difficult with the clamshell design....
 
Last edited:

Terry Syd

Pinnacle OPE Member
Local time
6:13 AM
User ID
575
Joined
Jan 18, 2016
Messages
1,589
Reaction score
5,973
Location
Comboyne, NSW Australia
Country flag
When I first got the strato Husky (2008) the common view over on AS was that it couldn't be modified as it was a 'clamshell' and also you couldn't mod stratos. - Crikey, it is an engine, you can always mod an engine.

As you can see from that thread I found a lot of 'dead-ends' as I worked through what worked and what didn't. The thread contains all my mistakes, which you may be able to learn from and not repeat them.

That little Husky is still my favorite saw. It took a lot of work to figure it out and redesign it, especially the transfers. However, it turned into an angry little saw that punches well above its weight and is a pleasure to use.

Take your time, it will probably be a steep learning curve.
 

sonoransaw

Super OPE Member
Local time
1:13 PM
User ID
11414
Joined
Jan 7, 2020
Messages
232
Reaction score
847
Location
Arizona
Thanks, Terry. I'm learning tons. You sure gave a thorough report of your entire modding process. Cool to hear that the saw turned out so well. I appreciated your comments earlier, but the internet doesn't give much context. Reading through your old posts kind of lets me get to know you and I see you from a whole different perspective....
 

rogue60

Here For The Long Haul!
Local time
6:13 AM
User ID
578
Joined
Jan 18, 2016
Messages
1,326
Reaction score
8,209
Location
AU
Country flag
One thing I did years ago to help get my head around a strato engine was this.
Trace the ports cut them out sticky tape paper cylinder together to easy.
Made it very clear how it all works you can actually see what opens and closers and why doing this.
073.jpg
Disclaimer I don't port things I just hack chit up with a Dremal lol
 

rogue60

Here For The Long Haul!
Local time
6:13 AM
User ID
578
Joined
Jan 18, 2016
Messages
1,326
Reaction score
8,209
Location
AU
Country flag
Cool way to get your head around stratos. If you need to increase the strato timing, you can just remove a bit from the piston to open it up earlier.
Helps you understand the piston cutaway aswell.
Removing a bit from the piston you mean from the piston cutaway to open the Strato port/ports earlier I take it?
I sent fuel through the Strato ports gutted it on that saw but going off what you are saying in theory I could get more air/fuel in the engine by doing as said above.
 

Terry Syd

Pinnacle OPE Member
Local time
6:13 AM
User ID
575
Joined
Jan 18, 2016
Messages
1,589
Reaction score
5,973
Location
Comboyne, NSW Australia
Country flag
you mean from the piston cutaway to open the Strato port/ports earlier I take it?

Right, just trim the cutaway to open sooner.

Sending fuel through the strato doesn't appear to do anything for the power. About all it will do is increase the fuel consumption as fuel tends to get blown out of the exhaust port. Perhaps there might be a small gain by washing some heat away, but that will come at the cost of more fuel. I think keeping the strato function makes a lot of sense. In any case, when the engine comes up on compression the swirling currents and squish makes for a homogeneous mixture at the time of combustion.

Getting as much AIR in the engine is the hardest part of modding, for example turbo and superchargers cramming more air in. - You can always tweak the carb to get more fuel. In fact, if you managed to get the strato port working really well (say like with thinner reeds on a Dolmar 6100) and it leaned out the mixture, that would be a good sign, it means more air in the engine. Then just tweak the carb for more fuel and a proper fuel mixture.

Matching the strato and intake timing appears to be the best way to mod stratos. If you have either the strato or intake with longer timing, then the other port gets 'shortchanged' on its timing and can't add that little bit more to the flow. Further, you can't begin to make base compression (crankcase compression) until both ports are closed. Matching the timing guarantees that you are maximizing both the port functions.
 

sonoransaw

Super OPE Member
Local time
1:13 PM
User ID
11414
Joined
Jan 7, 2020
Messages
232
Reaction score
847
Location
Arizona
Just a quick post here. I don't currently have internet at home... Thanks much for the posts above. I'll respond later...

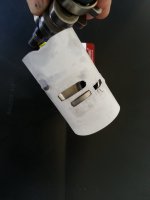
My brother helped me turn a wooden insert that fits perfectly in the cylinder. This will help me document and plan....

wK7M5fE.jpg


cT8Cn19.jpg
 

sonoransaw

Super OPE Member
Local time
1:13 PM
User ID
11414
Joined
Jan 7, 2020
Messages
232
Reaction score
847
Location
Arizona
I like that idea @rogue60 and will make me a little paper cylinder.

@Terry Syd I'm learning lots from that old thread of yours, about the piston skirt trimming (and that "scalloping" on the edge of the top), which I plan to try. I also really liked your spark plug mod to help with timing.

So I'm hoping to trace the ports on my wooden template and then mark where I plan to go and use it as a reference....
 

XP_Slinger

They’re Just Saws
Local time
4:13 PM
User ID
845
Joined
Feb 9, 2016
Messages
6,089
Reaction score
27,523
Location
Central NY
Country flag
I like that idea @rogue60 and will make me a little paper cylinder.

@Terry Syd I'm learning lots from that old thread of yours, about the piston skirt trimming (and that "scalloping" on the edge of the top), which I plan to try. I also really liked your spark plug mod to help with timing.

So I'm hoping to trace the ports on my wooden template and then mark where I plan to go and use it as a reference....
Cool idea. You’re going at this a lot better than I did on my first porting adventure. This is a great thread.
 

Redfin

Meh...
Local time
4:13 PM
User ID
159
Joined
Dec 24, 2015
Messages
7,645
Reaction score
39,982
Location
Central Pa
Country flag
One thing I did years ago to help get my head around a strato engine was this.
Trace the ports cut them out sticky tape paper cylinder together to easy.
Made it very clear how it all works you can actually see what opens and closers and why doing this.
View attachment 221417
Disclaimer I don't port things I just hack chit up with a Dremal lol
I did roughly the same years ago to help wrap my noodle around strato saws.

I port mapped the cylinder the way you did but used a clear piece of plastic to map the piston.

I could move the clear piece over the cylinder map to see the durations. It helped alot.

Nice work.
 

sonoransaw

Super OPE Member
Local time
1:13 PM
User ID
11414
Joined
Jan 7, 2020
Messages
232
Reaction score
847
Location
Arizona
I did roughly the same years ago to help wrap my noodle around strato saws.

I port mapped the cylinder the way you did but used a clear piece of plastic to map the piston.

I could move the clear piece over the cylinder map to see the durations. It helped alot.

Nice work.

Clear plastic.... great idea.... man, there needs to be some kind of glossaried list of this stuff.... definitely gonna do that... thanks!
 

sonoransaw

Super OPE Member
Local time
1:13 PM
User ID
11414
Joined
Jan 7, 2020
Messages
232
Reaction score
847
Location
Arizona
Made myself a little port map and I'm going to trace it onto some plastic for grasping the timing better. Used Pi for the first time in my life outside of a math class... Man I wish I had a decent math teacher back in school! They all sucked (or maybe it was me)...

I traced the exhaust port onto my dummy piston. Bore is 41 mm. 70% of bore is 28.7 mm and the current ex port is 20 mm, so that leaves about 8 mm of widening. Does that sound right? (Assuming the bolt holes, etc. permit it)...

I read an excellent thread last night on beveling/chamfering the ported edges. Man, there is a ton to know just on that topic! Glad I read it and I'll post some more on that when I get to it....

LvxD2Hg.jpg


dr2RzTb.jpg
 
Last edited:

sonoransaw

Super OPE Member
Local time
1:13 PM
User ID
11414
Joined
Jan 7, 2020
Messages
232
Reaction score
847
Location
Arizona
Back like a bad habit.... hope you guys don't hold anything against me... And thanks Randy for lettin me hang around some more....

This exhaust port is very oval shaped compared to others I’ve seen. The sides at the exit look straight, but inside it’s smaller and completely oval shaped. I’m not sure how much I can mess with the design, so I’ll do it in stages. This time around I’m going to mostly stick to the original port shape but just widen it, focusing more on the roof, so the roof will end up being the widest spot. I decided to use a chainsaw file.

The metal came off surprisingly easy. I knew being aluminum it would, but it went even faster than I anticipated. The thin black carbon layer in the port actually helped as a visual reference. I marked on my wooden blank where 70% of bore was. I ended up taking it to 61% and I’m thinking I may try that first before I go out to the full 70. Everything I’ve read says small changes make big differences and to be conservative. So I went about a total of 4mm. I also raised the roof a hair.

After filing I wrapped successive grits of sandpaper around the file and sanded down to 1000 grit. It went fast. Then to get the inner port bevels I took the smallest diameter chain file, heated it up, bent it, reheated and quenched in water to regain the temper. This worked very well (I’ll refine and smooth the end for next time to avoid any scratching of the cylinder, maybe even put something on it, but I was extra careful).

I then cleaned up the bevels with some fine grit sandpaper. I read also that these bevels shouldn’t be big at all and most of the bevel needs to be at the top arch of the port roof. The original ports had no bevel that I could see. The intake port even seemed to have a ragged sharp edge. I lightly cleaned up all the bevels. Second to last pic shows port. It’s upside down, so the wider part is actually the top.

sauDRkH.jpg


q6dQf3d.jpg


N7Et47L.jpg


kipOccX.jpg


rhbLF8Z.jpg


9cvkIT7.jpg
 
Last edited:

XP_Slinger

They’re Just Saws
Local time
4:13 PM
User ID
845
Joined
Feb 9, 2016
Messages
6,089
Reaction score
27,523
Location
Central NY
Country flag
Back like a bad habit.... hope you guys don't hold anything against me... And thanks Randy for lettin me hang around some more....

This exhaust port is very oval shaped compared to others I’ve seen. The sides at the exit look straight, but inside it’s smaller and completely oval shaped. I’m not sure how much I can mess with the design, so I’ll do it in stages. This time around I’m going to mostly stick to the original port shape but just widen it, focusing more on the roof, so the roof will end up being the widest spot. I decided to use a chainsaw file.

The metal came off surprisingly easy. I knew being aluminum it would, but it went even faster than I anticipated. The thin black carbon layer in the port actually helped as a visual reference. I marked on my wooden blank where 70% of bore was. I ended up taking it to 61% and I’m thinking I may try that first before I go out to the full 70. Everything I’ve read says small changes make big differences and to be conservative. So I went about a total of 4mm. I also raised the roof a hair.

After filing I wrapped successive grits of sandpaper around the file and sanded down to 1000 grit. It went fast. Then to get the inner port bevels I took the smallest diameter chain file, heated it up, bent it, reheated and quenched in water to regain the temper. This worked very well (I’ll refine and smooth the end for next time to avoid any scratching of the cylinder, maybe even put something on it, but I was extra careful).

I then cleaned up the bevels with some fine grit sandpaper. I read also that these bevels shouldn’t be big at all and most of the bevel needs to be at the top arch of the port roof. The original ports had no bevel that I could see. The intake port even seemed to have a ragged sharp edge. I lightly cleaned up all the bevels. Second to last pic shows port. It’s upside down, so the wider part is actually the top.

sauDRkH.jpg


q6dQf3d.jpg


N7Et47L.jpg


kipOccX.jpg


rhbLF8Z.jpg


9cvkIT7.jpg
Looking good man. Something else to keep in mind when widening the exhaust is skirt width. 70% is a good general rule of thumb but you have to make sure you don’t go beyond the skirt width. Would give your transfers a new outlet through the exhaust...ruined cylinder
 

sonoransaw

Super OPE Member
Local time
1:13 PM
User ID
11414
Joined
Jan 7, 2020
Messages
232
Reaction score
847
Location
Arizona
Looking good man. Something else to keep in mind when widening the exhaust is skirt width. 70% is a good general rule of thumb but you have to make sure you don’t go beyond the skirt width. Would give your transfers a new outlet through the exhaust...ruined cylinder

Thanks, man! Might be a stupid question, but do I have to worry about that with a piston like this???

AL0zj7e.jpg
 
Top