High Quality Chainsaw Bars Husqvarna Toys Hockfire Saws

HELP! Request for Advice on Preparation for Paint or Powder Coating Chainsaws

KellyJackson

Need Husky 65L Parts/Saw
Local time
4:26 PM
User ID
22375
Joined
Jan 22, 2022
Messages
8
Reaction score
8
Location
Abbotsford ..
Country flag
I know that the Pro's don't in a Lot of Cases, think that Painting or Powder Coating an a Couple Older Chainsaw is Sensible as I have Been Told by Some "Pros" that doing this is for People who are Glory or Shelf Chainsaw Inthuest's, That's Fine, Everyone is entitled to Think & Believe what they Will however it Depends what your Reasoning for Doing it is, Be it Personal, For Remembrance of Someone or Something in Particular, Doesn't really Matter.
For my Reasons, Being that I was Given a couple of Saws by a Friend whom I Hunted & Fished with, Cut so Many Cords of Wood with I could Never Count over the Years, Who I Learned so Much about Stewardship of Nature, Respect of Nature, and how Fickle Life can Be, I decided to Completely Rebuild a couple of Saws one being a 1991 Husky Model 55 c/w: 46mm Open Port Cylinder Assembly as well as an Older L65 Tomos
It amazed me the Comments from Some of the So Called "Pro's" or "Aficionado's" who have said Nothing other than " Why Waste your Time & Money" or "That OK if you Want your Saws to Fill a Shelf in Your Shop" Fact is I have my Reasons & Whatever they May be, In This case Out of Respect for a Good Friend Who Loved the Outdoors as Much or More than I do, I am Asking something Simple.
Can someone Advise me How to Prep a Magnesium or Aluminum Alloy Crankcase Saw such as an Older 1991 Year (Grey or Black Top) Model Husqvarna 55 Model or an even Older L65 Tomos (Yugoslavian Manufactured) Saw? Just Need to know if I Have to Sand Blast or Media Blast the Alloy Body to Remove All the Old Paint & Crud or Can I Boil away Most of the Dirt & Oil and Sand off the Old Paint? Should I Clean with Mineral Spirits afterwards before Painting or Powder Coating? I Know Painting isn't an Ideal Route to Take but its a Matter of Financial Sensibility.
As I said, Being an Avid Outdoorsman for so many Years' Just a Little over a Year & a Half Ago, After the " Covid 19 Pandemic" I was afflicted with a Knee Infection that eventually Resulted in an Amputation of my Leg Above the Knee which as I can only Simply Say " Put one Big Damper on My Outdoors Logging & Fishing Abilities to Say the Least. Not being a Pessimist,, I Decided that if I Couldn't do what I Enjoyed So Much, I would Take up a Hobby which has become Not Only Restoring Older Specific Chainsaws bu also Try and Help Wayward Street Kids or Under Privileged Kids to Learn Small Engine Repair, Primarily Chainsaws so that they May also Hopefully Learn something Useful as well as Get the Urge to Frequent the Outdoors other than the Streets.
In the Last 3-4 Years, Prices for Replacement Parts for Saws has become Insane Not to mention what "Flee Bay" wants for Shipping of these Parts and Even Worse, is the Vast Variety of Crap Parts and I Mean " Plain & Simple Garbage Parts" being Flogged on Multiple Sites & we all Know Who They are. Not Looking for Sympathy, Handouts, Nothing of the Sort, Just some Useful Help and Advice
 

Woodwackr

Pinnacle OPE Member
GoldMember
Local time
5:26 PM
User ID
28333
Joined
Jan 18, 2024
Messages
2,199
Reaction score
9,933
Location
ID
Country flag
In my limited experience, the paint on older Husky and Shindaiwa mag parts comes off very easily with media blasting. I use fine Coke ash for the most part.
You will need to tape off sections you don’t want hit but that’s normal for prep of any sort. Stihl powder coating is another subject…my media hardly touches it. But, it might rough up the coating just enough for new PC adhesion…don’t know.
 

hacskaroly

Pinnacle OPE Member
Yearly GoldMember
Local time
4:26 PM
User ID
27954
Joined
Nov 24, 2023
Messages
1,080
Reaction score
3,538
Location
Northern Idaho
Country flag
I know that the Pro's don't in a Lot of Cases, think that Painting or Powder Coating an a Couple Older Chainsaw is Sensible as I have Been Told by Some "Pros" that doing this is for People who are Glory or Shelf Chainsaw Inthuest's, That's Fine, Everyone is entitled to Think & Believe what they Will however it Depends what your Reasoning for Doing it is, Be it Personal, For Remembrance of Someone or Something in Particular, Doesn't really Matter.
If you want to paint or powder coat a chainsaw and there are those who poo-poo the idea or mock you for it, just give them a big middle finger! If you want to go for it whether to stop any damage (pitting/rusting), making it look pretty for display or because you want to wreck the woods in a very shiny and restored beauty....go for it!! I have a Husky 2100, 272, McCulloch 200, D-44 and a couple of 10-10s I would like to repaint or powder coat. Some people paint chainsaws, some people collect Pokemon cards and others smoke cigars, to each their own.

I have been looking at what it takes to get into powder coating and painting, but to do good job I will need a media blaster. I have been looking at Harbor Freight's hood for around $220-240. I will need a larger compressor, I don't think my pancake compressor will measure up. I would also need a powder coating kit and paint. I have been watching several videos on youtube where guys show how to paint car parts, especially valve covers with details (I am thinking like the McCulloch saws with raised lettering and emblems) and there seem to be some pretty easy ways to paint and clear coat in layers to achieve some really nice results, avoiding the need to free hand some detailed part.

Why have a garage that only holds one or two cars to restore when the same space can handle over 100 chainsaws!! :D

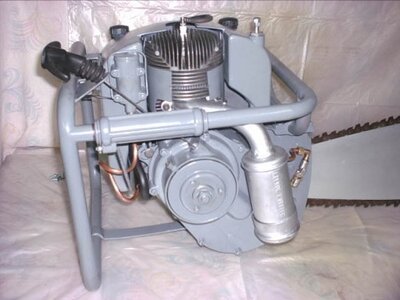
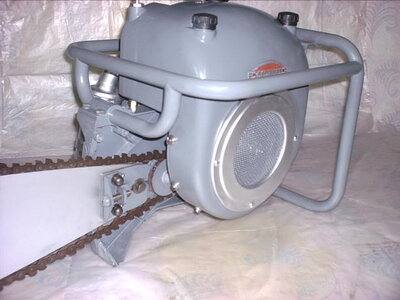
Whatever you end up doing for restoration...post pictures, we like pictures, here is a late 40's saw that someone restored just because they could:

CraftsmanReedPrentice1200B1947Re-1.jpg
CraftsmanReedPrentice1200B1947Re-2.jpg
 

dadstillsurfs

OPE Member
Local time
4:26 PM
User ID
29160
Joined
May 10, 2024
Messages
5
Reaction score
5
Location
Mt. Hannah, ca
Country flag
This is one of the best step-by-step descriptions I've seen for powder coating prep. Might be overkill for paint, but still very good.

Or this one for options


300whisper

Well-Known OPE Member
Local time
2:26 AM
User ID
24866
Joined
Aug 28, 2022
Messages
30
Reaction score
129
Location
Finland
Country flag
My experiences from last summer and fall when I started my very first powder coating experience. Be prepared to ”Holy Wall of Text”. Pictures will follow later.

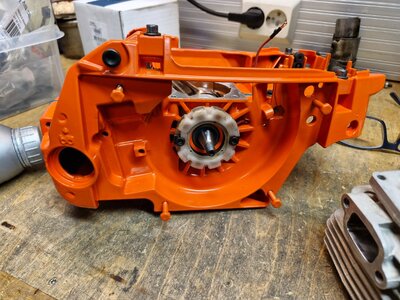
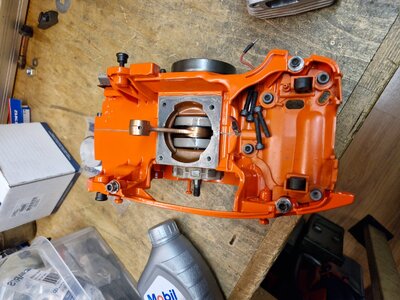
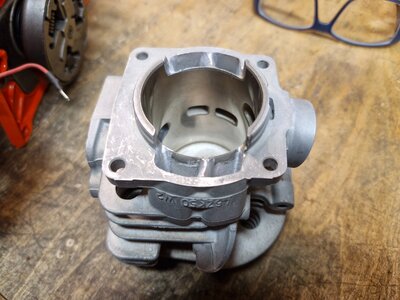
Powder coat removal is pain in the a** with paint remover, way too slow since enviroment destructing good s**t isn’t available in Europe. Then I tried soda plasting, works if coating is thin. Next step was sand plasting with fairly fine grit sand. Prepped case half screw holes with screw since I didn’t have silicone plugs. Plugs are available in Amazon and eBay but I was hesitant to buy for small job like this. Crank seal and bearing pockets I covered with masking tape and old crank seals. Masking tape holds fairly good as long as you don’t go grazy with blaster. After blasting I washed parts with dishwashing liquid, rinsed at least 2 times with hot water and used compressed air to blow water off the parts. Due to busy work schedule I had to abandon project for a while and started to make small painting booth. Will post pics later.

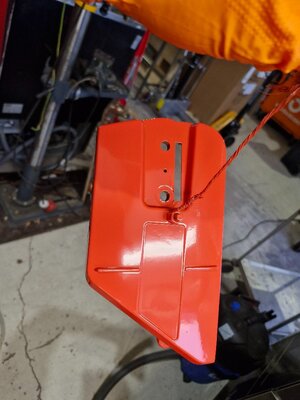
Yesterday I finally had some time to drag parts and painting booth to my work place. First thing I dropped first case half to ultrasonic cleaner and cranked heat to max temp (80C/ 176F) and assembled booth and set oven to 200C/ 392F. First test piece was scrapped 372XP clutch cover. For this part I didn’t do much other than washed it with dishwashing liquid and rinsed with hot water. I gave it little pre heat, about 10 min / 200C to get moisture off. For grounding I used copper wire and 6mm bolt through chain tensioner hole and placed it hanging in the booth.
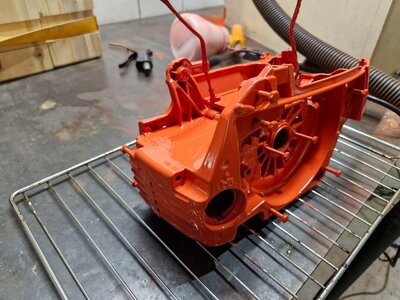
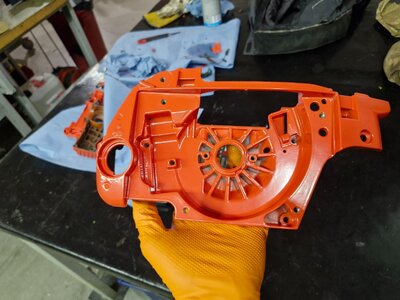
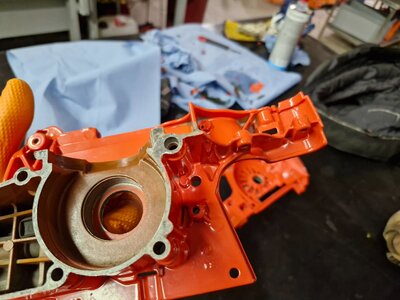
After washing case halves I covered cylinder deck and gasket surfaces with masking tape and bolted them lightly together and trimmed excessive tape off. My plan was to paint them as whole to save time and even finish. DON’T DO THIS unless you want to wrestle them apart. I managed to cut them loose with sharp box cutter and without any damage to coating. Don’t forget to screw bolts on every threaded hole. Small threads on magnesium are pain to open up and gateway to disaster if clogged. Powder will enter any opening about diameter of screw. I forgot one screw but luckily it was those coarse threaded screws, so no problem. Prepare to get several M5 and at least two or three M4 screws (generator screws under flywheel).

Paint gun I used is cheap chinese gun as sold in Harbor Freight, works with 20kV and 50kV. For clutch cover I used 20kV setting and crank case 50kV setting to get better cover for nooks and crannys, works very good.
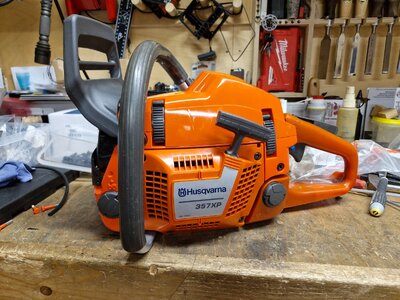
Compressor is made by Senco, more than enough for this kind of work. Paint was purchased from local coating shop who does subcontracting jobs for Sandvik mining equipment. Color in 357XP is Sandvik orange and close enough because I didn’t want buy 20kg/ 44lbs powder.

Good grounding of object is must to get even coat. I prepared my booth with M6 bolt, 10 and 12 mm copper tubing plus thrust bearing to get smooth rotation. Parts are hanged from T- shaped copper tubing with copper wire. Wires in turn are bolted to part with at least with two bolts. Case half grounding were through mask tape to cylinder deck.

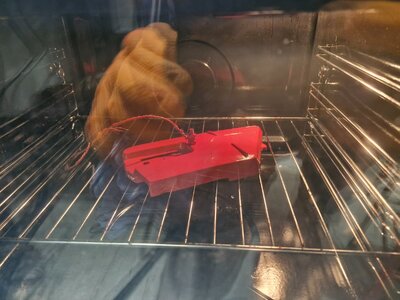
After coating I placed crankcase to oven and set timer to 30 min. It is better to overcook than undercook, it won’t hurt one damn bit, was advice from local shop I bought powder. Key is the heat. If oven is 200C, your part won’t necessarily be. Comply with powder coat manufacturers instructions.
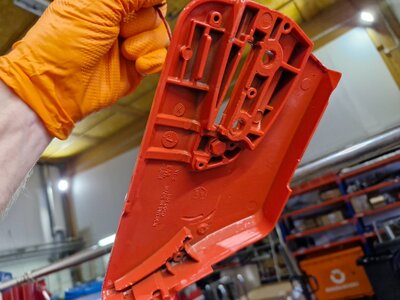
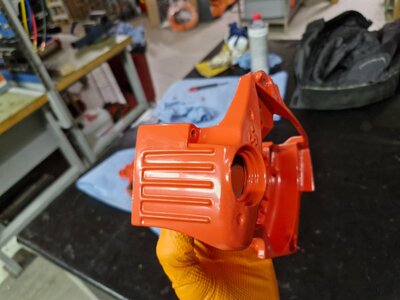
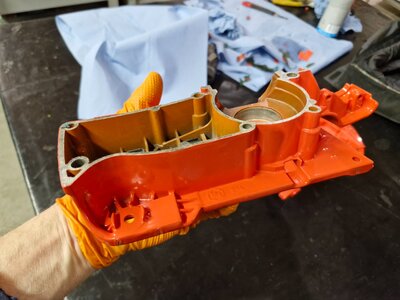
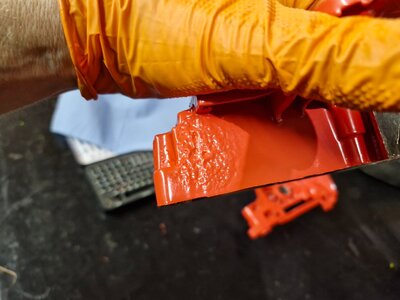
After longest 30 minutes of my life I took parts off the oven and felt relief, coating was more than satisfactory with only one plemish which will be covered by muffler. Reason for wrinkled area is either hasty paintgun operator and cheap paint gun. Sometimes when you pull the trigger gun spats out huge amount of powder and it leaves quite heavy coat. This could be prevented by modifying gun powder intake (youtube has instructions), modification ensures more even airflow. Since I preheated parts before coating blowing excess powder was out of question, powder started to melt immediately, so I had to deal with it.

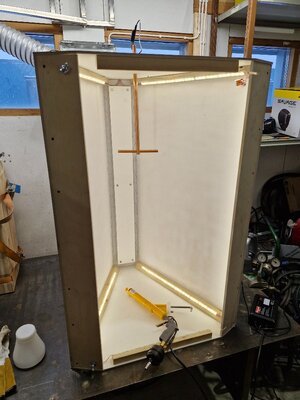
Paint booth is made from plywood interior painted white and lighting is made of led strips. Good lighting is mandatory as well as good dust extration, which was executed with two 75 - 50mm reducers coppled with screws to back of booth. To reducers I attached couple of 50mm elbows and Y- junction which I attached to shop vac. May not be fanciest but works good enough.

I will add pics later.
 

Attachments

  • 20241221_120222.jpg
    20241221_120222.jpg
    125.8 KB · Views: 7
  • 20241221_121956.jpg
    20241221_121956.jpg
    166 KB · Views: 8
  • 20241221_123639.jpg
    20241221_123639.jpg
    101.4 KB · Views: 7
  • 20241221_123648.jpg
    20241221_123648.jpg
    157.3 KB · Views: 7
  • 20241221_152342.jpg
    20241221_152342.jpg
    197.4 KB · Views: 7
Last edited:

300whisper

Well-Known OPE Member
Local time
2:26 AM
User ID
24866
Joined
Aug 28, 2022
Messages
30
Reaction score
129
Location
Finland
Country flag
Some more pictures from yesterdays mayhem.
 

Attachments

  • 20241221_155404.jpg
    20241221_155404.jpg
    165.4 KB · Views: 7
  • 20241221_155407.jpg
    20241221_155407.jpg
    129.8 KB · Views: 8
  • 20241221_155358.jpg
    20241221_155358.jpg
    139.4 KB · Views: 10
  • 20241221_155351.jpg
    20241221_155351.jpg
    132.1 KB · Views: 10
  • 20241221_155355.jpg
    20241221_155355.jpg
    159.2 KB · Views: 11

300whisper

Well-Known OPE Member
Local time
2:26 AM
User ID
24866
Joined
Aug 28, 2022
Messages
30
Reaction score
129
Location
Finland
Country flag
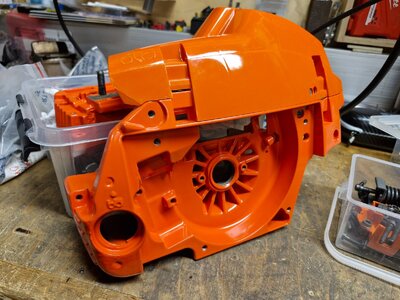
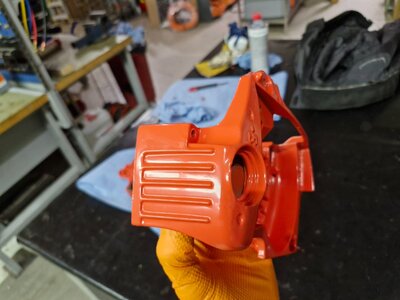
Sandvik Orange is not so much off I thought it would be and in total darkness it is perfect match!
Was it worth the hassle? Yes.
 

Attachments

  • 20241222_180157.jpg
    20241222_180157.jpg
    252.1 KB · Views: 11
  • 20241222_161149.jpg
    20241222_161149.jpg
    262.2 KB · Views: 11
  • 20241222_161130.jpg
    20241222_161130.jpg
    238.1 KB · Views: 9
  • 20241222_161125.jpg
    20241222_161125.jpg
    163.1 KB · Views: 9
  • 20241221_182953.jpg
    20241221_182953.jpg
    214.6 KB · Views: 9

hacskaroly

Pinnacle OPE Member
Yearly GoldMember
Local time
4:26 PM
User ID
27954
Joined
Nov 24, 2023
Messages
1,080
Reaction score
3,538
Location
Northern Idaho
Country flag
Was it worth the hassle? Yes.
That looks really good, I appreciate the information on your setup and how you did it! Did you have to use any filler for scratches or pitting? If so, was there any issues with the powder coating sticking to it?
 

300whisper

Well-Known OPE Member
Local time
2:26 AM
User ID
24866
Joined
Aug 28, 2022
Messages
30
Reaction score
129
Location
Finland
Country flag
Thank you, Sir.
I didn't use any filler, just heavy coat of powder and it melted to nice even finish. I would say it is twice the thickness of factory coating.
To be honest, end result exceed my wildest expectations because flywheel side case was pretty damn banged especially around oil cap. Some idiot must have opened it with hammer or tire iron.
Edit: I cannot emphasize enough prepping. Surfaces have to be clean!
If I had large enough tank, I would dip parts to acetone just to make sure there is no oil.
 

Attachments

  • 20241221_155407.jpg
    20241221_155407.jpg
    129.8 KB · Views: 8
  • 20240709_213801.jpg
    20240709_213801.jpg
    204.7 KB · Views: 9
Last edited:

300whisper

Well-Known OPE Member
Local time
2:26 AM
User ID
24866
Joined
Aug 28, 2022
Messages
30
Reaction score
129
Location
Finland
Country flag
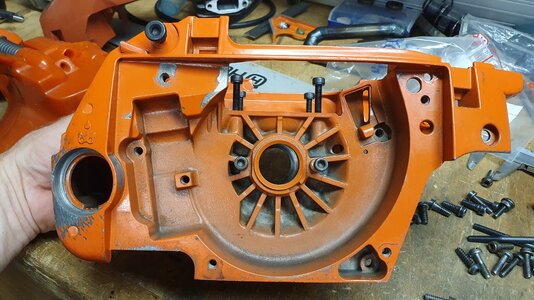
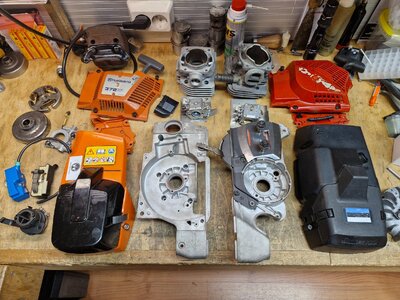
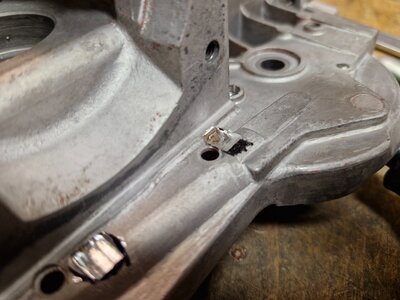
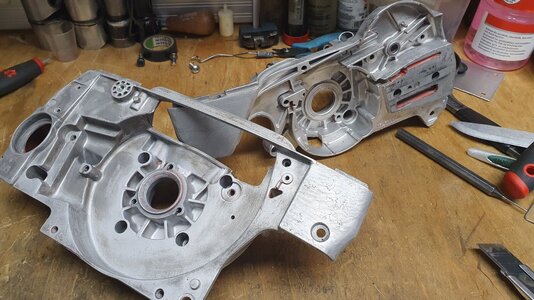
Since I have hijacked this thread with my rambling, I post couple of more pics of my next victim, CS 2171/ 2172 which was painted to Husky colors and used as race saw. Most of the threads are fixed with helicoils and timesert, crack or hole drilled for timesert in oil reservoir fixed with heavy layer of epoxy. I bought it from member here for very good price as bench project and I thought it would be time to restore its former glory. 😆
 

Attachments

  • 20240922_105538.jpg
    20240922_105538.jpg
    290.8 KB · Views: 6
  • 20240915_112253.jpg
    20240915_112253.jpg
    154.1 KB · Views: 6
  • 20240727_191353.jpg
    20240727_191353.jpg
    192.3 KB · Views: 5
Top