You are using an out of date browser. It may not display this or other websites correctly.
You should upgrade or use an alternative browser.
You should upgrade or use an alternative browser.
Show off your muffler mods
- Thread starter TreeLife
- Start date
- Local time
- 12:37 PM
- User ID
- 2704
- Joined
- Feb 26, 2017
- Messages
- 1,053
- Reaction score
- 3,900
- Location
- Belleville, Ontario, Canada
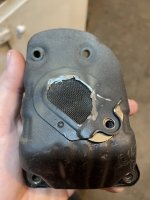
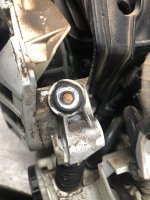
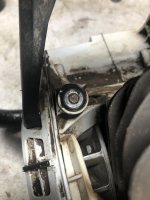
Very nicely done. I also like the felling dawgs on your saw - just about the perfect size I think.Added two holes to my Echo 7310 exhaust today. It’s not ported and it needs all the help it can get.


Sent from my iPhone using Tapatalk
- Local time
- 12:37 PM
- User ID
- 21
- Joined
- Dec 4, 2015
- Messages
- 5,253
- Reaction score
- 28,088
- Location
- In a meeting
kurtz
Super OPE Member
- Local time
- 11:37 AM
- User ID
- 14668
- Joined
- Nov 23, 2020
- Messages
- 131
- Reaction score
- 797
- Location
- Wausau,WI
Thanks. I like those dawgs too. They’re the factory ones from echo. One of the better things about the saw.Very nicely done. I also like the felling dawgs on your saw - just about the perfect size I think.
- Local time
- 11:37 AM
- User ID
- 13535
- Joined
- Aug 17, 2020
- Messages
- 3,642
- Reaction score
- 20,539
- Location
- Neenah Wisconsin
- Local time
- 11:37 AM
- User ID
- 13535
- Joined
- Aug 17, 2020
- Messages
- 3,642
- Reaction score
- 20,539
- Location
- Neenah Wisconsin
- Local time
- 11:37 AM
- User ID
- 13535
- Joined
- Aug 17, 2020
- Messages
- 3,642
- Reaction score
- 20,539
- Location
- Neenah Wisconsin
Kiwioilboiler
346 Pic Examiner
- Local time
- 4:37 AM
- User ID
- 12322
- Joined
- Apr 20, 2020
- Messages
- 8,719
- Reaction score
- 54,143
- Location
- Marsden Pt, NZ
WHAT!!??Customer wanted a pipe outlet on his 395xp.
View attachment 349872
- Local time
- 11:37 AM
- User ID
- 13535
- Joined
- Aug 17, 2020
- Messages
- 3,642
- Reaction score
- 20,539
- Location
- Neenah Wisconsin
She aint that loud, lol.WHAT!!??
- Local time
- 12:37 PM
- User ID
- 21
- Joined
- Dec 4, 2015
- Messages
- 5,253
- Reaction score
- 28,088
- Location
- In a meeting
- Local time
- 11:37 AM
- User ID
- 13535
- Joined
- Aug 17, 2020
- Messages
- 3,642
- Reaction score
- 20,539
- Location
- Neenah Wisconsin
Looks great!
Dolkitafreak
Dolkita686
- Local time
- 12:37 PM
- User ID
- 7904
- Joined
- Nov 19, 2018
- Messages
- 510
- Reaction score
- 1,696
- Location
- Central Ohio
Kiwioilboiler
346 Pic Examiner
- Local time
- 4:37 AM
- User ID
- 12322
- Joined
- Apr 20, 2020
- Messages
- 8,719
- Reaction score
- 54,143
- Location
- Marsden Pt, NZ
Wotcha working on Kevin?
- Local time
- 12:37 PM
- User ID
- 21
- Joined
- Dec 4, 2015
- Messages
- 5,253
- Reaction score
- 28,088
- Location
- In a meeting
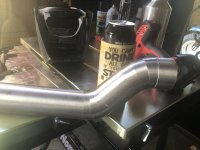
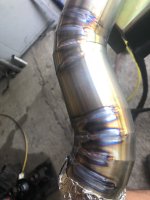
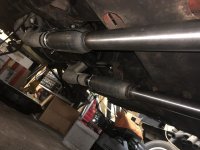
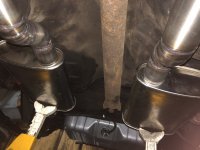
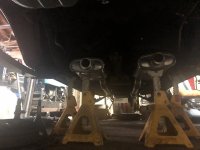
Custom stainless exhaust for the wifeys 69 convertible mudstain
Pics in Grease Monkey Garage thread
Pics in Grease Monkey Garage thread
charles.mann
Well-Known OPE Member
- Local time
- 11:37 AM
- User ID
- 24798
- Joined
- Aug 20, 2022
- Messages
- 36
- Reaction score
- 46
- Location
- Temple, Tx
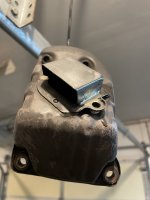
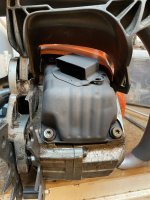
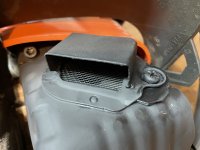
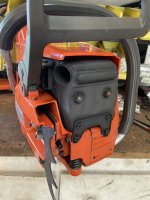
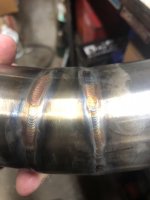
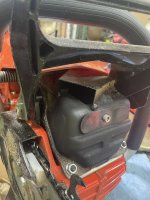
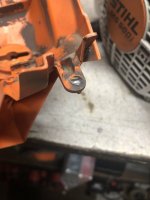
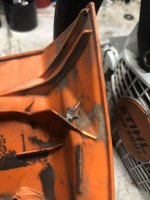
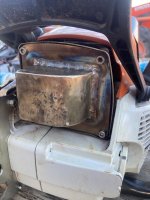
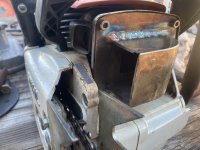
Started on this build late thur afternoon and finished up a lil after lunch yesterday. Still learning to tig, learning the machine and getting it dialed in.
I used 1/8” on the bolt on base and 0.080” for the curved section and sides. I used a piece of 2 1/4” od stainless tubing, tack welded the piece to the tubing and used a rose bud to heat the strip up and persuaded the metal with a brass hammer to roll/fold over the tubing. Tacked the top and sides together, then tacked to the base plate and stitch welded everything in hopes to prevent warping, which it still warped but only about a penny thickness on one ear.
I gotta order some woven stainless mesh and some 0.060” and 0.032” 1’x1’ plate and try it again, and put an upward deflector plate to keep the heat off the case half and tree dogs.


- Local time
- 9:37 AM
- User ID
- 573
- Joined
- Jan 17, 2016
- Messages
- 2,675
- Reaction score
- 14,398
- Location
- cape cod ma.
Started on this build late thur afternoon and finished up a lil after lunch yesterday. Still learning to tig, learning the machine and getting it dialed in.
I used 1/8” on the bolt on base and 0.080” for the curved section and sides. I used a piece of 2 1/4” od stainless tubing, tack welded the piece to the tubing and used a rose bud to heat the strip up and persuaded the metal with a brass hammer to roll/fold over the tubing. Tacked the top and sides together, then tacked to the base plate and stitch welded everything in hopes to prevent warping, which it still warped but only about a penny thickness on one ear.
I gotta order some woven stainless mesh and some 0.060” and 0.032” 1’x1’ plate and try it again, and put an upward deflector plate to keep the heat off the case half and tree dogs.
View attachment 349971 View attachment 349972
Learning the welding machine and wire size are crucial, Once you get that you will see
how easy it is. In certain applications adding gas to the opposite side helps greatly it helps
like in building pipes.
charles.mann
Well-Known OPE Member
- Local time
- 11:37 AM
- User ID
- 24798
- Joined
- Aug 20, 2022
- Messages
- 36
- Reaction score
- 46
- Location
- Temple, Tx
@Lee H
Yes sir, filler wire was to big and even though i was at 75 amps (should have went to probably 90-100) it took longer to heat the two pieces up and melt the filler. I guess having a 1” thick, 8” round ingot of copper to help pull the heat worked to good, until everything was hot. Once the muffler was hot, i backed off on the foot throttle about half way and was flowing the filler good once it melted.
Ill get some 1/16” filler and build another one out of thinner material. Plus i think i needed to swap from the #10 cup, to a 6 cup since i dont need a lot of stick out on my tungsten.
Plus, that was my 2nd time welding stainless. I bought the machine for aluminum and still need a LOT of practice for AL. My stainless and mild steel welding is better than my AL, but my steel is far better than my stainless.
- Local time
- 12:37 PM
- User ID
- 21
- Joined
- Dec 4, 2015
- Messages
- 5,253
- Reaction score
- 28,088
- Location
- In a meeting
Stainless can be very difficult to weld, it needs lots of shielding gas, and larger cups than you would think !! Good job getting yourself outta your comfort zone, one step at a time and you’ll get there !!! My R.O.T. Is to set the machine to 1a for every 0.001 thickness and use my foot to just keep it going
- Local time
- 12:37 PM
- User ID
- 21
- Joined
- Dec 4, 2015
- Messages
- 5,253
- Reaction score
- 28,088
- Location
- In a meeting
WARNING:
Photo heavy posts coming up.
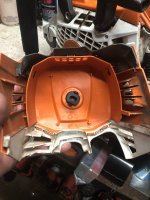
This 500i has been well used indeed, some weaknesses have allready begun to show up, but nothing major yet. I’ll let the pictures speak for themselves and comment here/there.
Id also like to thank @TINYHULK for sending me his saw to put up here as we go through this process !!!
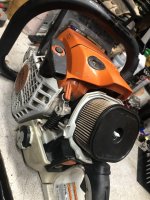
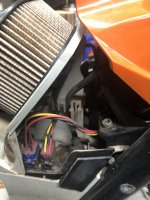
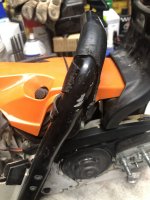
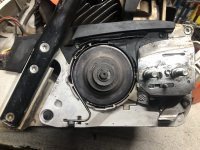


- Local time
- 12:37 PM
- User ID
- 21
- Joined
- Dec 4, 2015
- Messages
- 5,253
- Reaction score
- 28,088
- Location
- In a meeting
Similar threads
- Replies
- 0
- Views
- 106


