You are using an out of date browser. It may not display this or other websites correctly.
You should upgrade or use an alternative browser.
You should upgrade or use an alternative browser.
Stihl 075 - Complete Rebuild, Performance Mods
- Thread starter bulletpruf
- Start date
- Local time
- 10:25 AM
- User ID
- 3634
- Joined
- Jul 22, 2017
- Messages
- 741
- Reaction score
- 2,226
- Location
- San Antonio, TX
Ended up with some SKFs from eBay. 6203 c3 and 6204 c3. $5 - $8 each. Much better than dealer prices!
Thanks
Thanks
lehman live edge slab
Live Action
Yep substantially better price, I was pretty sure they were just a standard size and I’m sure you could find oil seals at a bearing house too since the dimensions are thereEnded up with some SKFs from eBay. 6203 c3 and 6204 c3. $5 - $8 each. Much better than dealer prices!
Thanks
- Local time
- 10:25 AM
- User ID
- 3634
- Joined
- Jul 22, 2017
- Messages
- 741
- Reaction score
- 2,226
- Location
- San Antonio, TX
Spent several hours on the saw this weekend and made some progress.
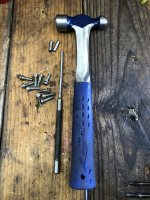
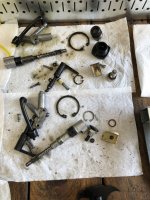
10 screws hold the case together. They have a regular flat tip screwdriver head. My preference would be an allen or torx, but I managed to get them out without stripping any of the heads. I also tapped out the two drive pins that align the case halves.
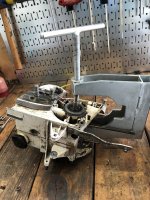
From there, I split the cases. The tool I use just barely fits inside the crankcase.
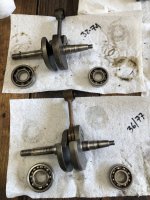
The cranks appeared to be the same. The one for the original saw was stamped "32 - 74" and the one from the eBay case was stamped "36-77". These should be date codes from when the cranks were produced. The 32 and the 36 could refer to the day of the year (32d day of 1974) or the week of the year (36th week of 1974) in which the the crank was made. Some of the bearings felt a little gritty at first, but after a good cleaning, they were all quite smooth.

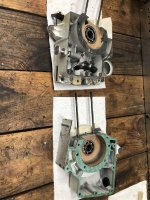
Oil system for original saw (top) and eBay case (bottom) were quite similar. I went with the pieces from the eBay case.
10 screws hold the case together. They have a regular flat tip screwdriver head. My preference would be an allen or torx, but I managed to get them out without stripping any of the heads. I also tapped out the two drive pins that align the case halves.

From there, I split the cases. The tool I use just barely fits inside the crankcase.

The cranks appeared to be the same. The one for the original saw was stamped "32 - 74" and the one from the eBay case was stamped "36-77". These should be date codes from when the cranks were produced. The 32 and the 36 could refer to the day of the year (32d day of 1974) or the week of the year (36th week of 1974) in which the the crank was made. Some of the bearings felt a little gritty at first, but after a good cleaning, they were all quite smooth.


Oil system for original saw (top) and eBay case (bottom) were quite similar. I went with the pieces from the eBay case.

- Local time
- 10:25 AM
- User ID
- 3634
- Joined
- Jul 22, 2017
- Messages
- 741
- Reaction score
- 2,226
- Location
- San Antonio, TX
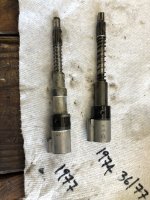
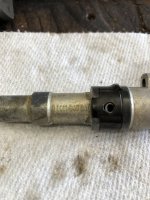
The oiler bodies for these two saws were configured differently, as you can see in the picture. As a result, I suspect the case is machined differently, too, and the oilers won't mix and match. I didn't try swapping the oilers, so I could be wrong on this. The later model (from 1977 eBay case) has a part number of 91111547040.
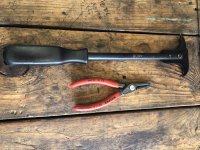
You'll need snap ring pliers to get a few snap rings out - one for a crankcase bearing and the other for the oil pump. Helps to have a seal puller to get the seals out, too, but you can also tap them out with a hammer and socket once the cases are split, of course.
Took quite some time to clean off decades of dirt, grease, and sawdust from the nook and crannies on the case but it cleaned up pretty good. This is a mechanical rebuild, not a cosmetic restoration, so I just give it a good cleaning; no painting at all.
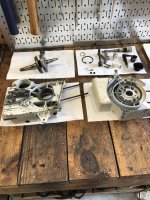


You'll need snap ring pliers to get a few snap rings out - one for a crankcase bearing and the other for the oil pump. Helps to have a seal puller to get the seals out, too, but you can also tap them out with a hammer and socket once the cases are split, of course.

Took quite some time to clean off decades of dirt, grease, and sawdust from the nook and crannies on the case but it cleaned up pretty good. This is a mechanical rebuild, not a cosmetic restoration, so I just give it a good cleaning; no painting at all.

lehman live edge slab
Live Action
Yes they had a few different oil pumps for this style of saw
- Local time
- 10:25 AM
- User ID
- 3634
- Joined
- Jul 22, 2017
- Messages
- 741
- Reaction score
- 2,226
- Location
- San Antonio, TX
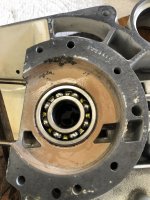
I removed the bearings from the cases to give them a good cleaning and inspection. From there, the pair that were going back into the case were put in a plastic bag and tossed in the freezer; this reduces the OD just enough to make them easier to reinstall. Then I used a heat gun to heat up the case where the bearings sit to expand the case a bit. I was able to get the area up to 300* or close to it.
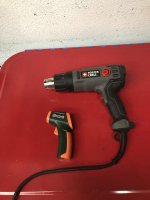
Tapped in easily afterwards and checked to make sure they still spin freely. Dribbled a bit of Stihl oil on them for good measure. Tapped the seals in using the same method - heat the case and freeze the seals. I added a dab of grease to the inner lip of the seal after installing it.
Next I installed the case gasket, held into place on one side with some Indian Head shellac.
Then I took the crank out of the freezer and installed it. I got it pretty close to being flush with some gentle tapping and then finished pulling together with the case screws.
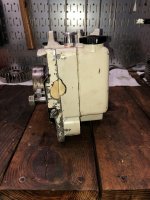

Tapped in easily afterwards and checked to make sure they still spin freely. Dribbled a bit of Stihl oil on them for good measure. Tapped the seals in using the same method - heat the case and freeze the seals. I added a dab of grease to the inner lip of the seal after installing it.

Next I installed the case gasket, held into place on one side with some Indian Head shellac.

Then I took the crank out of the freezer and installed it. I got it pretty close to being flush with some gentle tapping and then finished pulling together with the case screws.

- Local time
- 10:25 AM
- User ID
- 3634
- Joined
- Jul 22, 2017
- Messages
- 741
- Reaction score
- 2,226
- Location
- San Antonio, TX
Got the oil pump reinstalled next, followed by the sprocket and clutch assembly. Clutch shoes looked really nice with a lot of fiber left, so I re-used them. Sprocket is .404 rim drive, 7 pin.
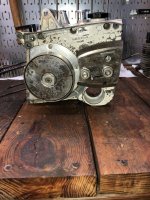
Got ignition installed after work today and got the flywheel cleaned up and installed, too. I know there are compatibility issues with ignition components but since all these parts came off the same saw, I don't expect to have any issues.
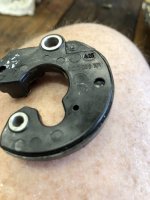
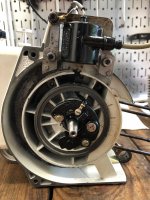
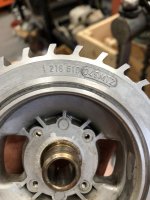
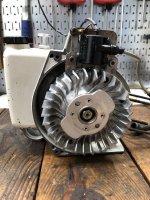
I'll set the flywheel gap next, and then probably install the jug and piston.

Got ignition installed after work today and got the flywheel cleaned up and installed, too. I know there are compatibility issues with ignition components but since all these parts came off the same saw, I don't expect to have any issues.


I'll set the flywheel gap next, and then probably install the jug and piston.
- Local time
- 10:25 AM
- User ID
- 3634
- Joined
- Jul 22, 2017
- Messages
- 741
- Reaction score
- 2,226
- Location
- San Antonio, TX
The oiler bodies for these two saws were configured differently, as you can see in the picture. As a result, I suspect the case is machined differently, too, and the oilers won't mix and match. I didn't try swapping the oilers, so I could be wrong on this. The later model (from 1977 eBay case) has a part number of 91111547040.
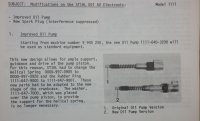
The case is indeed different, starting with saw 9945250. There were several additional pages that described the process and special tools needed to convert an early case to use the later oiler.
lehman live edge slab
Live Action
Yeah definitely some changes through the years, I have an old 050 av repair manual with a bunch of separate update sheets explaining the oil pump, they also updated crank seals and ignitions ect but looks like most stuff will work on all cases but the oiler. As long as used in a set like the ignition and flywheel ect.
- Local time
- 10:25 AM
- User ID
- 3634
- Joined
- Jul 22, 2017
- Messages
- 741
- Reaction score
- 2,226
- Location
- San Antonio, TX
lehman live edge slab
Live Action
I’ll look if I have one
- Local time
- 10:25 AM
- User ID
- 3634
- Joined
- Jul 22, 2017
- Messages
- 741
- Reaction score
- 2,226
- Location
- San Antonio, TX
Yeah definitely some changes through the years, I have an old 050 av repair manual with a bunch of separate update sheets explaining the oil pump, they also updated crank seals and ignitions ect but looks like most stuff will work on all cases but the oiler. As long as used in a set like the ignition and flywheel ect.
050's and early 051's came with points ignition. Same deal with crank bearings -- 050's and apparently early 051's came with one ball bearing and one roller bearing on the crank. Roller bearing should take a different crank seal.
Later ignitions apparently changed as well, but haven't gotten that far in my research yet.
lehman live edge slab
Live Action
One change was single lip to double lip seals on the crank
lehman live edge slab
Live Action
No cup my stuff is all newer
- Local time
- 10:25 AM
- User ID
- 3634
- Joined
- Jul 22, 2017
- Messages
- 741
- Reaction score
- 2,226
- Location
- San Antonio, TX
No cup my stuff is all newer
Ok, thanks for checking.
- Local time
- 10:25 AM
- User ID
- 3634
- Joined
- Jul 22, 2017
- Messages
- 741
- Reaction score
- 2,226
- Location
- San Antonio, TX
Found a good starter cup in my parts stash.
While I was looking for the starter cup, I pulled out my extra pistons, inventoried the extra jugs, checked mufflers, and grabbed my full wrap specific bits for the handlebar.
I'm in good shape on pistons -- have 4 to choose from -- NOS, almost new, nice used, and an ok used one. Will probably go with almost new.
The jug on this saw is nice, but it looks like I have 5 spares for the rest of my saws.
I have about 5 mufflers to choose from, but one is homemade and two are aftermarket. I think I have two that would force me to use the 1/2" spacers on the muffler guard and one that wouldn't.
I also have bits to do at least the full wrap on this saw, but then I run out of the hard to find handlebar mounts and AV rubber.
- Local time
- 10:25 AM
- User ID
- 3634
- Joined
- Jul 22, 2017
- Messages
- 741
- Reaction score
- 2,226
- Location
- San Antonio, TX
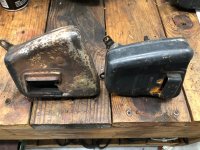
Comparing mufflers here; have two 075/076 mufflers pictured, but one is wider. As I understand it, the wider muffler is a U.S. only model, and the standard muffler cover won't fit over it, so you have to use 1/2" spacers and longer screws to mount it. This saw came with the thinner muffler, so that's what I'm going to use. I resisted the urge to blast it and paint it hi-temp flat black, but I did clean up some of the exit where it was a bit jagged and uneven.
I have an 051 muffler somewhere in one of my boxes; would have been nice to have one to compare, but I didn't want to spend 30 minutes digging through my stuff to find it.
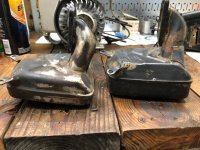
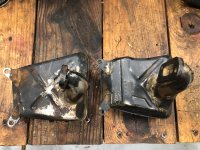
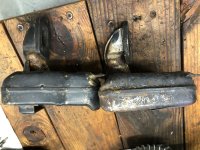
I have an 051 muffler somewhere in one of my boxes; would have been nice to have one to compare, but I didn't want to spend 30 minutes digging through my stuff to find it.


- Local time
- 10:25 AM
- User ID
- 3634
- Joined
- Jul 22, 2017
- Messages
- 741
- Reaction score
- 2,226
- Location
- San Antonio, TX
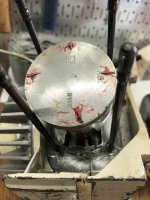
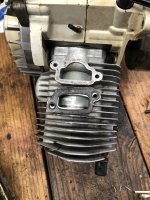
Got a bit more done after work today. I cleaned the carbon off the very lightly used piston and mounted it on the rod so I could check piston to cylinder clearance. I checked with no base gasket and it was tighter than I expected at .012". No chance of doing a base gasket delete.
My technique - use thin solder wire held into place with a dab of grease, install jug, rotate several times, remove jug, measure solder with calipers.
I then checked the thickness of the base gasket and it was .008, so all I have to do is use it for perfect clearance of .020". It doesn't usually work out like this, but I'm not complaining.


- Local time
- 1:25 AM
- User ID
- 573
- Joined
- Jan 17, 2016
- Messages
- 2,675
- Reaction score
- 14,397
- Location
- cape cod ma.
Lookin good Scott, One of my 076's has the spacers to move the muffler guard out. It came that
way when i got the saw. The saw is in really nice shape so i think it is original. I like to look as
it makes the saw look wider and stout.
On the 051 mufflers, They have a smaller port and bolt pattern where it mounts to the cylinder.
way when i got the saw. The saw is in really nice shape so i think it is original. I like to look as
it makes the saw look wider and stout.
On the 051 mufflers, They have a smaller port and bolt pattern where it mounts to the cylinder.
Similar threads
- Replies
- 25
- Views
- 640


