- Local time
- 7:12 AM
- User ID
- 325
- Joined
- Dec 30, 2015
- Messages
- 5,031
- Reaction score
- 25,171
- Location
- Centre County
Nice work guys. Sure beats the old rattle can treatment.
I believe the marks you are referring to are from a Blanchard grinder.One thing I did notice between the new and old Oregon bars I have now stripped, is that the old one is of better quality.
The new one didn't have the nice cross milled machine marks. It just had deep course grind marks which held the paint down deep.
I expect grinding is faster and cheaper than milling
Hello buddy!hello jeremy!
Hey Duane,
I have not had very many things blasted to compare to. This was my first go-around at having things soda blasted. I live in a boating area and fiberglass hulls are not easy or cheap to maintain. Soda blasting is all the rage at the moment because it's supposed to be easier on the material. The results do not look like what I have gotten with a wire wheel in the past. Don't get me wrong, the results are good, but not as clean as a wire wheel finish which is a bit shiney or polished looking by compairison. The finish is a little pitted looking almost like they are salt coated. I have been inspired by this thread and started my restoration process. After soda blasting, I belt sanded my 6 Stihl bars with 80 then 120 grit. Then wire wheeled them on my bench grinder. Then power palm sanded them with 240 grit (see pic). Next I will palm sand them with Scotch Brite pads and then hit them with "000" Steel Wool. Then onto the actual blue solution- fingers crossed. I will take a couple of close up pics of the bars and clutch covers as they are- untouched after the soda blasting to give you a better idea of the initial results.
View attachment 18880
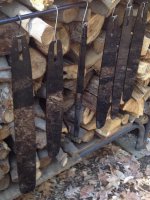
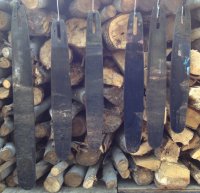
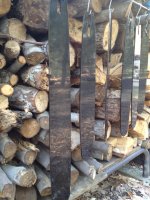
They look good. Let's see some closer up and without the reflection. At first I thought they were all messed up. Lol. Like what's this guy showing this for. Then I looked about 5 more times and finally realized what was going on.Okay, last night, I took the plunge and did all 6 bars at one time. I don't think I would recommed doing any more than 2 or 3 at a time to anyone though- it was kinda tough keeping up with all of them at the same time. I felt like I was one of those plates on sticks spinner guys from the circus-Lol!
I followed the suggested directions in the thread and I think that they turned out pretty darn well overall. I ended up applying between 4-6 coats. I only rinsed and dried them between coats for the first 2 coats because I was running out of daylight, and bluing liquid. Also the temps were dropping so I just kept continuously coating them for about 20-30 minutes after the second rinse. I used the sponge type of disposable paint brushes (instead of a bristle paint brush) and I think it was easier to apply the bluing liquid more evenly since it is so watery (I see why people like the paste). Same for the application of a coat of 90wt. Gear oil at the end of the process and they have been drip drying over night. One word of advise- if you are going to do both sides of the bars at the same time (which I recommend doing to maximize time and materials). Do Not lay the coated side down on anything (like sheet plastic or a workbench) while it is still wet and you are trying to coat the other side. It will screw up the first side by causing patterns in the bluing. Use "S" hooks and have a place ready to hang the bars as you coat them. The blue may run to the sprocket tip a little, but I kept constantly brushing mine and they did not really streak. So...
View attachment 19009 View attachment 19010 View attachment 19011
I'll snap a few on some saws after they drip off and get mounted.
Scott, what is the texture of the bar after soda blasting? Sort of like sand blast or bead blast?
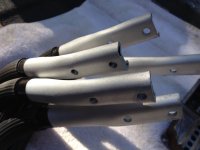
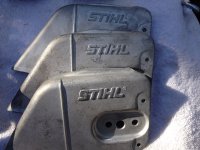
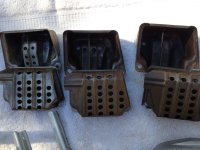
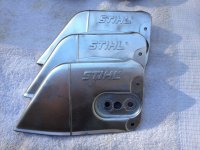
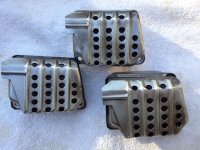
Much better!!! I know what I'll be doing with mine. Thanks for sharing.

Nice! How did you get that finish?here's my first go at it. just the cheap laminated husky bar that came with my saw.not sure if I'm going to try and protect it or just leave it raw. I'm leaning towards raw, being a Welder I like metal. I have a gb bar on my saw now that's pretty beat up. I want to do the same as this one, but can't find rivets for the nose. are all nose rivets the same size?
-scott
Nice! How did you get that finish?
here's my first go at it. just the cheap laminated husky bar that came with my saw.not sure if I'm going to try and protect it or just leave it raw. I'm leaning towards raw, being a Welder I like metal. I have a gb bar on my saw now that's pretty beat up. I want to do the same as this one, but can't find rivets for the nose. are all nose rivets the same size?
-scott
It's amazing how much better a guide bar looks once you get the paint off of it.
Have you checked with Left Coast Supply for the GB rivets? They have replacement tips as well.
I did look at left coast but could not find rivets alone. I know new noses come with them but I don't need a new nose, just the rivets to r&r the one that's on there.
-scott


