High Quality Chainsaw Bars Husqvarna Toys

Landscape truck build

fordf150

Pinnacle OPE Member
Local time
9:02 AM
User ID
591
Joined
Jan 18, 2016
Messages
865
Reaction score
3,452
Location
Newcomerstown ,Ohio
finally gathered up most of the pieces parts to get this going and had time to start on it tonite.

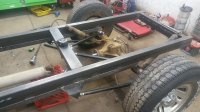
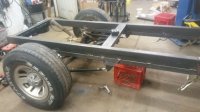
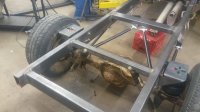
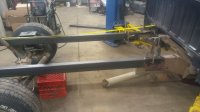
Starting with a 2000 Ford Ranger xtended cab shortbed. I started by stripping the bed and rear frame section off the truck. On these rangers the frame is 2 piece so removing the rear section is as simple as removing the rivets and separating the halves. Forgot to take pictures until i got to this point.

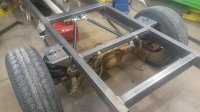
4x2 .120 wall tubing is what i am starting my frame addition with. Planning on this being a complete bolt on deal, had to tack weld the new frame in place because i didnt have enough C clamps. Will be thru bolting the 2 pieces together and sleeving the holes thru the tubing.
AS 005.jpg

rear crossmember is welded in place....dont look to closely at the welds, first time welding with this setup and its MIG so assumed i could set it on the fly without bothering to make a test weld, I was WRONG! Been welding with this welder for 4-5 months but its always been on 110V and sheet metal, havent liked the results since the day i brought it home but have been getting better with it. Not sure if its the welder or if the Hobart wire is crap since i normally run Washington Alloy or Lincoln wire and am used to the old Lincoln welder.

Already found a problem, I need to buy the rims and tires I'm going to run before i can mount the air bags because its a tight fit with the stock rims and 30x9.50/15 tires and my plans involve swapping to 245/70-17 tires and a 17x8 rim.
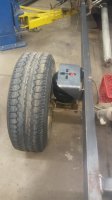
AS 002.jpg

and on to the next issue I found.....it just keeps giving, nothing can be a simple line it up and weld it on.
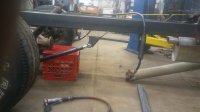
AS 006.jpg

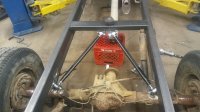
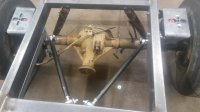
there is a 2x2 tube that will be welded onto the bottom of the 4x2 so i mocked up the lower control arm like it would be welded to that portion of the frame, its still a pretty steep angle since this 4 link kit is more designed for cars and not a pickup so the links are fairly short.
 

fordf150

Pinnacle OPE Member
Local time
9:02 AM
User ID
591
Joined
Jan 18, 2016
Messages
865
Reaction score
3,452
Location
Newcomerstown ,Ohio
plans are for an 8' flat bed with 2' of dovetail so cab to end of frame is a little over 8' leaving me with a couple inches to play with for a gap between the headache rack and cab.

AS 004.jpg


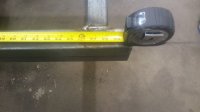
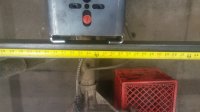
quick eyeball for axle location puts me at just over 6' from cab to axle centerline, tomorrow i will dig out my notes on wheelbase and overall length of the Z's i measured and get it set at its final location based on those lengths, aiming for keeping all the weight either over the axle or in front of it.

AS 003.jpg

and that brings me to the next problem i found, with that axle location it gives me a driveshaft length of 105" so I guess we will be swapping to a 2 piece driveshaft and adding another crossmember under the cab to hang a carrier bearing on. Need to do a bit of research and measuring but earlier rangers had a 2 piece shaft so may be able to harvest one of those from the junkyard along with a steel single piece ranger driveshaft from a long bed to cut down to length to keep costs down.
 

Dub11

Saw R skeery
GoldMember
Local time
8:02 AM
User ID
2014
Joined
Oct 21, 2016
Messages
34,438
Reaction score
146,042
Location
Kansas
Country flag

fordf150

Pinnacle OPE Member
Local time
9:02 AM
User ID
591
Joined
Jan 18, 2016
Messages
865
Reaction score
3,452
Location
Newcomerstown ,Ohio
been working on it off and on but continued having issues with the welder.....my welds look like crap so I finally had enough and ditched the hobart brand wire dug around the shelves in my storage room and found an old spool of AWR wire. its not my normal brand but its .023 so I cant put any heat to my welds but they look much better now.

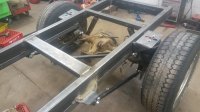
got creative and instead of adding to the bottom of the frame, i drilled new holes in the lower brackets to raise the mounting point for the link and stuck to my plan of 2x2 tubing under the 4x2. Also had to flip the upper links. flipping them solved a few issues that would have shown up if i would have mounted them in the fashion they were designed for.

the first was that i wasnt comfortable welding tabs to the cast center section of the rearend

second was that either the arms would need shortened or i would have to get creative mounting them on the frame end

third was that with the arms mounted on top of the pumpkin the vertical separation would have been over double the ideal of 25% of tire height.

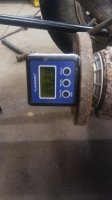
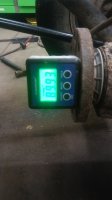
all in all I think the suspension came out pretty good, ended up around 8" of separation at the rear attachment and 5.5" at the front mounting point(ideally 50-60% of the rear separation).

hopefully the info/measurements i found online for 4 links work for this application....most of the in depth articles i found came from one of 2 places.....drag cars and 4x4 trucks....i figured 4x4 fit my application better so i dismissed the drag articles and focused on the 4x4 articles.


AS 003.jpg AS 004.jpg AS 005.jpg
 

fordf150

Pinnacle OPE Member
Local time
9:02 AM
User ID
591
Joined
Jan 18, 2016
Messages
865
Reaction score
3,452
Location
Newcomerstown ,Ohio
so far everything is just tacked in place, going to do one final measurement to make sure the frame section is square and that the axle is centered before tearing it back apart to final weld it. Most likely going to drag out the stick welder and give that a shot since sadly i cant seem to get a mig to cooperate.
 

fordf150

Pinnacle OPE Member
Local time
9:02 AM
User ID
591
Joined
Jan 18, 2016
Messages
865
Reaction score
3,452
Location
Newcomerstown ,Ohio
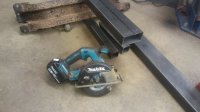
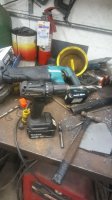
gotta put a plug in for Makita as well....I dont know how i lived without a metal cutting saw for so long, this thing has been a life saver since getting it last year.

AS 001.jpg

and these poor little sub compact drills will surprise you. thats a 5/8 drill bit I've been using to drill the frame and brackets with.

AS 003.jpg
 

fordf150

Pinnacle OPE Member
Local time
9:02 AM
User ID
591
Joined
Jan 18, 2016
Messages
865
Reaction score
3,452
Location
Newcomerstown ,Ohio
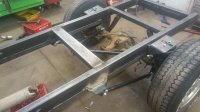
Did one final measurement check and pulled the rear axle to weld all the brackets on permanently. Got that done along with fabbing up a quick shock mount to use the original ranger shocks and bolted everything in for the last time. Air bag bracket is bolted on the drivers side, still need to do the passenger side but I am out of bolts long enough to go thru the frame. I sleeved all the holes in the frame with tubing and welded itto the inner side of the tubing. Looks like with just a little modification i can snake the original tailpipe past all the linkage which makes me happy, its brand new. Ordered the new rims and 1" wheel spacers this evening, going to the junkyard tomorrow in search of a driveshaft that can be tweaked to fit. Hopefully by this weekend i will be able to drive it out of the shop under its own power and go for one quick test drive to be sure i dont have a major flaw before i get started building the bed for it.

AS 023.jpg AS 024.jpg AS 025.jpg AS 026.jpg AS 027.jpg
 

Dub11

Saw R skeery
GoldMember
Local time
8:02 AM
User ID
2014
Joined
Oct 21, 2016
Messages
34,438
Reaction score
146,042
Location
Kansas
Country flag
Did one final measurement check and pulled the rear axle to weld all the brackets on permanently. Got that done along with fabbing up a quick shock mount to use the original ranger shocks and bolted everything in for the last time. Air bag bracket is bolted on the drivers side, still need to do the passenger side but I am out of bolts long enough to go thru the frame. I sleeved all the holes in the frame with tubing and welded itto the inner side of the tubing. Looks like with just a little modification i can snake the original tailpipe past all the linkage which makes me happy, its brand new. Ordered the new rims and 1" wheel spacers this evening, going to the junkyard tomorrow in search of a driveshaft that can be tweaked to fit. Hopefully by this weekend i will be able to drive it out of the shop under its own power and go for one quick test drive to be sure i dont have a major flaw before i get started building the bed for it.

View attachment 108335 View attachment 108336 View attachment 108337 View attachment 108338 View attachment 108339

Looks great! Is that plug on the front of the jug for an electric locker? And you need to add some chrome to this bish!
 

fordf150

Pinnacle OPE Member
Local time
9:02 AM
User ID
591
Joined
Jan 18, 2016
Messages
865
Reaction score
3,452
Location
Newcomerstown ,Ohio
Looks great! Is that plug on the front of the jug for an electric locker? And you need to add some chrome to this bish!
ABS.

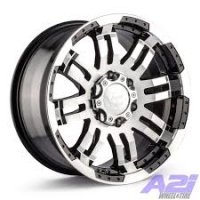
at some point it will get painted black with tinted windows. I'm not going for flashy but it needs to look good. with 8.5" wide wheels and the wider tires it will probably get fender flares on the front to keep the tires tucked in. Here are the wheels that are ordered.....not to many choices if you want to stay within a reasonable budget. these were just over $100 each. I only found a total of 5-6 wheels under $175 that fit my criteria of 17x8 or 17x8.5 and were truck wheels

upload_2018-1-23_23-36-30.jpeg
 

Dolmar Junkie

Not interested in rehab, just more Saws...
Local time
8:02 AM
User ID
2967
Joined
Apr 5, 2017
Messages
2,086
Reaction score
5,858
Location
N.Central Arkansas
ABS.

at some point it will get painted black with tinted windows. I'm not going for flashy but it needs to look good. with 8.5" wide wheels and the wider tires it will probably get fender flares on the front to keep the tires tucked in. Here are the wheels that are ordered.....not to many choices if you want to stay within a reasonable budget. these were just over $100 each. I only found a total of 5-6 wheels under $175 that fit my criteria of 17x8 or 17x8.5 and were truck wheels

View attachment 108346
I may have missed it, but did you calculate and order your back spacing on your new wheels so as to clear your airbags?
Impressive project, I mean most people would have just cobbled a bed on the existing truck and wish they had done it differently the entire time that they owned the truck. You have built an impressive complete new back half and are seemingly overcoming any issues in stride. Keep the pics coming.
 

fordf150

Pinnacle OPE Member
Local time
9:02 AM
User ID
591
Joined
Jan 18, 2016
Messages
865
Reaction score
3,452
Location
Newcomerstown ,Ohio
I may have missed it, but did you calculate and order your back spacing on your new wheels so as to clear your airbags?
Impressive project, I mean most people would have just cobbled a bed on the existing truck and wish they had done it differently the entire time that they owned the truck. You have built an impressive complete new back half and are seemingly overcoming any issues in stride. Keep the pics coming.
only way to get wheels with the correct back spacing was to spend $300 per wheel so i compromised and bought cheap wheels plus 1" wheel spacers, if my measurements are correct they will clear the bags with room to spare.....kinda difficult to figure it exactly since I am switching from 15 to 17" rims, its a guessing game where the sidewall bulge will be and just how big it will be since sidewall height is reduced. My best guess is the bulge will be above the bag at ride height which means i will have close to an inch of clearance. All else fails I will just order 1 1/2" spacers. Currently i am only using spacers on the rear but if i end up needing more clearance on it I will take the 1" spacers and use them up front with the 1.5's in rear, that should keep it from looking goofy.

wider wheels/tires plus spacers also serves another purpose....it lets me widen the bed a few extra inches. most mowers are 50-60" decks now with commercial Z's being 72" as a pretty standard size, ranger cabs are only 68", anything i can do to increase bed width without making it look goofy is a good thing and a big part of that is the tires need to be out to the edge of the bed, nothing looks worse than a dually bed on a single wheel truck with the wheels being 6" back underneath of the bed. Same thing applies to the body lift this ranger has, I hate body lifts and originally planned on removing it but it works out great with a flatbed, the bed floor will be even with the bottom of the cab and i gain a few extra inches of headache height because of it so decided to leave the lift in it.

I dont really like the idea of spacers but I've been running them on my 1 ton dump for a couple years now without issue....needed them on it to keep the duals from kissing. I run 285/75-16 tires on it so i can just take my 1/2 worn out tires from my pickup and use on it and the taller tire helps since it has 4.10 gears with a C6 trans.
 

Dub11

Saw R skeery
GoldMember
Local time
8:02 AM
User ID
2014
Joined
Oct 21, 2016
Messages
34,438
Reaction score
146,042
Location
Kansas
Country flag
ABS.

at some point it will get painted black with tinted windows. I'm not going for flashy but it needs to look good. with 8.5" wide wheels and the wider tires it will probably get fender flares on the front to keep the tires tucked in. Here are the wheels that are ordered.....not to many choices if you want to stay within a reasonable budget. these were just over $100 each. I only found a total of 5-6 wheels under $175 that fit my criteria of 17x8 or 17x8.5 and were truck wheels

View attachment 108346
Only kidding about the chrome LOL. I prefer flat black and grey. Hell I'd take rusty over shinny

QUOTE="fordf150, post: 597449, member: 591"]only way to get wheels with the correct back spacing was to spend $300 per wheel so i compromised and bought cheap wheels plus 1" wheel spacers, if my measurements are correct they will clear the bags with room to spare.....kinda difficult to figure it exactly since I am switching from 15 to 17" rims, its a guessing game where the sidewall bulge will be and just how big it will be since sidewall height is reduced. My best guess is the bulge will be above the bag at ride height which means i will have close to an inch of clearance. All else fails I will just order 1 1/2" spacers. Currently i am only using spacers on the rear but if i end up needing more clearance on it I will take the 1" spacers and use them up front with the 1.5's in rear, that should keep it from looking goofy.

wider wheels/tires plus spacers also serves another purpose....it lets me widen the bed a few extra inches. most mowers are 50-60" decks now with commercial Z's being 72" as a pretty standard size, ranger cabs are only 68", anything i can do to increase bed width without making it look goofy is a good thing and a big part of that is the tires need to be out to the edge of the bed, nothing looks worse than a dually bed on a single wheel truck with the wheels being 6" back underneath of the bed. Same thing applies to the body lift this ranger has, I hate body lifts and originally planned on removing it but it works out great with a flatbed, the bed floor will be even with the bottom of the cab and i gain a few extra inches of headache height because of it so decided to leave the lift in it.

I dont really like the idea of spacers but I've been running them on my 1 ton dump for a couple years now without issue....needed them on it to keep the duals from kissing. I run 285/75-16 tires on it so i can just take my 1/2 worn out tires from my pickup and use on it and the taller tire helps since it has 4.10 gears with a C6 trans.[/QUOTE]

Pics of current dually it sounds kinda mean.
 

Dolmar Junkie

Not interested in rehab, just more Saws...
Local time
8:02 AM
User ID
2967
Joined
Apr 5, 2017
Messages
2,086
Reaction score
5,858
Location
N.Central Arkansas
only way to get wheels with the correct back spacing was to spend $300 per wheel so i compromised and bought cheap wheels plus 1" wheel spacers, if my measurements are correct they will clear the bags with room to spare.....kinda difficult to figure it exactly since I am switching from 15 to 17" rims, its a guessing game where the sidewall bulge will be and just how big it will be since sidewall height is reduced. My best guess is the bulge will be above the bag at ride height which means i will have close to an inch of clearance. All else fails I will just order 1 1/2" spacers. Currently i am only using spacers on the rear but if i end up needing more clearance on it I will take the 1" spacers and use them up front with the 1.5's in rear, that should keep it from looking goofy.

wider wheels/tires plus spacers also serves another purpose....it lets me widen the bed a few extra inches. most mowers are 50-60" decks now with commercial Z's being 72" as a pretty standard size, ranger cabs are only 68", anything i can do to increase bed width without making it look goofy is a good thing and a big part of that is the tires need to be out to the edge of the bed, nothing looks worse than a dually bed on a single wheel truck with the wheels being 6" back underneath of the bed. Same thing applies to the body lift this ranger has, I hate body lifts and originally planned on removing it but it works out great with a flatbed, the bed floor will be even with the bottom of the cab and i gain a few extra inches of headache height because of it so decided to leave the lift in it.

I dont really like the idea of spacers but I've been running them on my 1 ton dump for a couple years now without issue....needed them on it to keep the duals from kissing. I run 285/75-16 tires on it so i can just take my 1/2 worn out tires from my pickup and use on it and the taller tire helps since it has 4.10 gears with a C6 trans.
I don't see any problems with spacers for your application. And you're 100% right about the astetics of the truck being off if you couldn't get your wheels out to the standard position, cause duallys do look silly missing a wheel.As far as your dump truck goes have you ever looked at 255/85/16's
They may be a little tall,but would eliminate your rubbing issues. I put them on my Suburban to have a narrower tire without loosing the height. I felt like the width was the most detrimental thing to front end wear. Plus I like tall skinny tires. Good looking work,I look forward to seeing the finished product... Matt
 

Redfin

Meh...
Local time
9:02 AM
User ID
159
Joined
Dec 24, 2015
Messages
7,645
Reaction score
39,981
Location
Central Pa
Country flag
Looking good Man. Are you gonna run a small tank for the bags?
 

Redfin

Meh...
Local time
9:02 AM
User ID
159
Joined
Dec 24, 2015
Messages
7,645
Reaction score
39,981
Location
Central Pa
Country flag
Looking good Man. Are you gonna run a small tank for the bags?
 

fordf150

Pinnacle OPE Member
Local time
9:02 AM
User ID
591
Joined
Jan 18, 2016
Messages
865
Reaction score
3,452
Location
Newcomerstown ,Ohio
I don't see any problems with spacers for your application. And you're 100% right about the astetics of the truck being off if you couldn't get your wheels out to the standard position, cause duallys do look silly missing a wheel.As far as your dump truck goes have you ever looked at 255/85/16's
They may be a little tall,but would eliminate your rubbing issues. I put them on my Suburban to have a narrower tire without loosing the height. I felt like the width was the most detrimental thing to front end wear. Plus I like tall skinny tires. Good looking work,I look forward to seeing the finished product... Matt
my daily driver superduty runs 285/75-16, makes it kinda easy to always have good tires on stuff if everything runs the same size tire. plus thats a cheap/common tire, 285/75-16's i can buy Falken AT3W for $155(there are over 75 tires listed the cheapest is $100), switching to 255/85-16 limits the tire selection drastically(mastercraft courser CXT and goodyear endurance ct is it) and the cheapest of those is $180.

I'm sure there are more tires available for 255/85-16 but I never looked anywhere else other than my tire distributor, why pay retail when i get them for cost.
 

fordf150

Pinnacle OPE Member
Local time
9:02 AM
User ID
591
Joined
Jan 18, 2016
Messages
865
Reaction score
3,452
Location
Newcomerstown ,Ohio
Well i screwed up so it'll be a few more days until I have tires and wheels on it. added wheels and spacers to my shopping cart but forgot to click the final buy button. :BangHead:
 
Top