High Quality Chainsaw Bars Husqvarna Toys Hockfire Saws

Dolkita 6401->7910 improvement tips

CountryBoy19

Active OPE Member
Local time
12:34 PM
User ID
5484
Joined
Mar 1, 2018
Messages
21
Reaction score
21
Location
Southern Indiana
Country flag
I have a Makita DCS-6401 (ex-HD rental saw) that I've had for several years now. Recently discovered a crack in the crankcase near the left rear anti-vibe mount. So while I have it torn apart to replace that half of the crankcase I'm looking to bump performance. I emailed mastermind from that other forum and he suggested I sign-up and post my question here for all to see & weigh-in.

I have en-route an OEM 7910 P&C to put on. I'm just a firewood cutter but I love to tinker with things. I have a relatively well equipped machine-shop at my disposal (for a home-shop). I don't want to go too crazy on things but what is the low-hanging fruit on these?

I've done quite a bit of reading and I'm hesitant to mess with raising/lowering ports unless I have some good guidance on doing that. I can physically do that, but how do you measure timing? Especially transfers? Do you get your squish set where you want it, install the P&C, and measure the crank-angle at certain points in the cycle?

Things on my list to consider:
Check squish and adjust if necessary (would you recommend doing a pop-up or pass on that for a light port job?)
Widen & smooth exhaust port, especially the transition "lip" left by that recess for the muffler (I assume there is something to be gained there)
Widen intake port (any benefit in changing intake port timing?)
Smooth transfer openings on bottom (I won't have a way to get much inside the transfers or to the transfer ports up top)
Adjust timing? If I understand how this is done you pull the flywheel, file the key off, and manually set the flywheel back on at a certain point, then tighten the nut down carefully to ensure the flywheel doesn't move on the crank? So this relies entirely on the taper locking together correct? What are you torqueing the flywheel nut at to ensure no movement here?

Disclaimer: if there is high risk on these things it's best I stay away from them. IE, if changing intake timing to X has something to offer, but X+1 will kill all the performance gains I won't want to risk going 1 degree too far & killing it all. But if it's something relatively easy, with a little bit of margin for error, I would like to give it a try.

I don't plan to carb mod or change out the limited coil at this time. I can practice the porting/smoothing on my 6401 P&C once I start to tear into this.

I'm a very capable/inclined person that just hasn't worked on porting a saw before so a little guidance would be appreciated.

Thanks for your help!!!
 

CountryBoy19

Active OPE Member
Local time
12:34 PM
User ID
5484
Joined
Mar 1, 2018
Messages
21
Reaction score
21
Location
Southern Indiana
Country flag
I usually like to run a saw before I get into it. My suggestion would be to get it all back together and make sure you don't have any air leaks. Muffler mod for sure though.
Muffler mod is already done. Plan to replace all seals & gaskets except the intake boot and impulse line. If I put it all back together just to run it I'm liable to just leave alone and never do anything to it due to procrastination.
 

Deets066

AKA Deetsey
Local time
12:34 PM
User ID
290
Joined
Dec 28, 2015
Messages
15,442
Reaction score
73,548
Location
Illinois
Country flag
Well the piston and jug have to go on just to time it. You'll need to mount a timing wheel
 

CountryBoy19

Active OPE Member
Local time
12:34 PM
User ID
5484
Joined
Mar 1, 2018
Messages
21
Reaction score
21
Location
Southern Indiana
Country flag
Well the piston and jug have to go on just to time it. You'll need to mount a timing wheel
Right, but I don't have to mount up the muffler, carb etc and run it to get the timing. Mounting a timing wheel is no problem. I guess the questions I'm asking pertain more to the actual details.

For a novice in the realm of porting, what would be easy power to grab without risk of doing something harmful? Simply widening the ports seems easy enough. When you start talking about raising/lowering ports (mess with timing) I get a little more uneasy without some guidance.

What about advancing the timing: Is that done how I suspect (and mentioned above)?
 

Deets066

AKA Deetsey
Local time
12:34 PM
User ID
290
Joined
Dec 28, 2015
Messages
15,442
Reaction score
73,548
Location
Illinois
Country flag
Right, but I don't have to mount up the muffler, carb etc and run it to get the timing. Mounting a timing wheel is no problem. I guess the questions I'm asking pertain more to the actual details.

For a novice in the realm of porting, what would be easy power to grab without risk of doing something harmful? Simply widening the ports seems easy enough. When you start talking about raising/lowering ports (mess with timing) I get a little more uneasy without some guidance.

What about advancing the timing: Is that done how I suspect (and mentioned above)?
Ignition timing on these models can vary, Its not far off in stock form usually. I'd leave that be.
You can clean up the ex and intake ports. Widen some, you'd probly pick up a little. But machining the jug and changing the port timing is where the real gains are at.
 

CountryBoy19

Active OPE Member
Local time
12:34 PM
User ID
5484
Joined
Mar 1, 2018
Messages
21
Reaction score
21
Location
Southern Indiana
Country flag
Ignition timing on these models can vary, Its not far off in stock form usually. I'd leave that be.
You can clean up the ex and intake ports. Widen some, you'd probly pick up a little. But machining the jug and changing the port timing is where the real gains are at.
Like I said, I can do those things, but I'm not going to "just wing it and guess". Looking for a little more solid guidance in that realm.

Just for perspective, I have a 15" swing lathe with a 12 foot bed on it which is way overkill for this, but I'm just trying to put in perspective that I have the capability and knowledge to carefully remove metals where needed, to exacting tolerances, I just don't have the knowledge of doing it on a 2-cycle engine.
 

mdavlee

Hillbilly grinder
Local time
12:34 PM
User ID
279
Joined
Dec 28, 2015
Messages
14,194
Reaction score
64,608
Location
TN
Country flag
Don't dead head any flow on the lowers. Put the piston in there and you'll see it. If you want safe timing numbers 100 126/128 and 80 with a small amount off the base and chamber to set squish at .022".
 

CountryBoy19

Active OPE Member
Local time
12:34 PM
User ID
5484
Joined
Mar 1, 2018
Messages
21
Reaction score
21
Location
Southern Indiana
Country flag
Don't dead head any flow on the lowers. Put the piston in there and you'll see it.
You'll have to pardon my ignorance. What do you mean by dead-head? I have some ideas what you mean but I'm not certain.

If you want safe timing numbers 100 126/128 and 80 with a small amount off the base and chamber to set squish at .022".
Take some out of the base and chamber? So the actual amount is going to be determined by where the ports need set then? And because I'm capable of changing intake/exhaust ports but not the transfers would it be best to determine the amount to take from each by setting the transfers at a certain point then going at the in/ex ports to get them right?

Another stupid question, the timing numbers on the exhaust and transfers are when the top of the piston closes off the port (or completely clears the port) not the ring right? Obviously the intake is when the bottom edge of the skirt closes/clears the port.
 

mdavlee

Hillbilly grinder
Local time
12:34 PM
User ID
279
Joined
Dec 28, 2015
Messages
14,194
Reaction score
64,608
Location
TN
Country flag
You'll have to pardon my ignorance. What do you mean by dead-head? I have some ideas what you mean but I'm not certain.


Take some out of the base and chamber? So the actual amount is going to be determined by where the ports need set then? And because I'm capable of changing intake/exhaust ports but not the transfers would it be best to determine the amount to take from each by setting the transfers at a certain point then going at the in/ex ports to get them right?

Another stupid question, the timing numbers on the exhaust and transfers are when the top of the piston closes off the port (or completely clears the port) not the ring right? Obviously the intake is when the bottom edge of the skirt closes/clears the port.
Look at the piston shape to transfer inlets.

I only cut .030" from base and whatever from the chamber to set squish.

Top of piston and top of exhaust and transfers. Bottom of intake
 
Last edited:

CountryBoy19

Active OPE Member
Local time
12:34 PM
User ID
5484
Joined
Mar 1, 2018
Messages
21
Reaction score
21
Location
Southern Indiana
Country flag
Look at the piston shape to transfer inlets.
Are you saying it's possible for the piston to block the transfer inlets? Mine definitely doesn't have that problem and I don't think it could.

I only cut .030" from base and whatever from the chamber to set squish.
Got it, that's more in-tune with what I understand. Is it possible for a factory P&C to get piston slap? The used OEM 7910 P&C I picked up seems to indicate a small amount of slap was occurring on the intake side of the combustion chamber.

Top of piston and top of exhaust and transfers. Bottom of intake
That, along with the timing numbers will likely make more sense after I get it broken down and get a degree wheel on it.

ETA, I watched a youtube vid that had a really nice timing wheel, the guy said he prints them and sticks them on a plain disk of AL. The end of the video said, "Join us at opeforum.com"... anybody know the fellow with the degree wheel printout? I can easily make a disk of aluminum (and I can easily make a simple degree wheel in publisher and print it), but if half the work is already done for me it would be beneficial.

What about the weird exhaust port that accepts the cat muffler? Do you do anything with that?
 
Last edited:

mdavlee

Hillbilly grinder
Local time
12:34 PM
User ID
279
Joined
Dec 28, 2015
Messages
14,194
Reaction score
64,608
Location
TN
Country flag
Are you saying it's possible for the piston to block the transfer inlets? Mine definitely doesn't have that problem and I don't think it could.


Got it, that's more in-tune with what I understand. Is it possible for a factory P&C to get piston slap? The used OEM 7910 P&C I picked up seems to indicate a small amount of slap was occurring on the intake side of the combustion chamber.


That, along with the timing numbers will likely make more sense after I get it broken down and get a degree wheel on it.

What about the weird exhaust port that accepts the cat muffler? Do you do anything with that?

Look at where the Windows would be under the rings and how it will force flow outwards.

Unless it was run gasketless I don't see how it could have.

If you blend it completely out you will free port with not much more than .030" off. The sides and top will be ground so they'll be blended better. Bottom can't go crazy on.
 

AlfA01

Mastermind Approved!
GoldMember
Local time
7:34 PM
User ID
5546
Joined
Mar 8, 2018
Messages
6,071
Reaction score
45,986
Location
Evia, Greece
Country flag
Are you saying it's possible for the piston to block the transfer inlets? Mine definitely doesn't have that problem and I don't think it could.


Got it, that's more in-tune with what I understand. Is it possible for a factory P&C to get piston slap? The used OEM 7910 P&C I picked up seems to indicate a small amount of slap was occurring on the intake side of the combustion chamber.


That, along with the timing numbers will likely make more sense after I get it broken down and get a degree wheel on it.

ETA, I watched a youtube vid that had a really nice timing wheel, the guy said he prints them and sticks them on a plain disk of AL. The end of the video said, "Join us at opeforum.com"... anybody know the fellow with the degree wheel printout? I can easily make a disk of aluminum (and I can easily make a simple degree wheel in publisher and print it), but if half the work is already done for me it would be beneficial.

What about the weird exhaust port that accepts the cat muffler? Do you do anything with that?

Just a tid bit of advice to start with from a lowly enthusiast. I would start with replacing your case half and then ensure you have a good match between the old case and the new, unless you are replacing both halves. If your cases do not match perfectly, I see a base gasket delete and most other cylinder mods as being moot, as you will cause more problems than you are able to fix. If you have the tooling to mill the cases and true them up, you can prevent a lot of problems, such as airleaks. Without doing that first, I wouldn't worry about squish, port timing or most other mods.

If you do have the tooling, I'd start with measuring squish with, and without, a base gasket. This will tell you where you need to be, and where you can go from there. Its easy to assume that all cylinders are created equal, but they aren't perfect. Squish can vary, so its important to check it before you begin 'turning up' your saw.

Also, do a good vacuum and pressure test after replacing the case. Its a pain to tear it back down after you've finished putting it together.

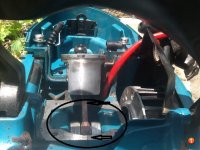
See pic of areas where case misalignment can occur.
a3u6ypas.jpg

Good luck and also check Arboristsite. Some knowledgeable guys over there too.

Degree wheel can be found by Google search: Here
 

mettee

Pinnacle OPE Member
Local time
10:34 AM
User ID
5872
Joined
Apr 10, 2018
Messages
1,425
Reaction score
5,403
Location
Arizona
Country flag
This is old, but for anyone who references this.

This is what mdavlee is talking about.
aDUncpf.jpg


50QyhBr.jpg


To this.

9SsaLN0.jpg
 

huskyboy

Sorta a husqvarna guy...
Local time
12:34 PM
User ID
1352
Joined
May 30, 2016
Messages
10,025
Reaction score
43,463
Location
Ct
Country flag
I wonder if they did that for a reason though? Perhaps to direct the charge? I guess test it both ways and see if it gains or not is the only way to tell.
 

mettee

Pinnacle OPE Member
Local time
10:34 AM
User ID
5872
Joined
Apr 10, 2018
Messages
1,425
Reaction score
5,403
Location
Arizona
Country flag
I am taking away from the advice given that mdavlee had tested it a few times. I've seen his saws go and they are no joke. I know there are compromises with tuning and porting a two stroke and for longevity you don't want to take it too far.
 

huskyboy

Sorta a husqvarna guy...
Local time
12:34 PM
User ID
1352
Joined
May 30, 2016
Messages
10,025
Reaction score
43,463
Location
Ct
Country flag
I am taking away from the advice given that mdavlee had tested it a few times. I've seen his saws go and they are no joke. I know there are compromises with tuning and porting a two stroke and for longevity you don't want to take it too far.
Just wondering why they did the solo jug like that and the dolmar jug differently? I matched my 7900 lowers to the base, might grind that wall back if I go back in. The saw runs well with good torque so I’m tempted to leave it alone... for now.
 
Last edited:

mettee

Pinnacle OPE Member
Local time
10:34 AM
User ID
5872
Joined
Apr 10, 2018
Messages
1,425
Reaction score
5,403
Location
Arizona
Country flag
Only thing I can think is that it flowed well enough to hit the number they were looking for with epa and horse power numbers.

Once we improve/change intake, exhaust, compression, ignition timing, and transfer flow that has to all go out the winder.
 

huskyboy

Sorta a husqvarna guy...
Local time
12:34 PM
User ID
1352
Joined
May 30, 2016
Messages
10,025
Reaction score
43,463
Location
Ct
Country flag
It’s fascinating to look at the 6400 cylinder compare to the 7300/7900, huge transfer area and open port. The 7300/7900 has tight transfers.
 
Top