High Quality Chainsaw Bars Husqvarna Toys

Husqvarna 350 to 346

jmester

Pinnacle OPE Member
Local time
1:39 PM
User ID
1769
Joined
Aug 28, 2016
Messages
1,144
Reaction score
3,386
Location
MD
Country flag
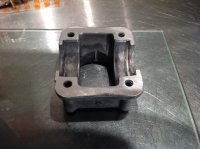
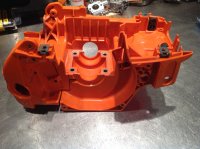
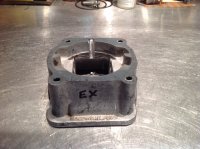
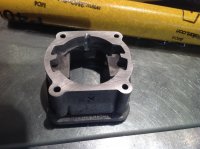
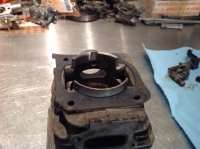
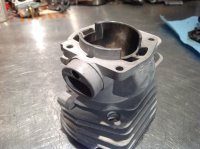
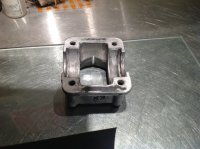
Project that I am starting on. Got a toasted 350 that I am going to put a 346 cylinder on. Got the case cleaned up. The riser ground for the impulse passage. As the 346 cylinder pulls impulse from out side the cylinder bore. The 350 pulls pulse from inside the cylinder bore. Flattened the riser on both sides. The bottom of the riser that meets the case is the area that needs the most work. The screws over time pull the corners down and give you high and low spots across the sealing surface. Got the case sealing surface rough up with sandpaper to provide more bite for the sealer. More to come as I make progress.
IMG_0970.JPG IMG_0971.JPG IMG_0974.JPG
 
Local time
1:39 PM
User ID
4866
Joined
Dec 24, 2017
Messages
3,771
Reaction score
23,964
Location
NW CT
In to see how others do this.


My 340->346 project ended up 340->353 when I ordered the wrong cylinder. I filled the bearing cup lower transfer feed pockets with jb weld, from the crank opening up to the mounting surface. Its a little less than 45* angle after being smoothed out. Forgot to take pics. I am pretty happy with it thus far, but its still breaking in.
 

jmester

Pinnacle OPE Member
Local time
1:39 PM
User ID
1769
Joined
Aug 28, 2016
Messages
1,144
Reaction score
3,386
Location
MD
Country flag
That is interesting. Seems it would help with smoothing the flow and velocity as it would be more gradual access to the upper transfers. What about surface area of the over all lower transfer?
 

Magic_Man

Oh Yea !
Local time
1:39 PM
User ID
9
Joined
Dec 4, 2015
Messages
1,151
Reaction score
3,560
Location
SE Ohio
In to see how others do this.


My 340->346 project ended up 340->353 when I ordered the wrong cylinder. I filled the bearing cup lower transfer feed pockets with jb weld, from the crank opening up to the mounting surface. Its a little less than 45* angle after being smoothed out. Forgot to take pics. I am pretty happy with it thus far, but its still breaking in.
Didn’t Treemonkey do one this way a while back ?
 
Local time
1:39 PM
User ID
4866
Joined
Dec 24, 2017
Messages
3,771
Reaction score
23,964
Location
NW CT
He did. He and aomeone else piped in when I inquired as to what epoxy to use in the bearing cup. They both used JB weld. So, I did as well. He did a smaller portion of the bearing cup than I did, I kind of went whole hog on it. Easier to remove some than try to layer the JB weld, at least in theory.

Saw spins up pretty damned well. I was at 15,600 and still 4 stroking. Fast little bugger but not a huge amount of torque. May go back in and try a little massaging of the jb weld at some point. I did the 357/359 intake manifold, air filter mount and air filter as its a bit larger than the oem 340/345/350 parts. Thanks @Onan18 for that info and parts!
 

jmester

Pinnacle OPE Member
Local time
1:39 PM
User ID
1769
Joined
Aug 28, 2016
Messages
1,144
Reaction score
3,386
Location
MD
Country flag
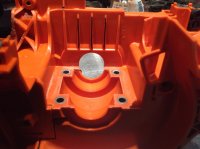
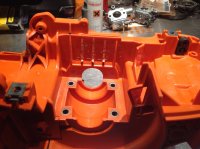
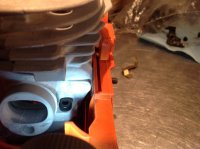
Got the ribs trimmed off the pto side of the case to clear the transfer tunnels. Then mocked it up with the riser and cylinder to check clearance and also check to make sure the cylinder bolts don't bottom out before they pull tight.
IMG_0977.JPG IMG_0978.JPG IMG_0984.JPG
 

jmester

Pinnacle OPE Member
Local time
1:39 PM
User ID
1769
Joined
Aug 28, 2016
Messages
1,144
Reaction score
3,386
Location
MD
Country flag
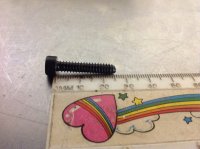
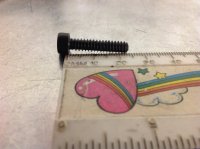
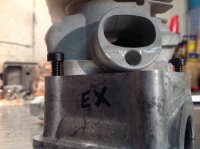
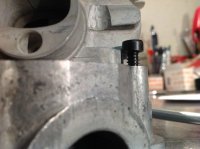
Made a little more progress got the cylinder screws trimmed down. The first two pics are the cylinders screws the second two pics are the screws bottomed out in the riser to hopefully show why you need to check your screw length. 1st is normal 2nd trimmed. Especially if you are not going to run a base gasket. The cylinder will slide right under the bottomed out stock screw.
IMG_0985.JPG IMG_0986.JPG IMG_0987.JPG IMG_0988.JPG
 

J. Dirt

Super OPE Member
Local time
1:39 PM
User ID
6409
Joined
Jun 13, 2018
Messages
376
Reaction score
1,028
Location
WNY
Country flag
I’m setting up to try this as well! Love following along and seeing how this all goes together, as well as stopping me from wrecking things! :rolleyes:
My whole project started when I lost a 350 30’ from the bucket a few weeks ago and needed parts to fix it.
 

jmester

Pinnacle OPE Member
Local time
1:39 PM
User ID
1769
Joined
Aug 28, 2016
Messages
1,144
Reaction score
3,386
Location
MD
Country flag
I’m setting up to try this as well! Love following along and seeing how this all goes together, as well as stopping me from wrecking things! :rolleyes:
My whole project started when I lost a 350 30’ from the bucket a few weeks ago and needed parts to fix it.

If you have any questions feel free to ask, I would be more than willing to give you a hand.
 
Top