High Quality Chainsaw Bars Husqvarna Toys

Husky 51 saw build project

malk315

Running Saws for Therapy
Local time
5:52 AM
User ID
421
Joined
Jan 6, 2016
Messages
2,101
Reaction score
10,140
Location
Lancaster, MA
Country flag
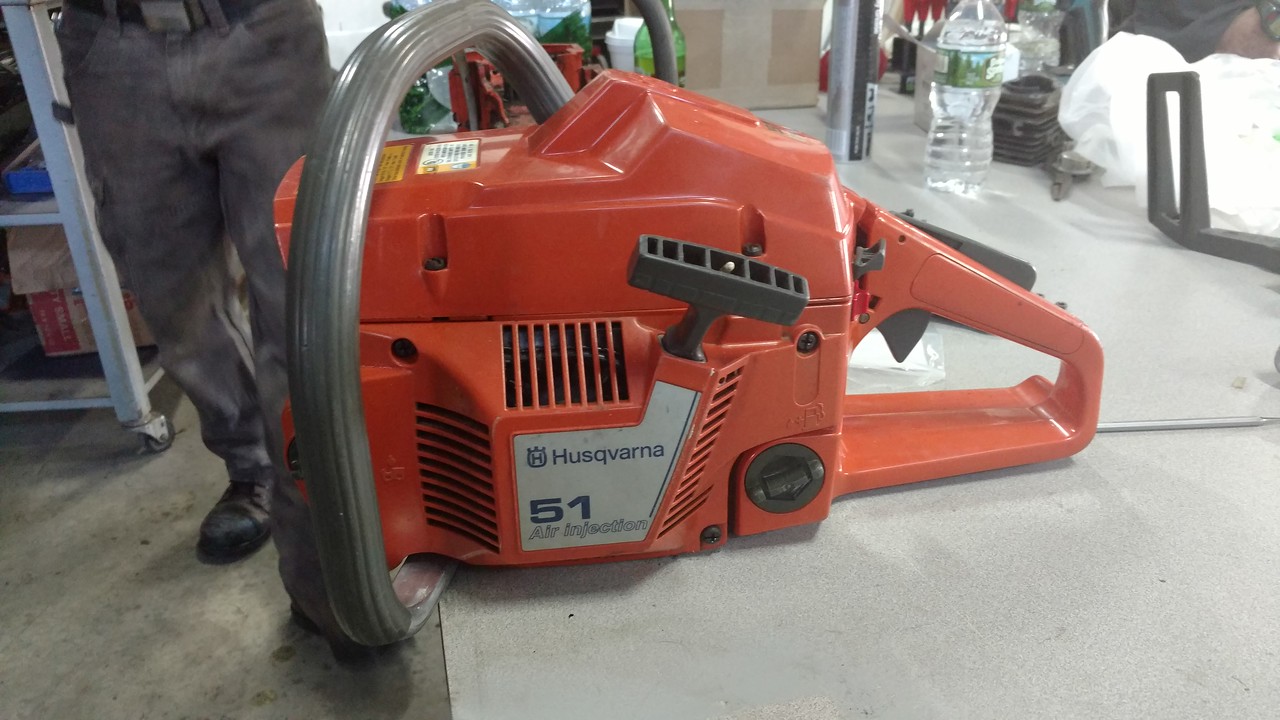
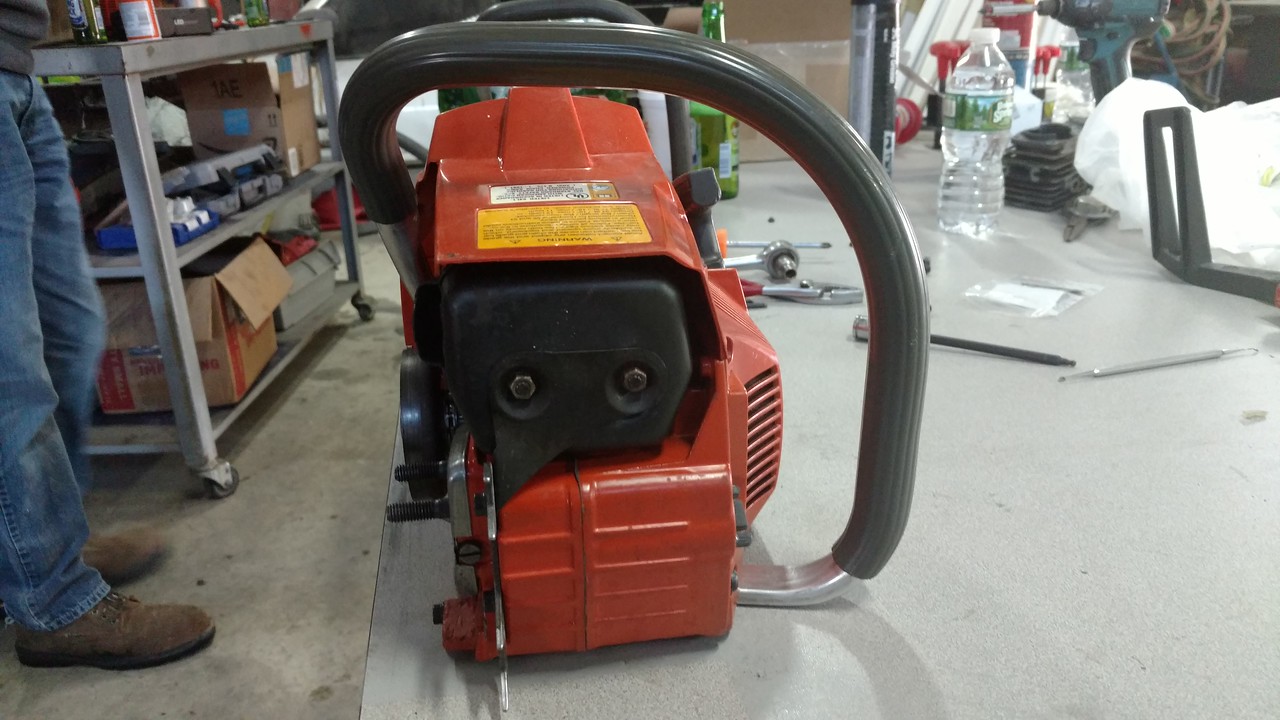
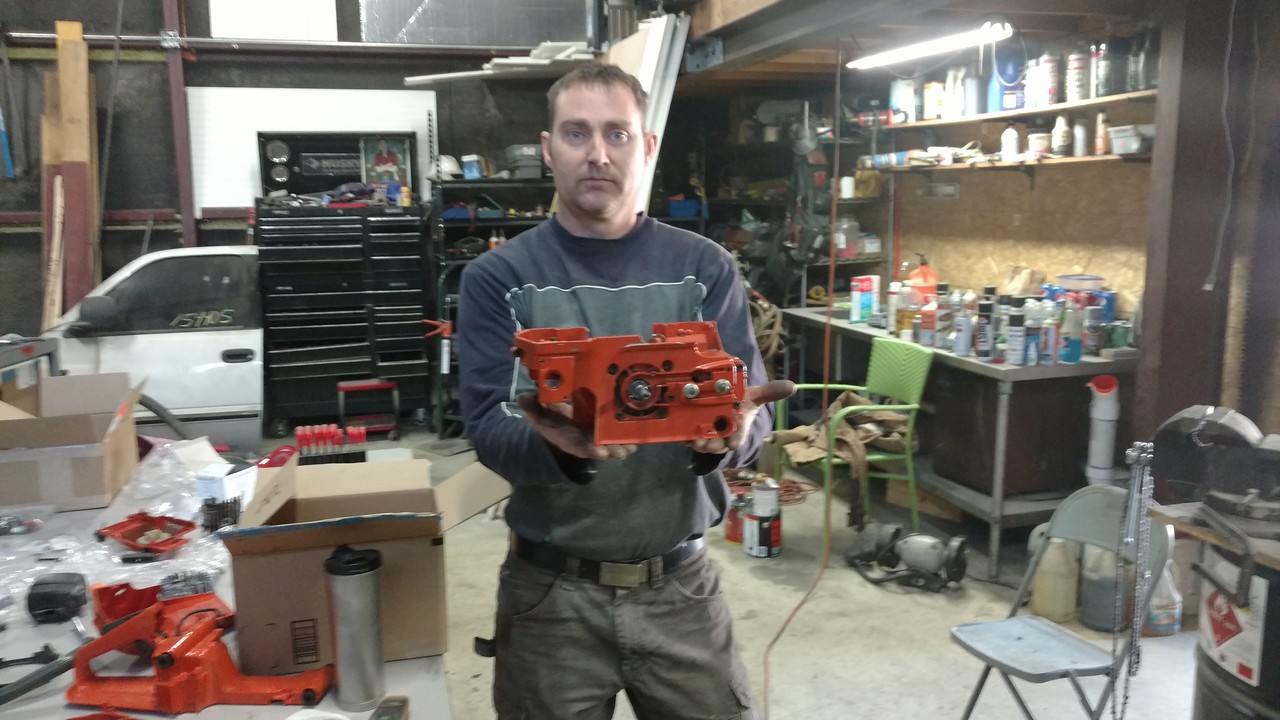
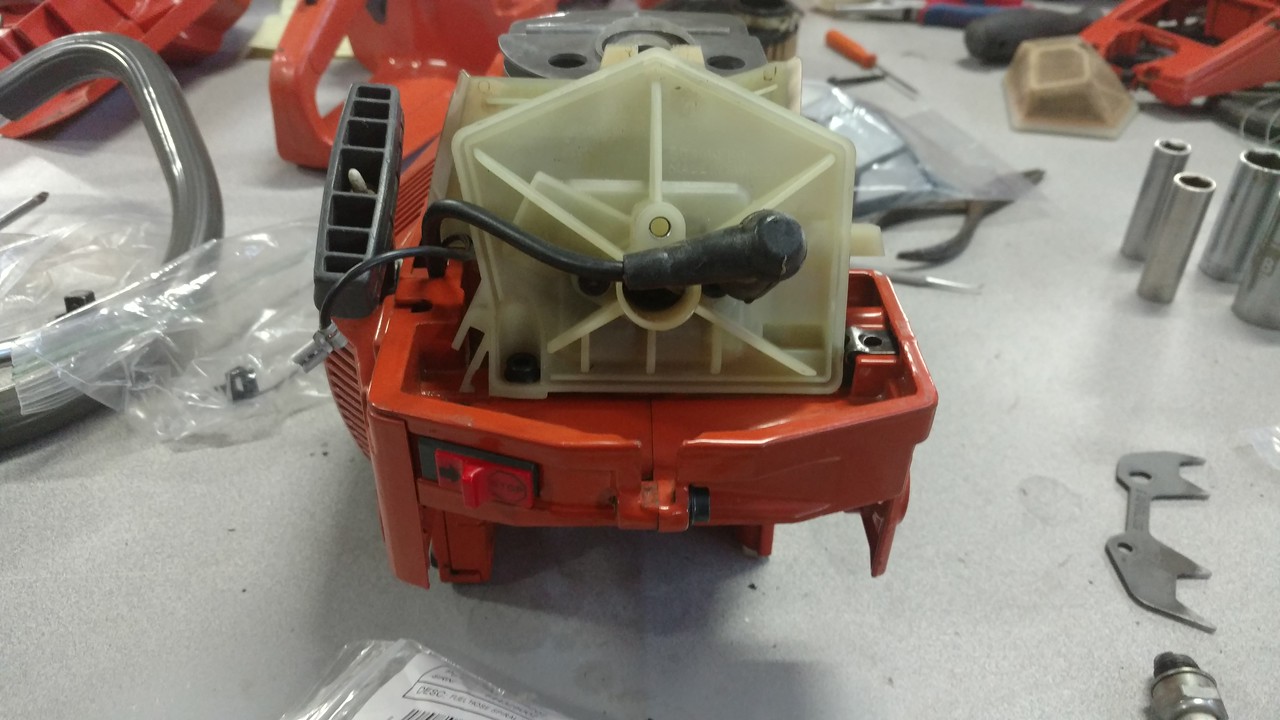
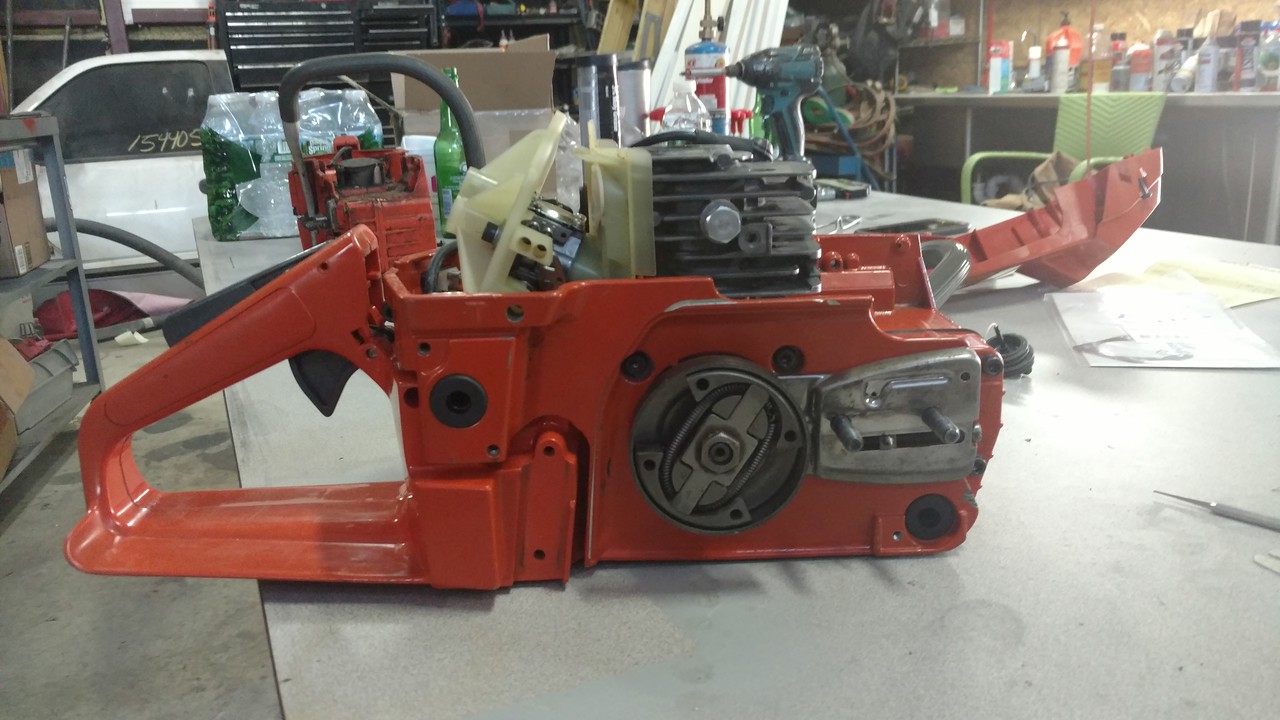
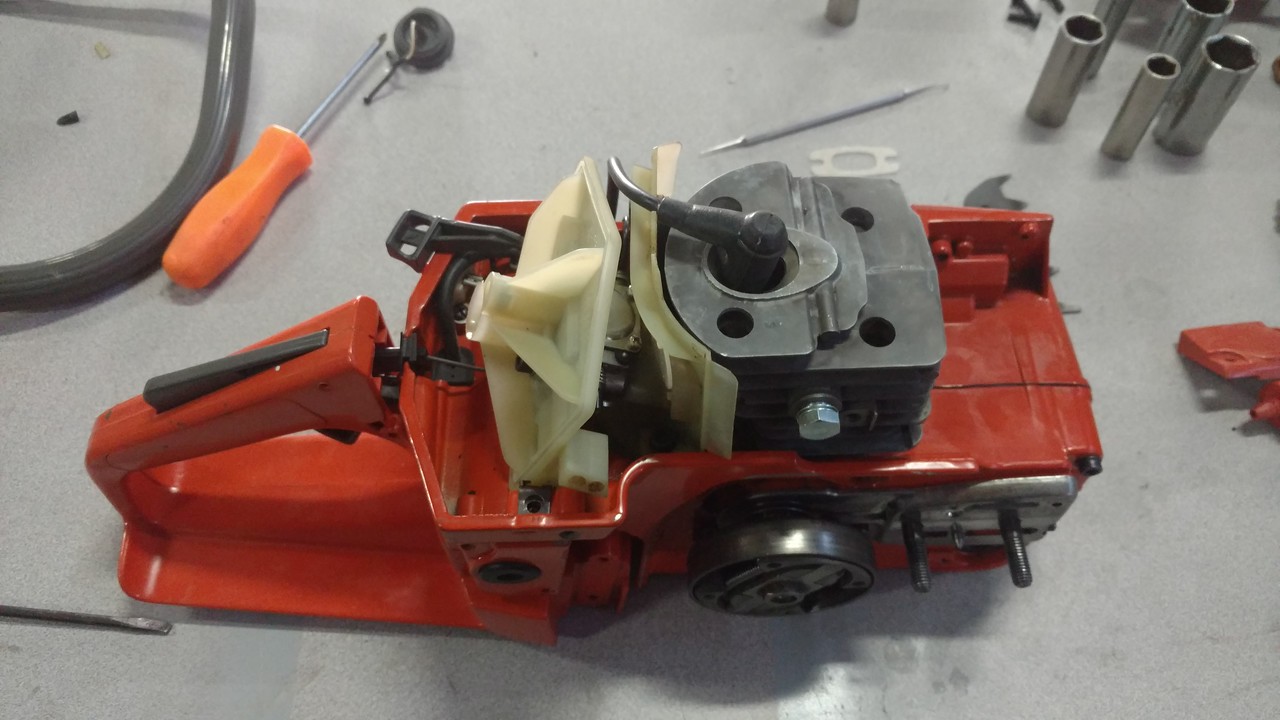
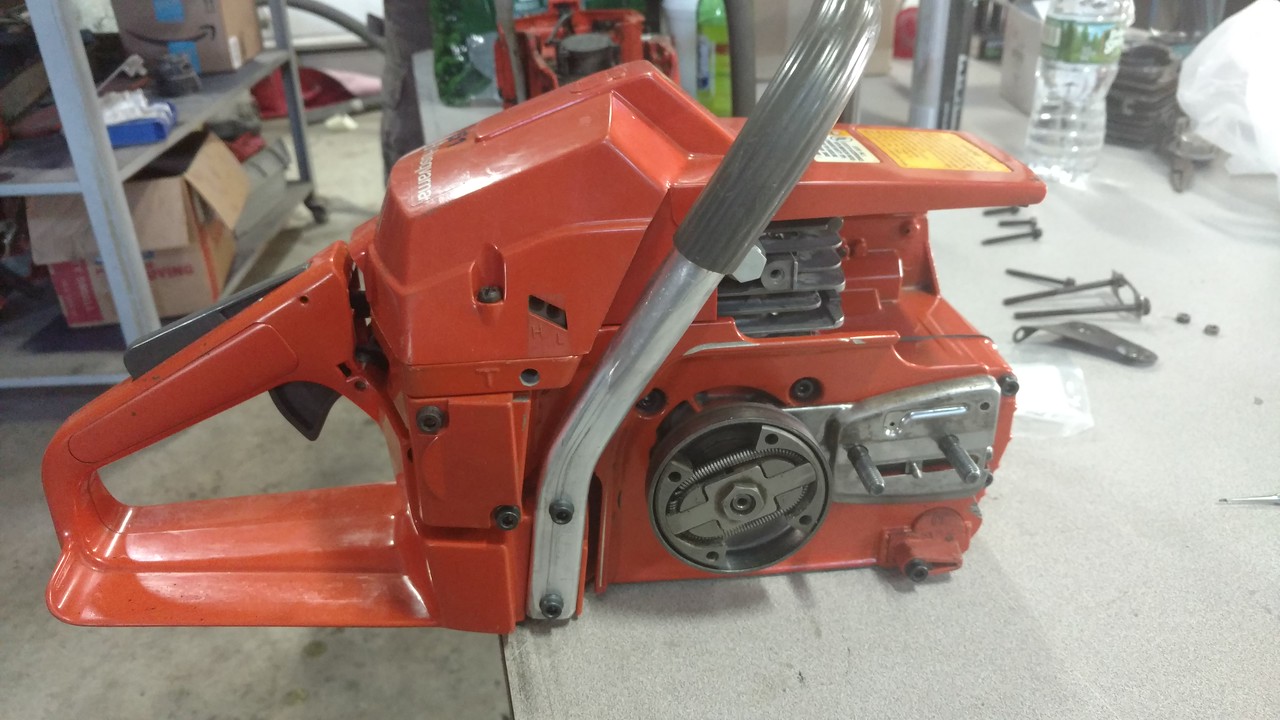
Spent the day at my favorite place @paragonbuilder shop and Dan helped me do my first complete assembly of the 51 rebuild project. Took a bunch of pics and I'm going to attempt to document everything here for you folks to enjoy.

IMG_20170218_090347465_TOP-X2.jpg


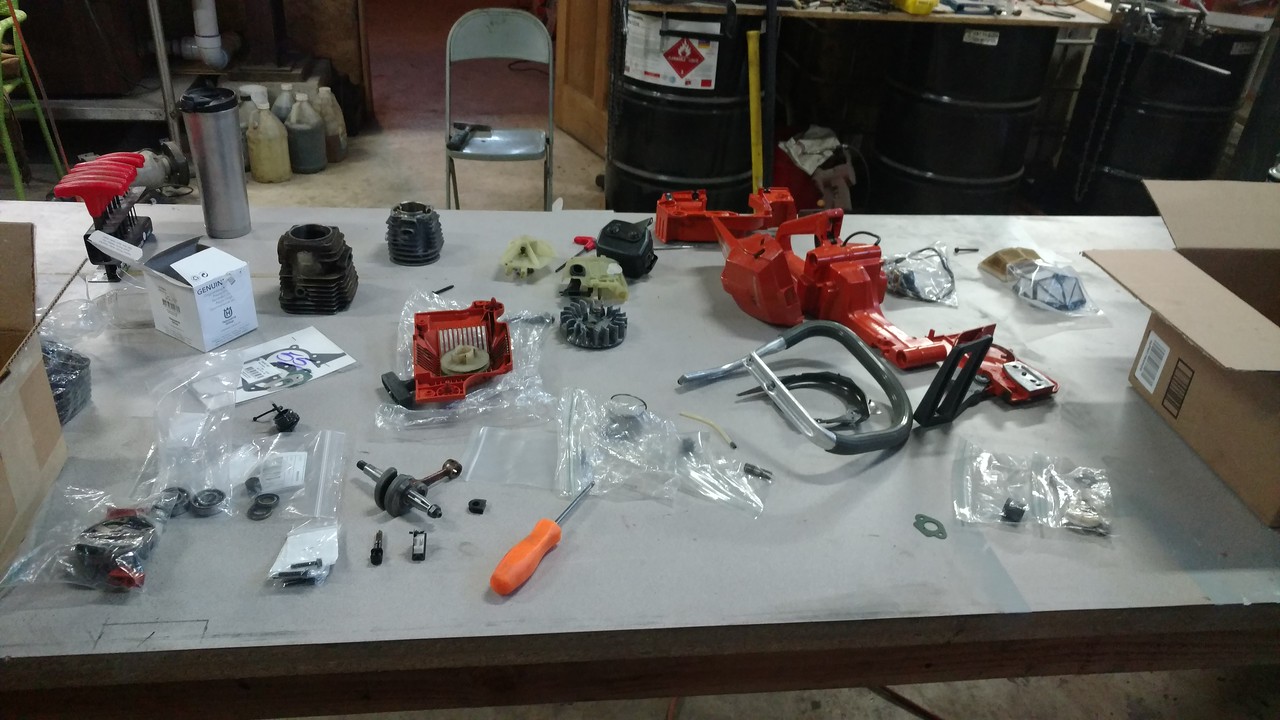
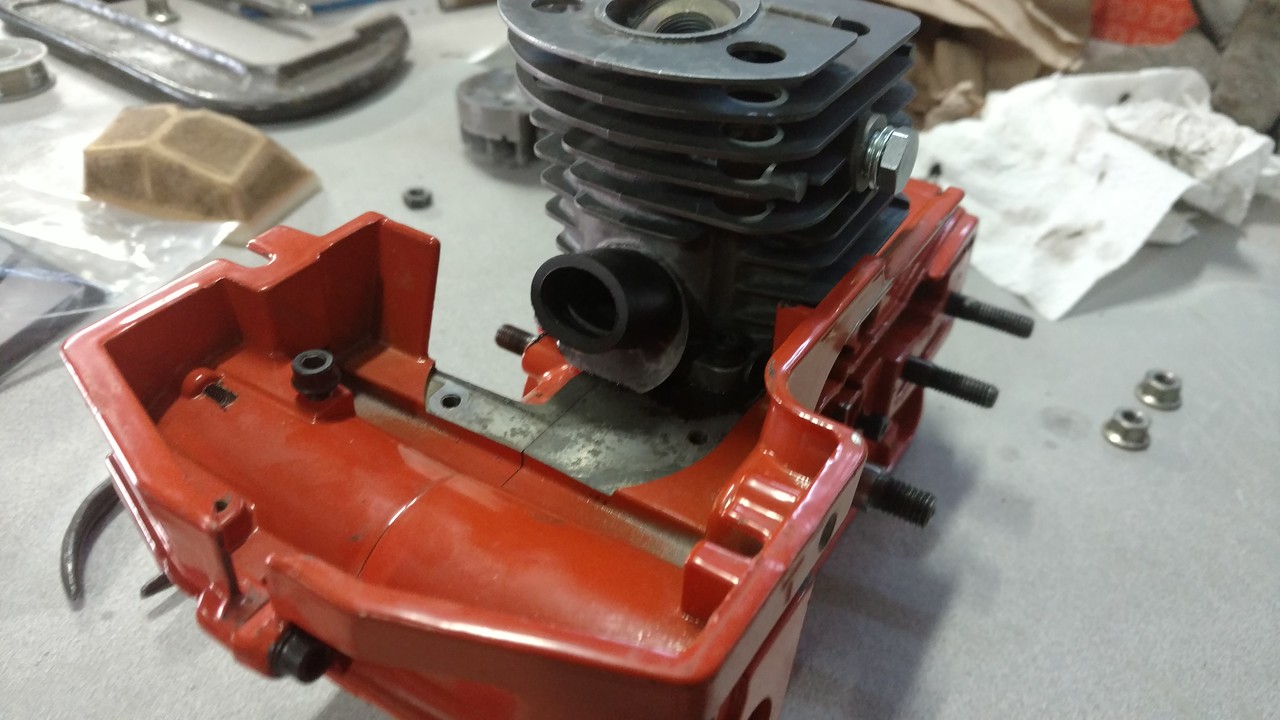
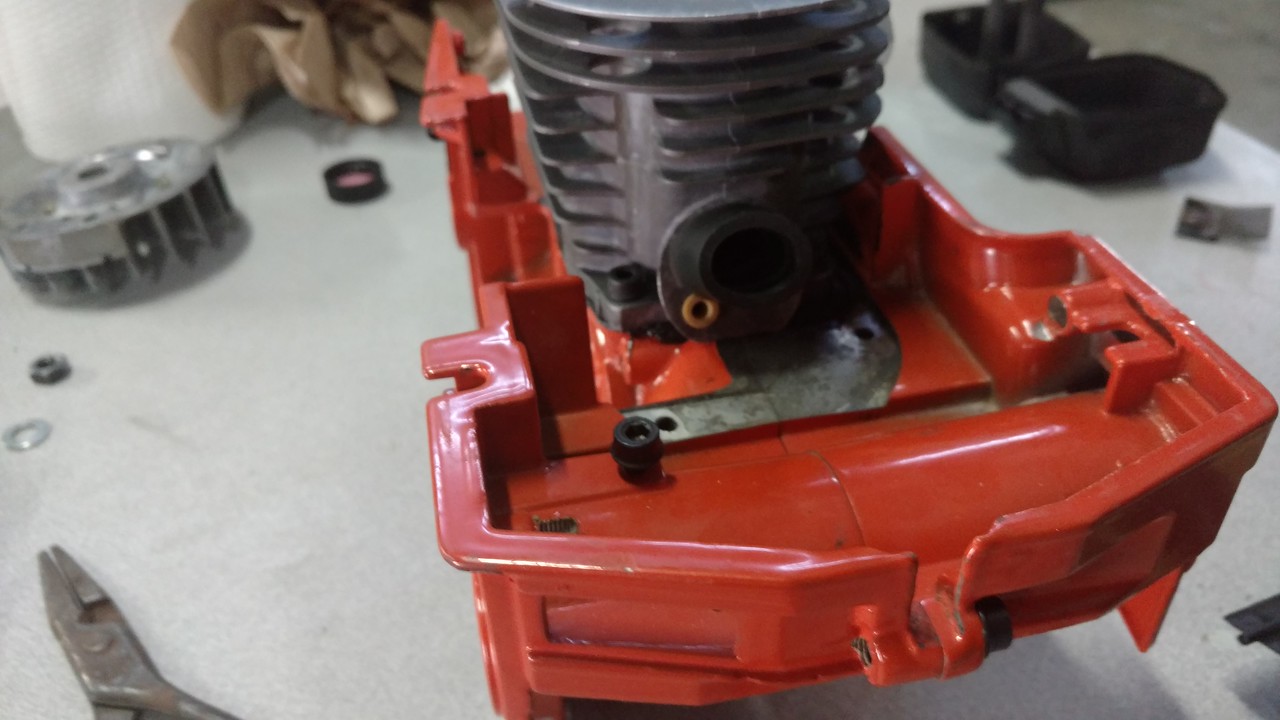
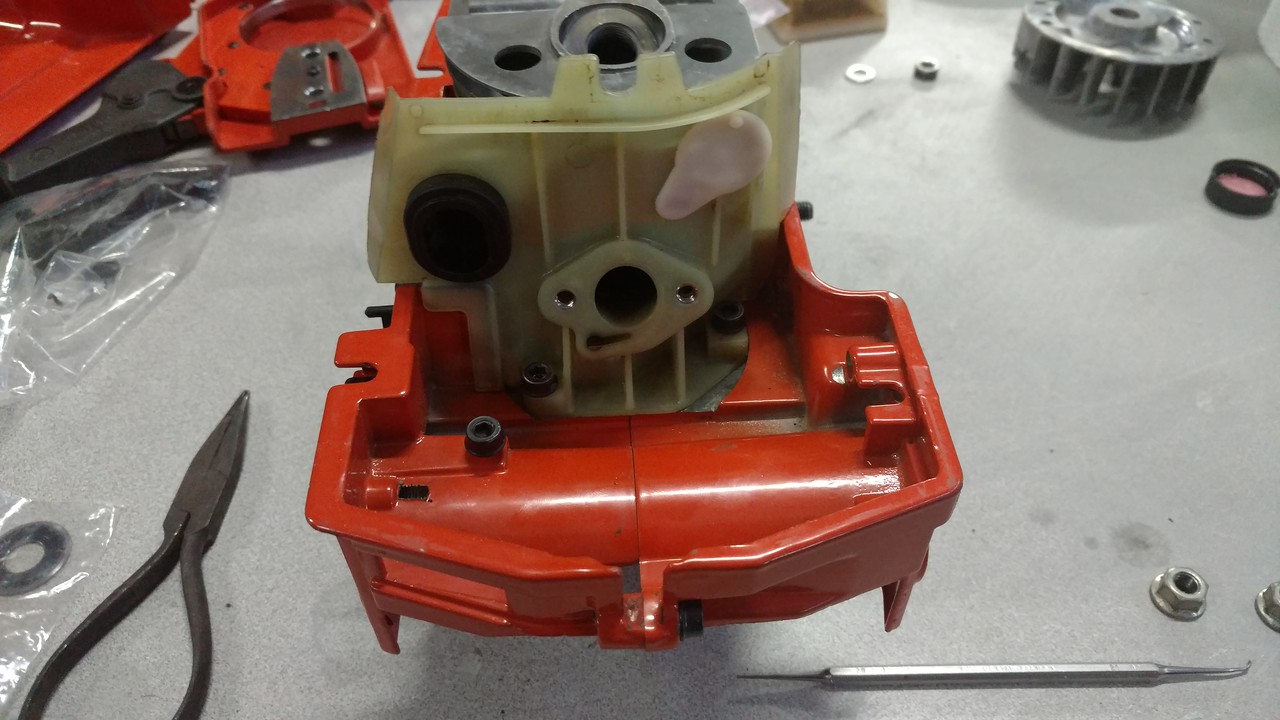
Started with a bench full of parts new and old. @Mattyo disassmbled this thing at Dan's GTG in minutes. I use purple power to clean the saw and organized all of the parts in a box. New parts include OEM bearings + seals, gasket kit, new 55 open port OEM piston/cylinder kit, clutch needle bearing, mesh air filter, fuel line, impulse tube grommet, probably a few other parts I forgot!

IMG_20170218_090408726-X2.jpg


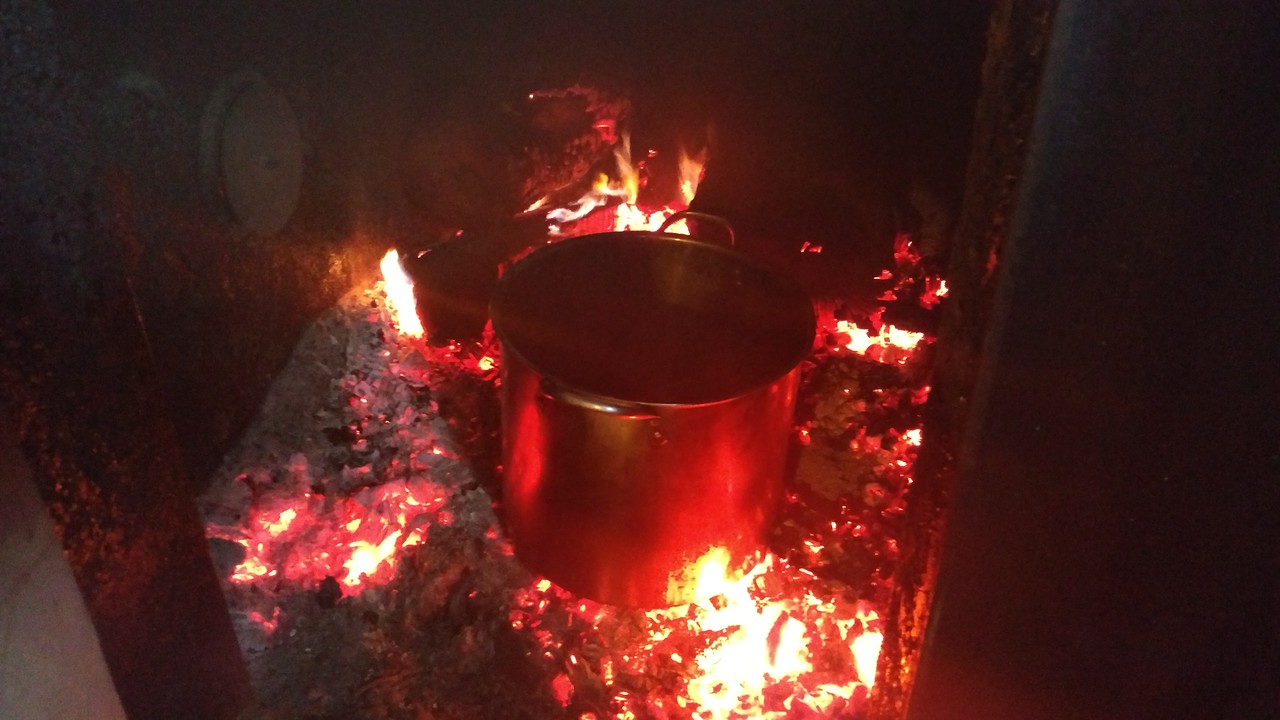
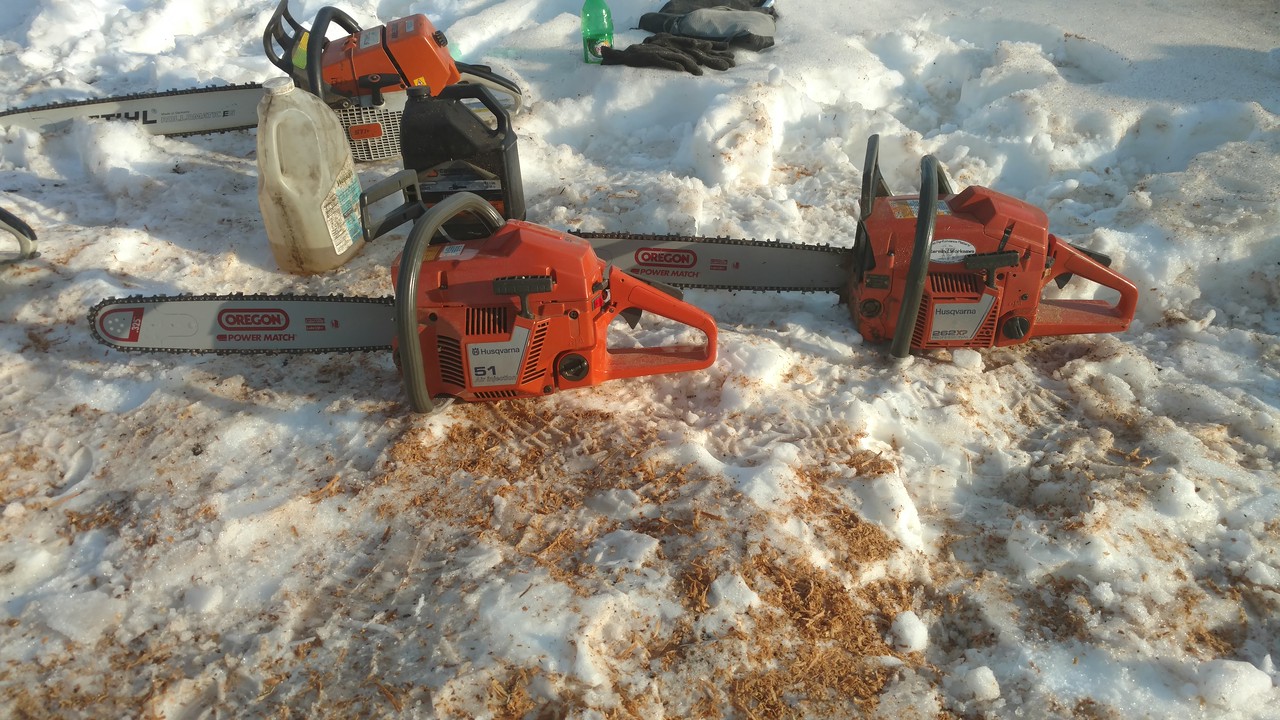
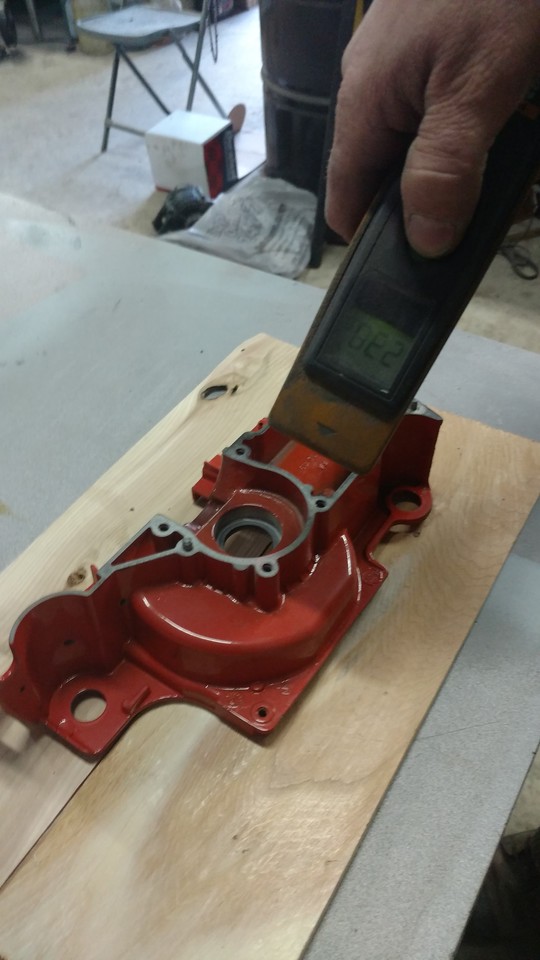
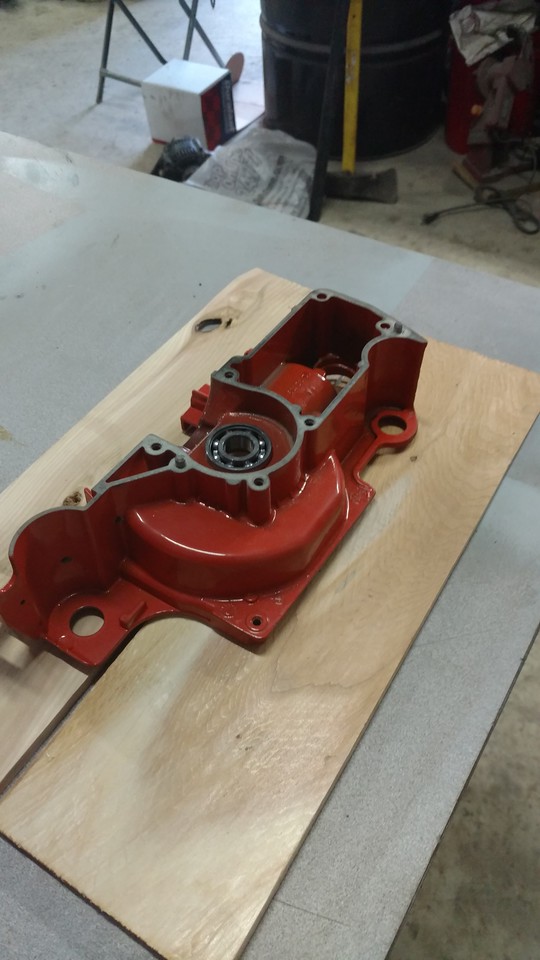
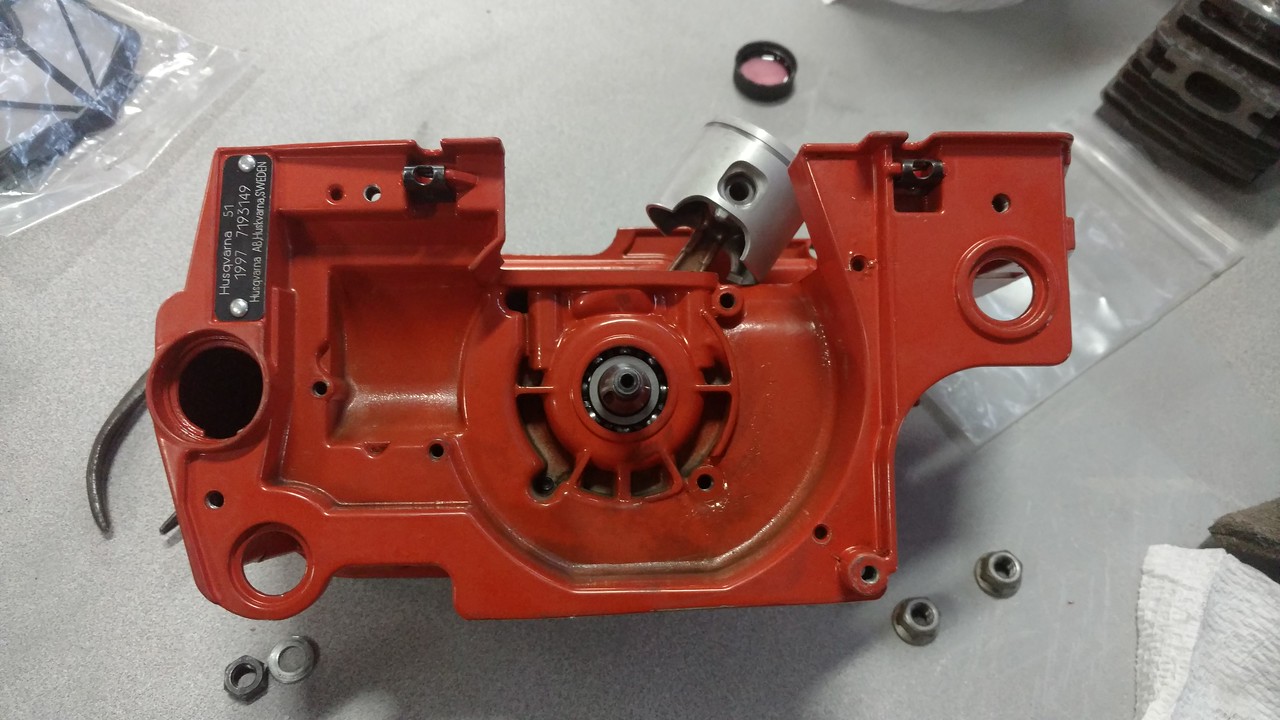
Dan's wood furnace was perfect for heating things up. First up case half to put first bearing in. Bearing put out on the snow no need for a freezer! First case half was well north of 350 degrees probably close to 500 but no problem.

IMG_20170218_091131116-X2.jpg


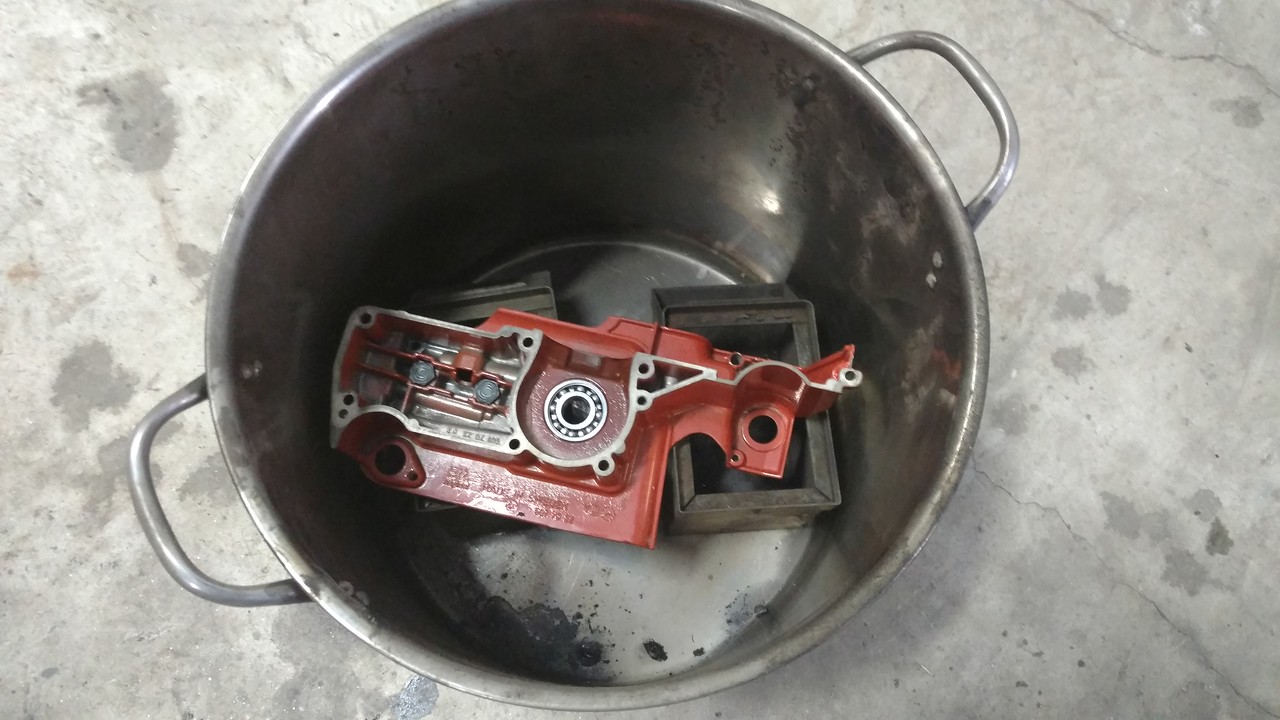
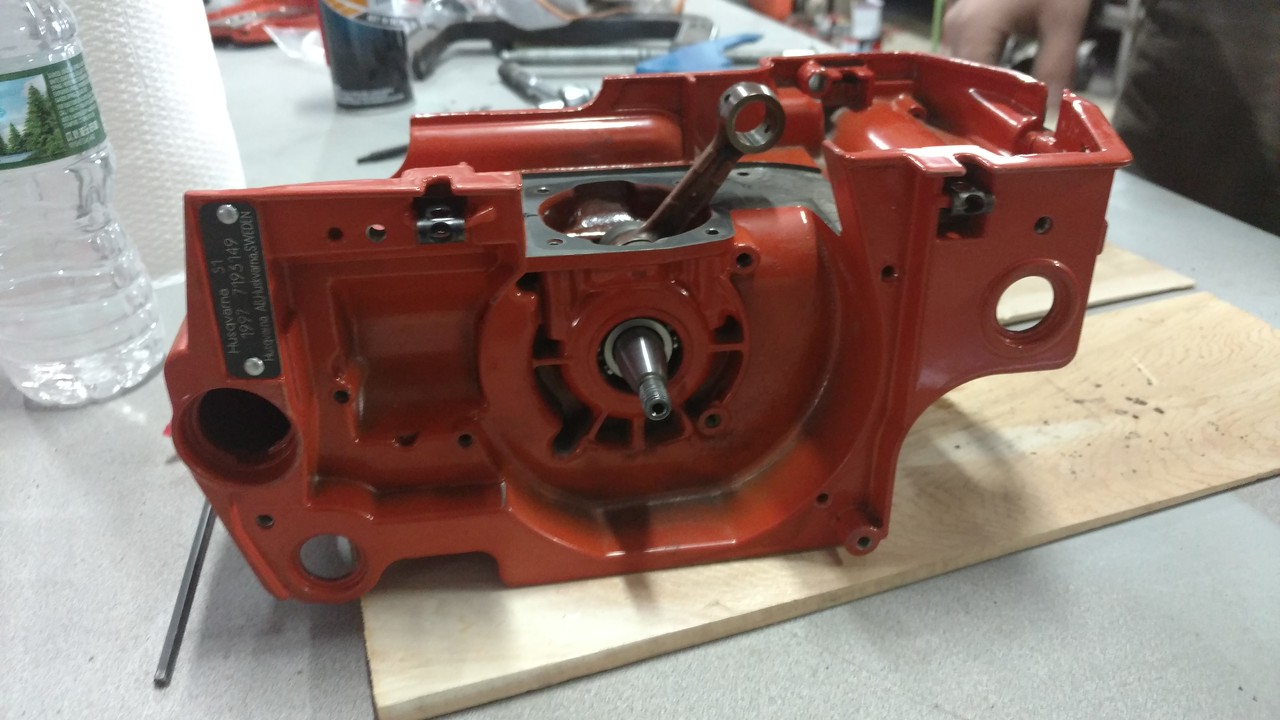
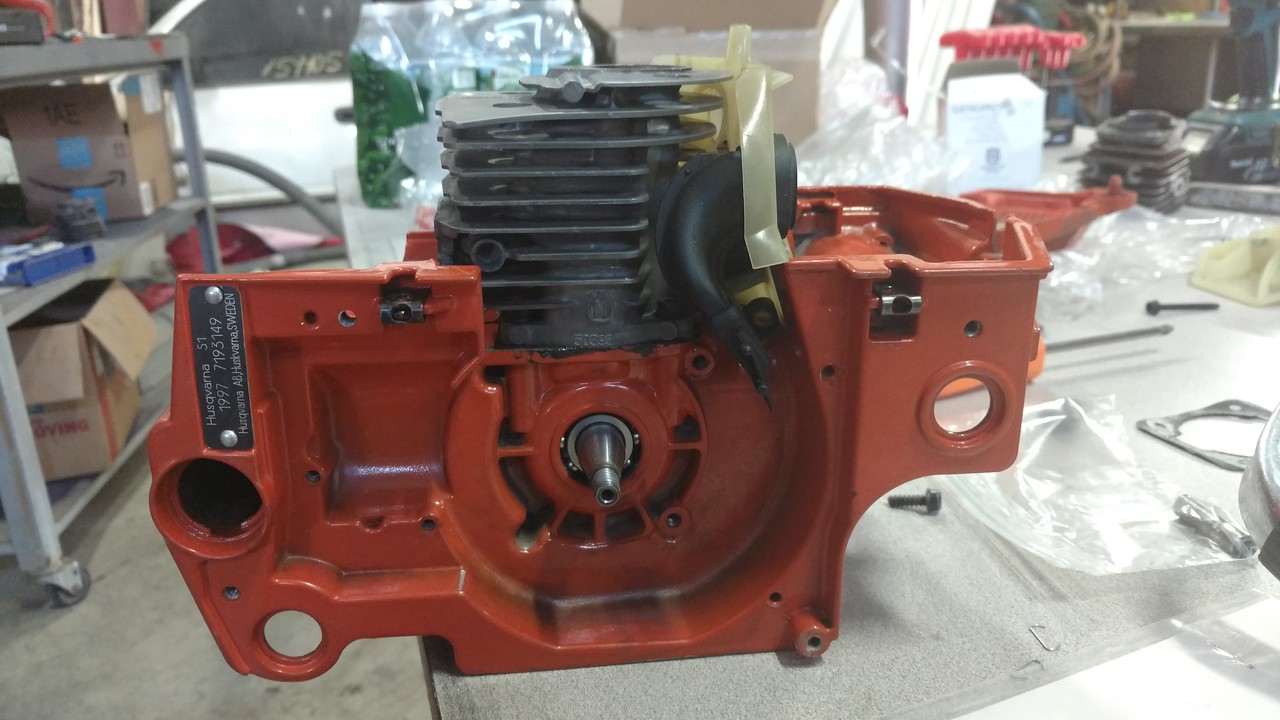
Bearing dropped in home in PTO side of case. No coaxing required at all!

IMG_20170218_091346321_TOP-X2.jpg


IMG_20170218_091641709-X2.jpg


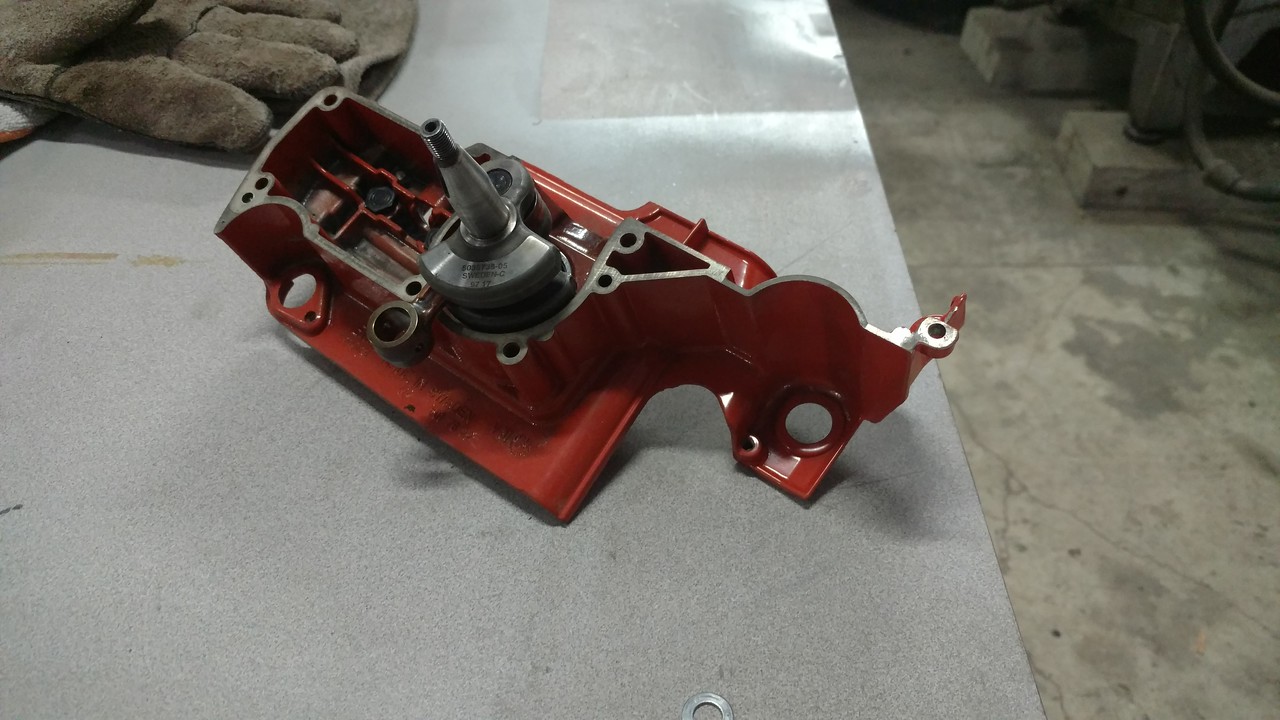
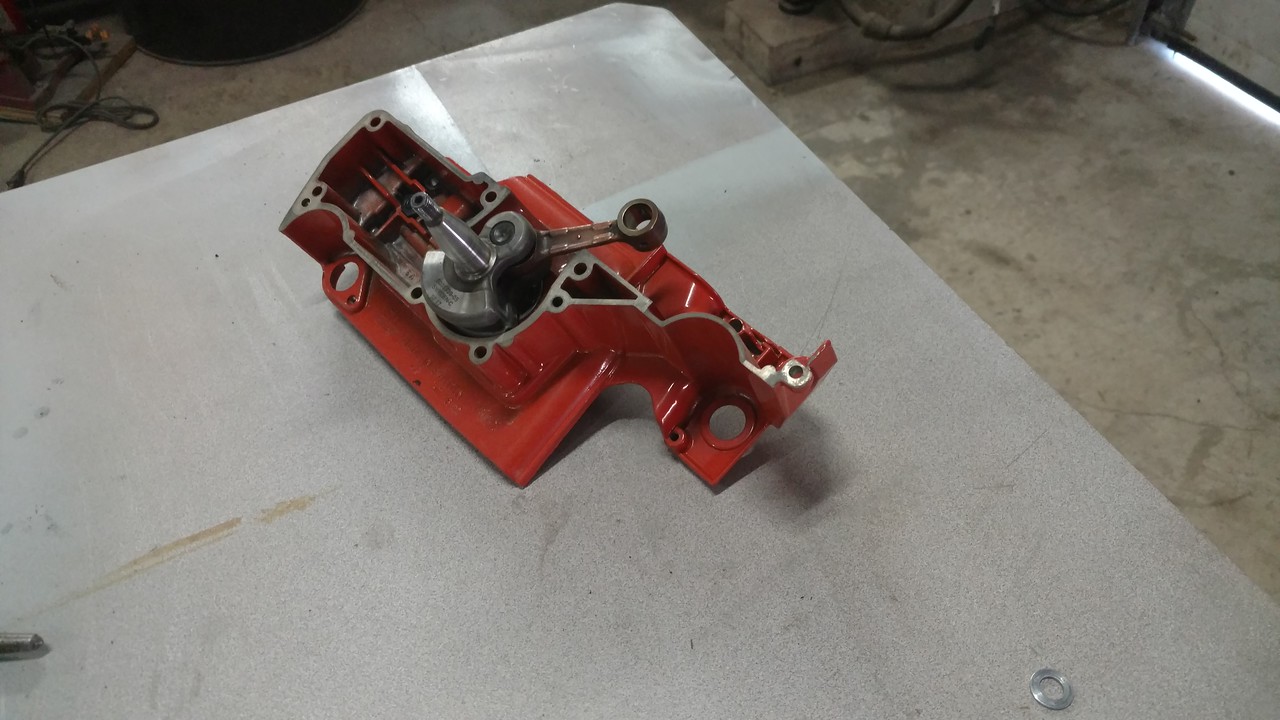
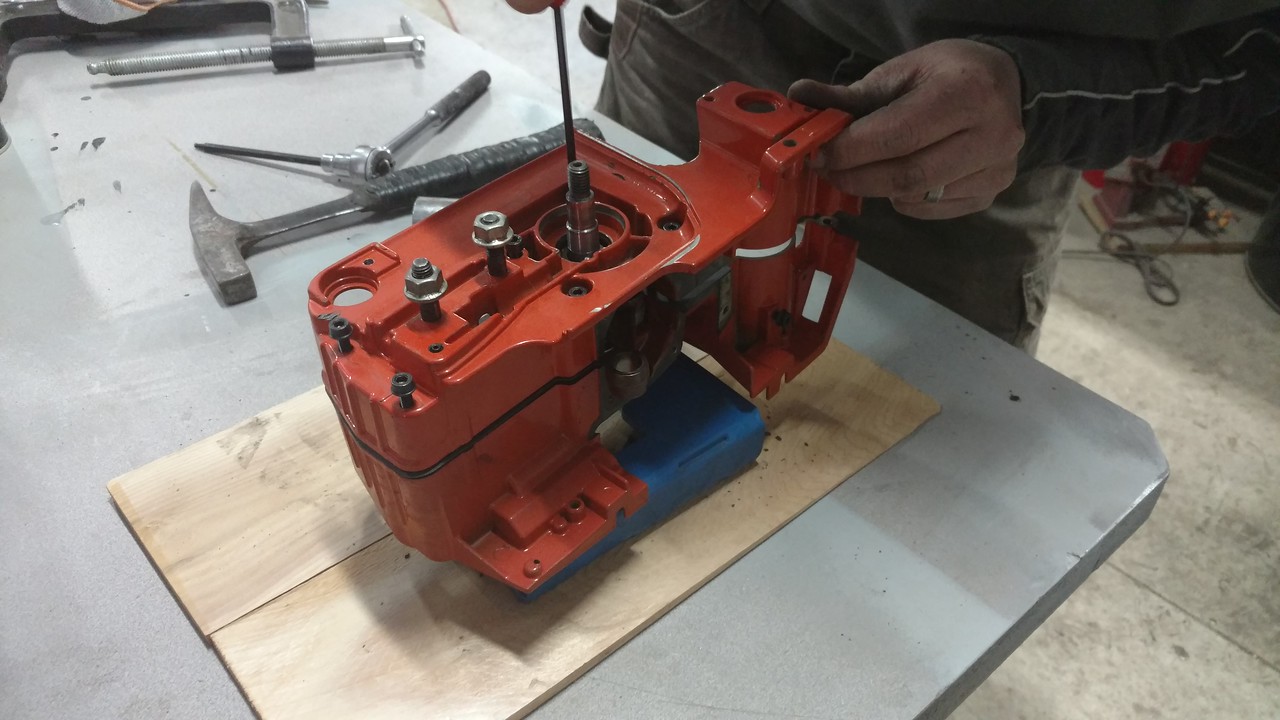
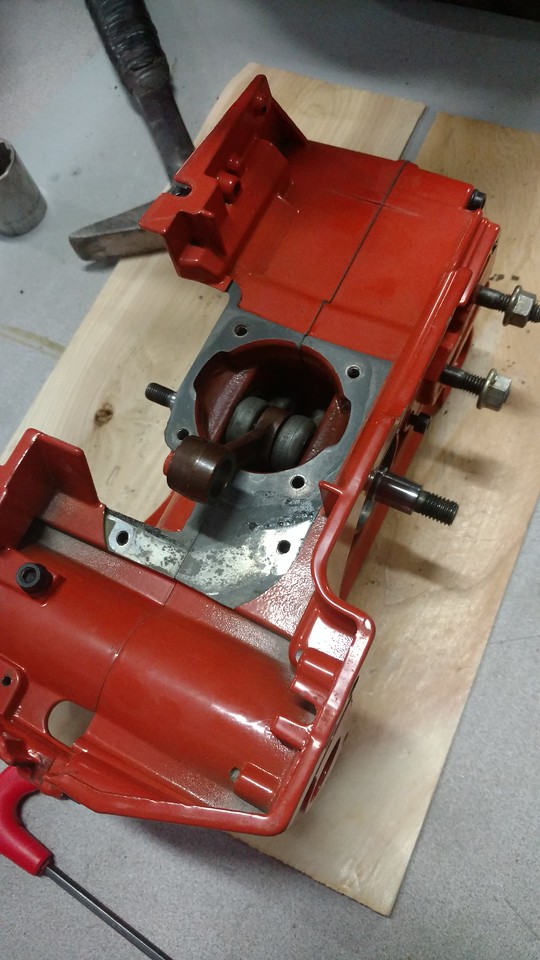
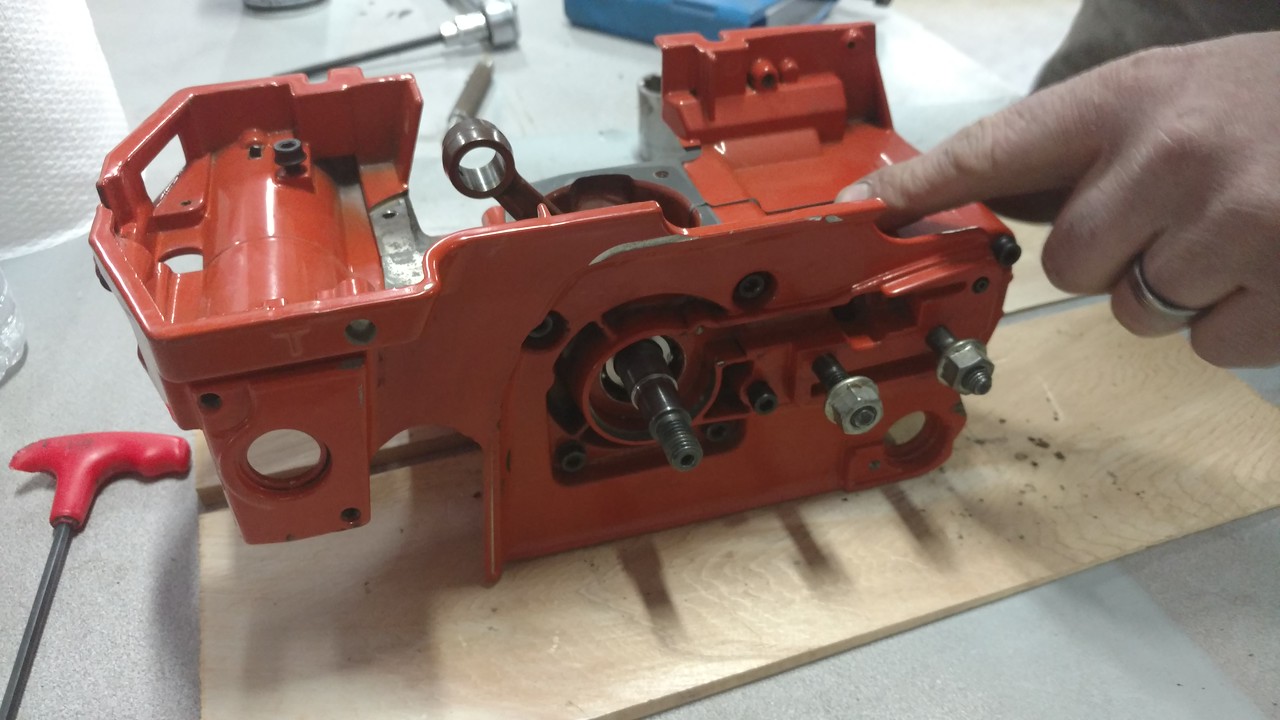
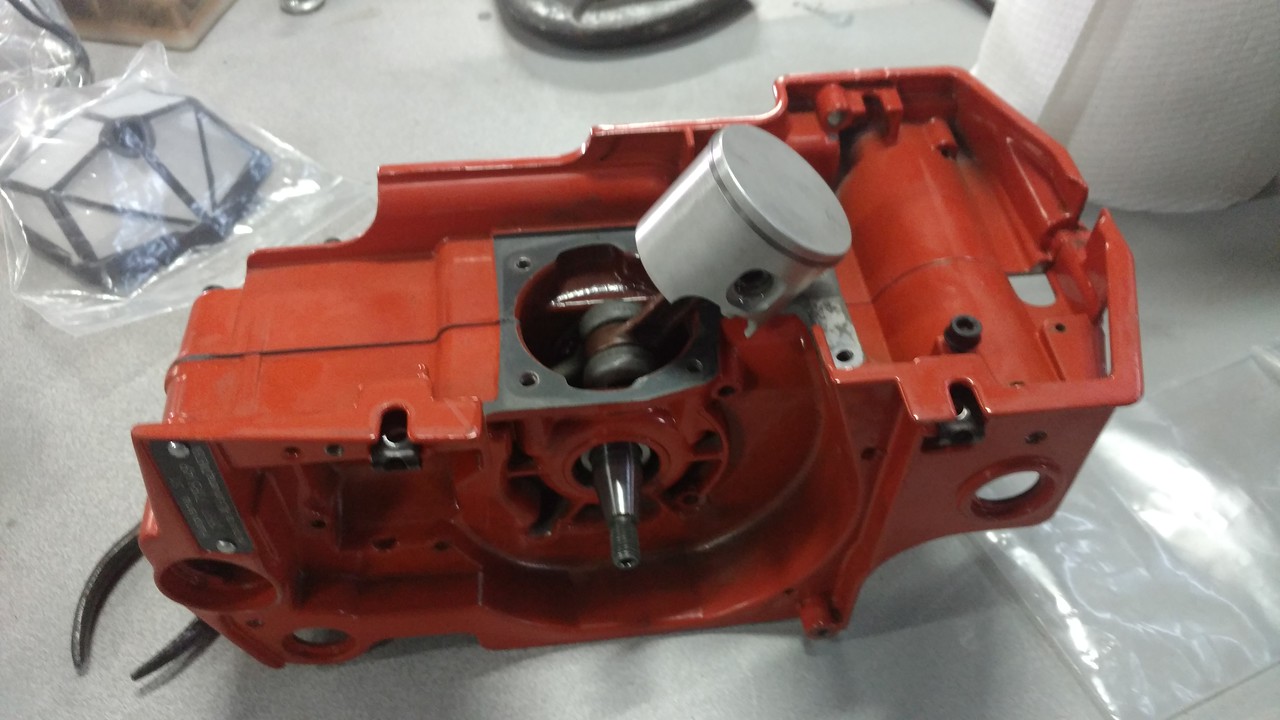
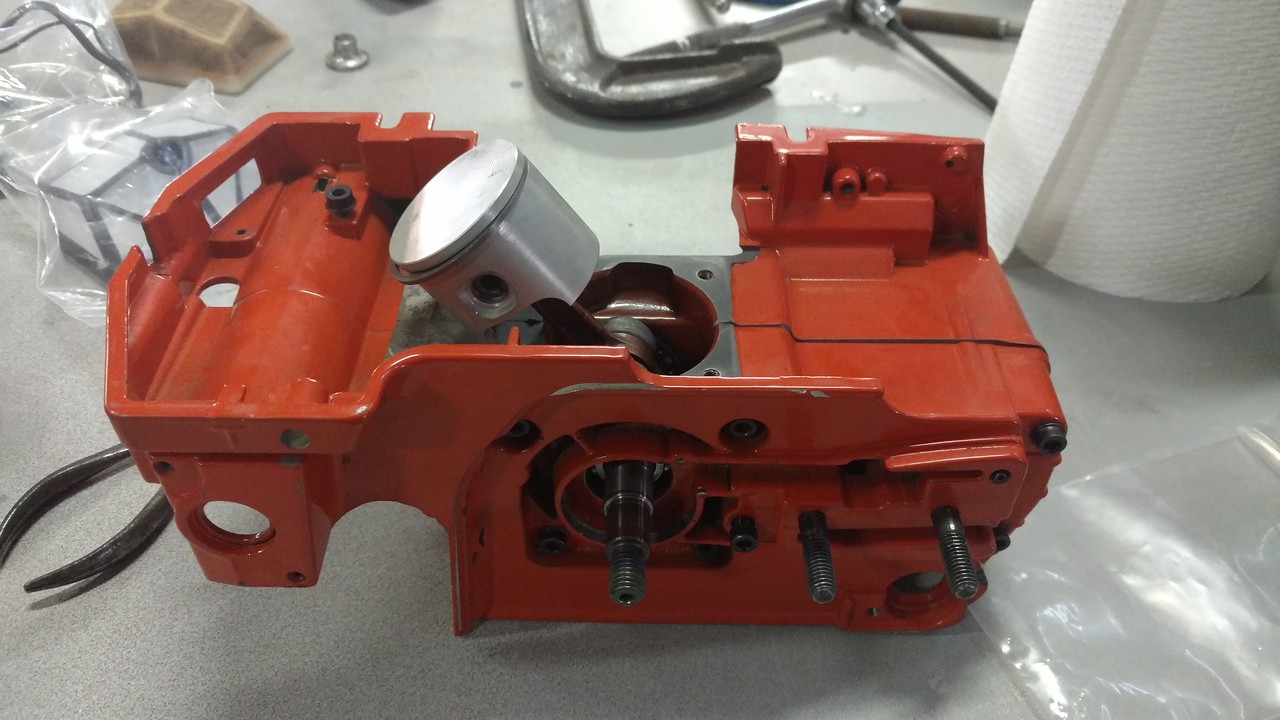
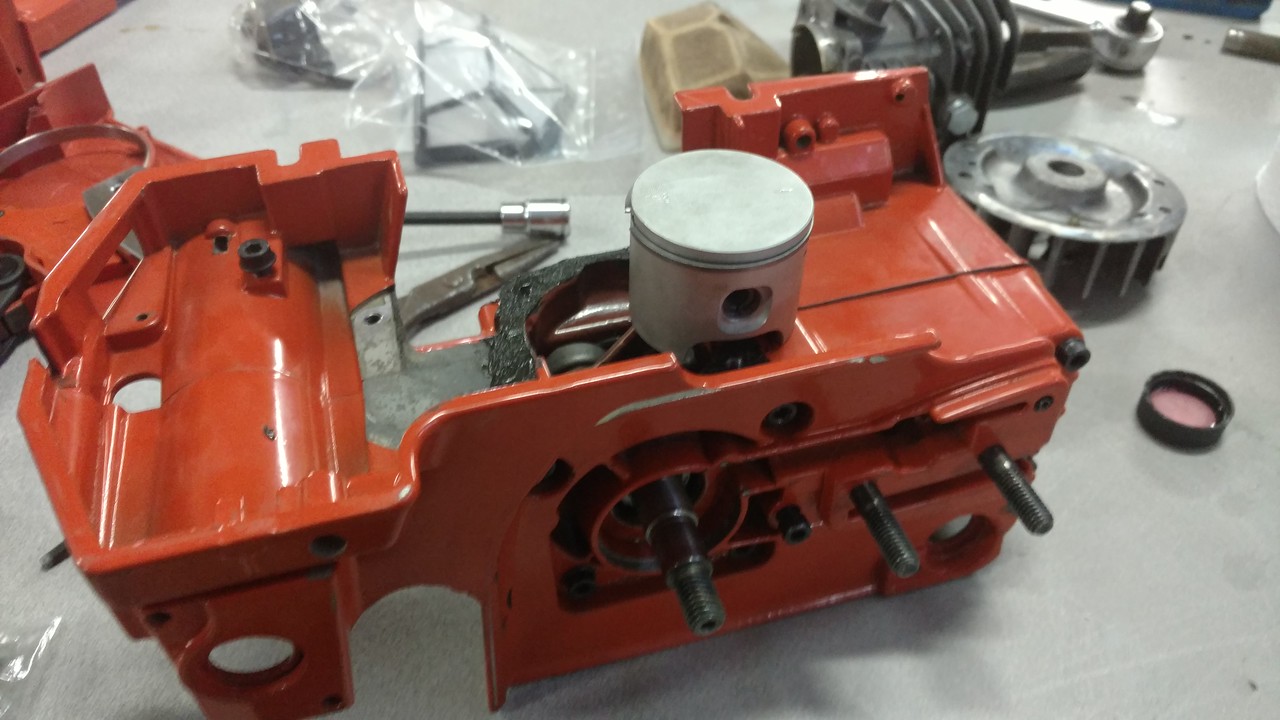
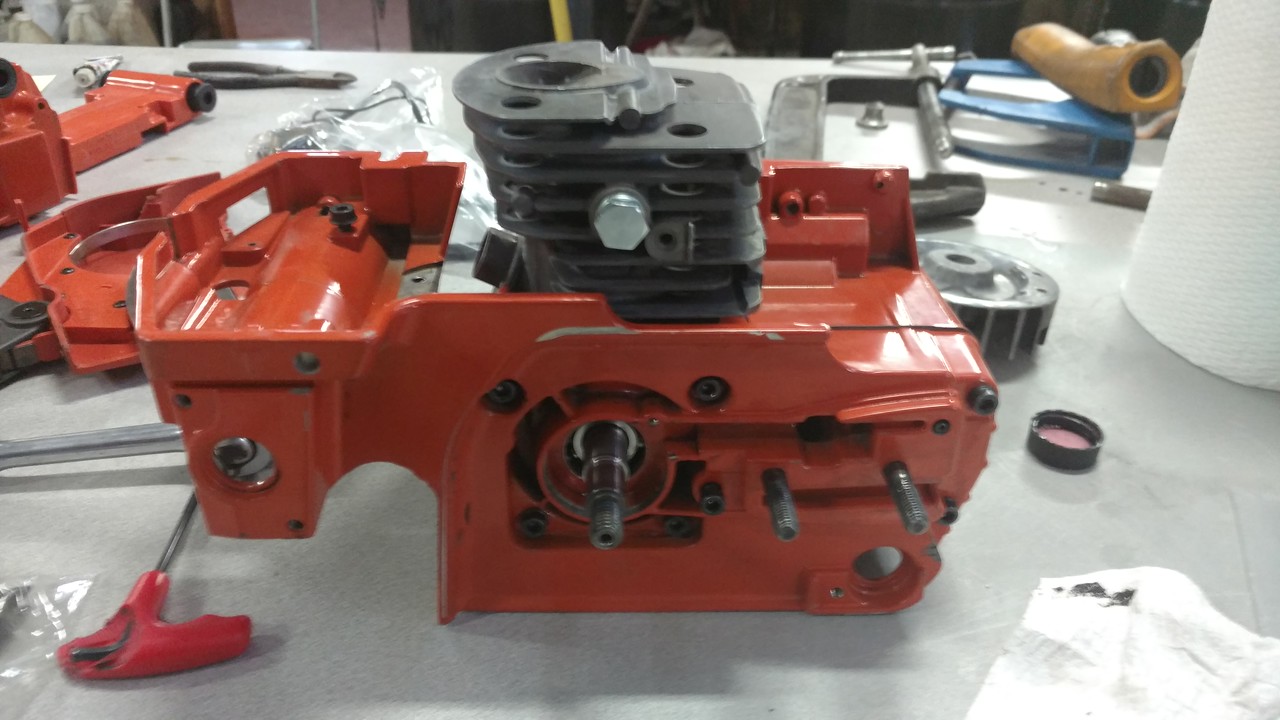
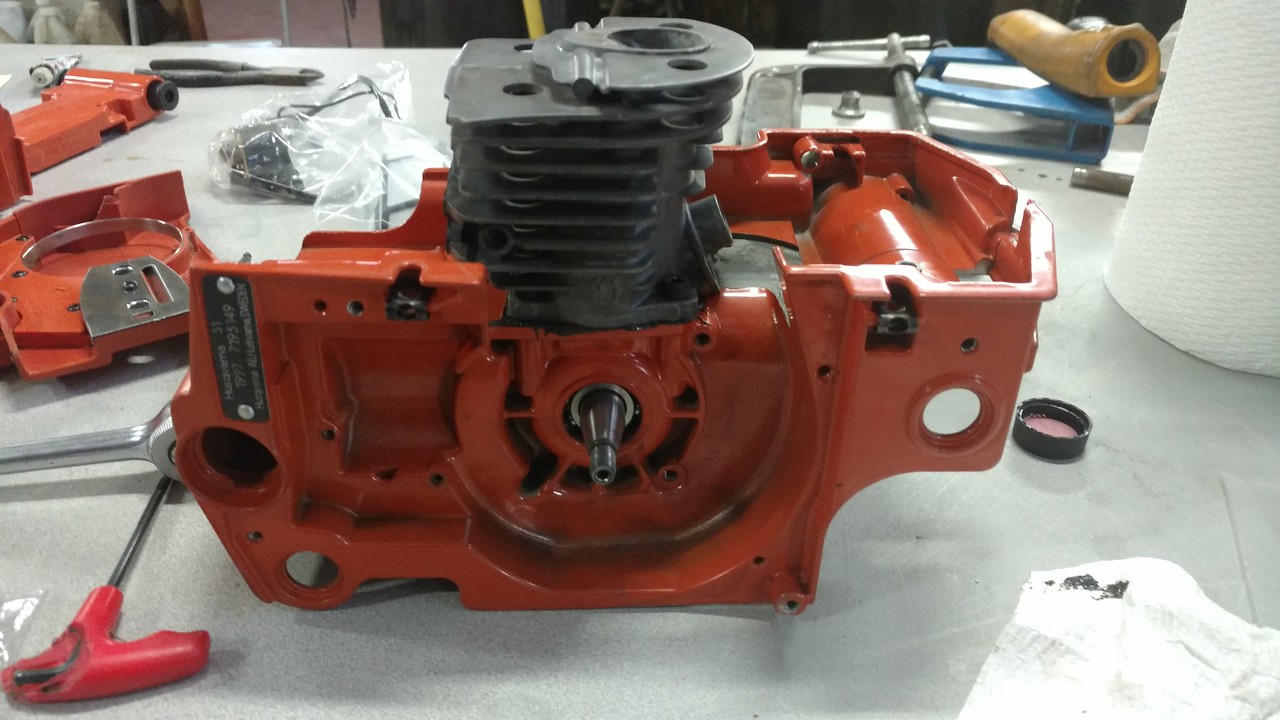
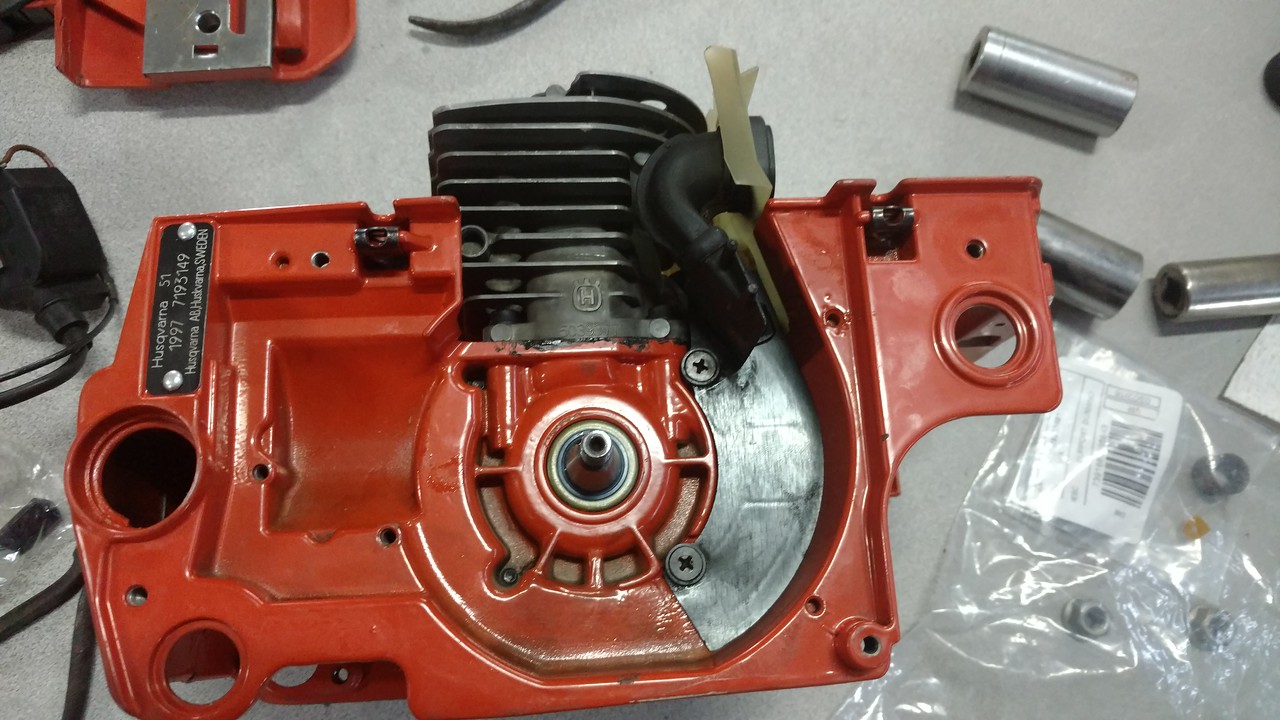
With a cold crank after some heat soaked into the PTO bearing we dropped the crank in. Used a center punch to save crank threads and a few taps to get the PTO side cam mostly where it belongs.

IMG_20170218_091734274-X2.jpg


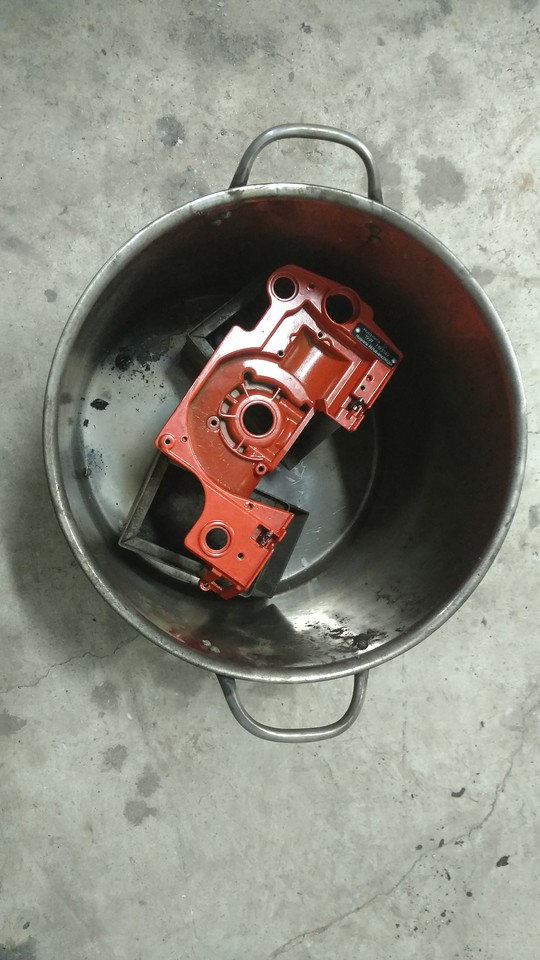
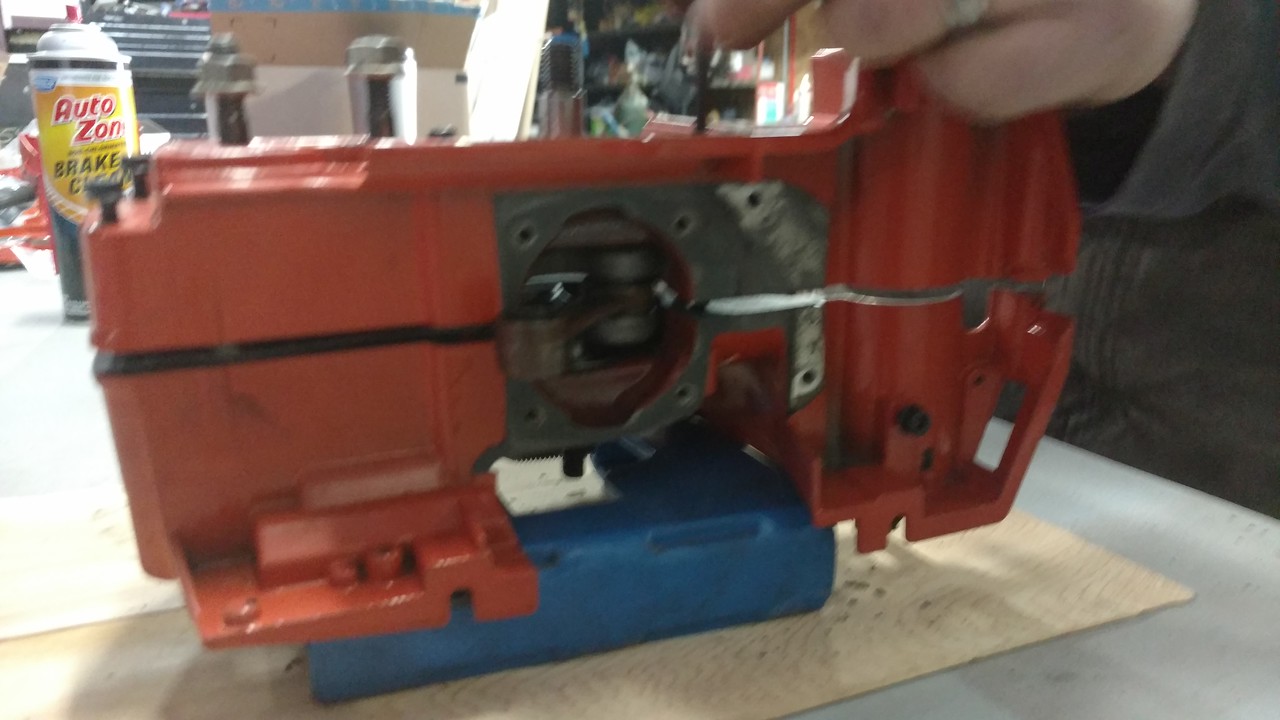
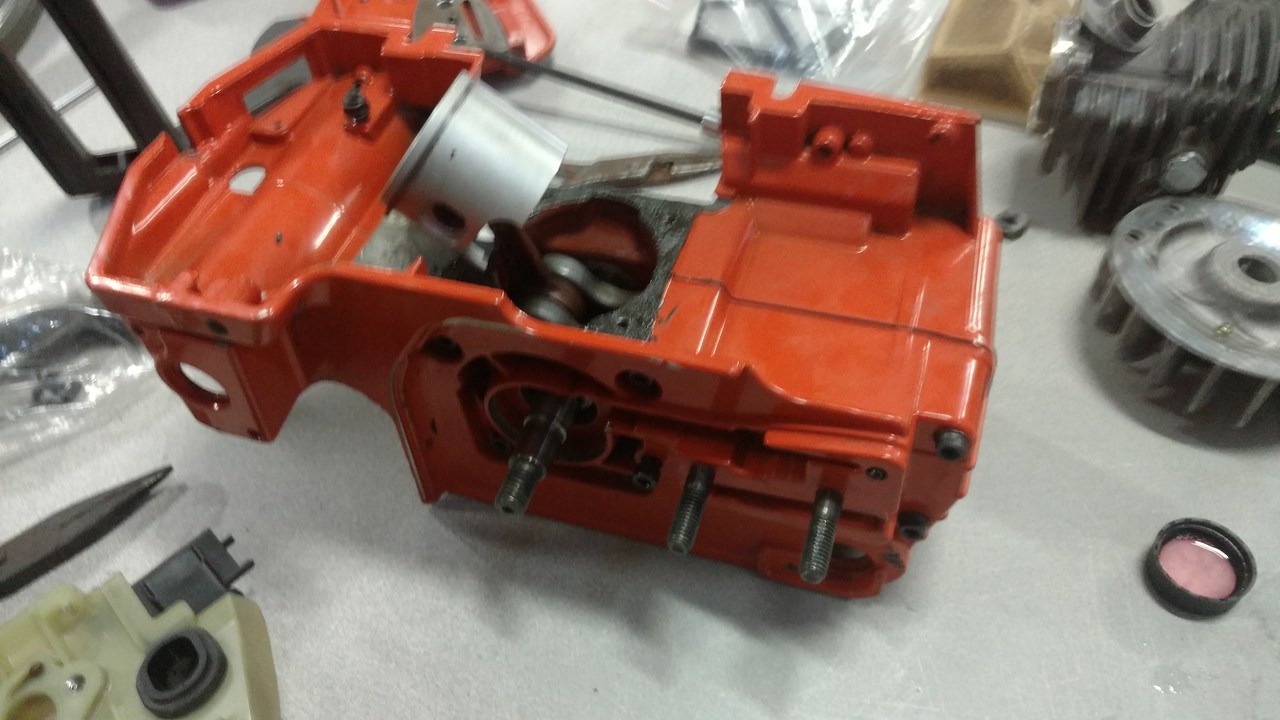
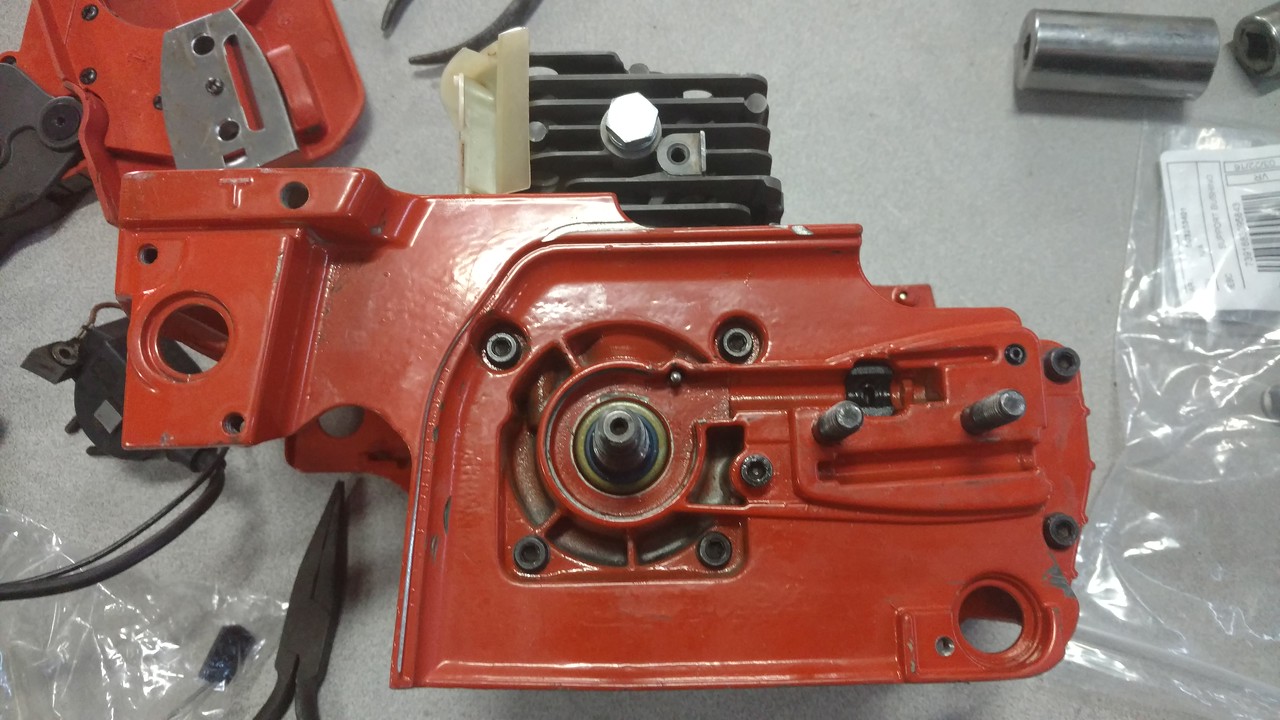
Flywheel side case half goes for bake in the furnace. Only takes about 10 mins to get up over 300 on the coals in there. More in next post.
 

malk315

Running Saws for Therapy
Local time
5:52 AM
User ID
421
Joined
Jan 6, 2016
Messages
2,101
Reaction score
10,140
Location
Lancaster, MA
Country flag
IMG_20170218_092941364-X2.jpg


Checking temp to see about getting flywheel side bearing in.

IMG_20170218_093011693-X2.jpg


This one needed a little coaxing with a socket to engage the bearing and a few taps to get it home.
Let some heat soak in so we can get her over the crank. Laid out the case half bolts
and put the case gasket on the locator pins to help hold it in place while we get the case together.

IMG_20170218_094448333-X2.jpg


PTO side case half came in from laying on the snow outside to help get the crank through the flywheel side case half. Used the six case bolts to bring everything closed evenly. With the cold side and warm side no creaks or stress noises it just went together like butter!

IMG_20170218_094455379-X2.jpg


IMG_20170218_094943172-X2.jpg


Few taps with center punch to get crank cam lobes where they belong and case bolts tight we have a completed case!
 

malk315

Running Saws for Therapy
Local time
5:52 AM
User ID
421
Joined
Jan 6, 2016
Messages
2,101
Reaction score
10,140
Location
Lancaster, MA
Country flag
IMG_20170218_095129908-X2.jpg


Start thinking about no base gasket and check squish.

IMG_20170218_095137806-X2.jpg


IMG_20170218_095147355-X2.jpg


IMG_20170218_100806796-X2.jpg


Little oil on the wrist pin and new needle bearing drop those in with new 55 piston. @huskyboy gave me some circlip install tips pretty simple on huskies with the grove. Rotate 'em in with needle nose holding the ear and then give em a spin to ears at 6 o'clock making sure they are in their grooves.

IMG_20170218_100815783-X2.jpg


IMG_20170218_100824847-X2.jpg
 

malk315

Running Saws for Therapy
Local time
5:52 AM
User ID
421
Joined
Jan 6, 2016
Messages
2,101
Reaction score
10,140
Location
Lancaster, MA
Country flag
IMG_20170218_103344777-X2.jpg


I don't have a picture but I installed cylinder without a gasket and checked squish. It didn't crush the thin or thick solder Dan had so we knew the squish was large. I was reading another thread about 50/51/55 and it seems it's common for these to have really large squish. Didn't want to get into machining the base and changing transfer timing etc. Mainly wanted to make sure with no base gasket the squish wouldn't be too tight. No problem there!

I put way too much permatex #2 on half of base so I spread it around to thin it out. Ready for final cylinder install.

IMG_20170218_103400589-X2.jpg


IMG_20170218_104210598-X2.jpg


IMG_20170218_104218805-X2.jpg


Cylinder bolted on.

IMG_20170218_110526841-X2.jpg


New impulse grommet it's hiding to the left of the intake boot. It seems it's much easier putting the intake boot on the jug first when getting ready to install the intake. The boot on this one was in perfect condition so I did not replace it. Seals nicly on the jug.

IMG_20170218_110530910-X2.jpg


Theres that impulse grommet. Common issue on these is leak at the impulse grommet which I think is what contributed to this saw smoking it's original 51 top end. Tip from @wcorey if you have one of these failing you can remove it, turn around, and re-insert the other side having not been mated with the impulse tube can get you by until it can be replaced.

IMG_20170218_111445830_TOP-X2.jpg


Installed the intake -- the impulse horn went home into the grommet nice and tight and made a really nice seal. Not worried about the impulse on this thing for a long time.
Notice the intake upgrade the saw's owner drilled out the plastic where self tapper screws hold the carb on. Heli coils installed in the plastic to allow torquing the carb on and not have the self tapper screws strip the plastic which is a common issue on these also. Strongly recommend the intake upgrade!
 
Last edited:

malk315

Running Saws for Therapy
Local time
5:52 AM
User ID
421
Joined
Jan 6, 2016
Messages
2,101
Reaction score
10,140
Location
Lancaster, MA
Country flag
IMG_20170218_111510630-X2.jpg


Air injection tube ready to go.

IMG_20170218_114341519-X2.jpg


Support installed before flywheel and coil. Support screws have factory loctite on them.

IMG_20170218_114351189-X2.jpg


PTO side seal -- oil the bead and with a twist around the lip it went over no prob for me. Use a socket to tap it home by the metal so the rubber and spring parts don't get hurt.

IMG_20170218_115545123_TOP-X2.jpg


Flywheel side seal is easy with the cone shape it slides right on. Tap it home with a socket. Install coil bolts finger tight install flywheel. Insert a business card between coil pickups and flywheel magnets to set the gap and tighten coil bolts home. Remove business card and check clearance.

IMG_20170218_115830603-X2.jpg


Flywheel shroud and route ignition and kill switch wires.

IMG_20170218_121000428-X2.jpg


Insert oiler sump which is under the rubber piece that is between the bar studs. This is a common wear part on these, this one in good shape. Had to tap the seal home a bit more to get the worm gear home and oiler to sit flush. You can see the brass pipe fitting -- put the oil pump worm gear in the furnace for a while so it would go over the crank easier. I think it's 1/2 " pipe thread on the fitting screw on to worm gear (so you can tap fitting without wrecking the worm gear threads) and tap to press worm gear on to crank. Had to make sure seal was home and clear of the worm gear keep checking so worm gear doesn't get involved with seal. This is the crank driven oiler variety like my 262 where the oiler runs all the time off the crank instead of the clutch side. This setup works great so we didn't change anything.

The washer shown over the oiler goes on after the metal oiler cover goes on to protect cover and oiler from the clutch -- I got ahead of myself in the picture LOL. Installed chain adjuster with new OEM retension grommet to keep it from backing out. Old school front chain tensioner instead of side tensioner. At very front of oiler trough near front top case bolt is the oil tank vent tube. That was in great shape and was installed before the case halves went togther. Good thing we remembered that vent!
 
Last edited:

malk315

Running Saws for Therapy
Local time
5:52 AM
User ID
421
Joined
Jan 6, 2016
Messages
2,101
Reaction score
10,140
Location
Lancaster, MA
Country flag
IMG_20170218_123825866-X2.jpg


Remember: the starter cover should be installed upside down.

IMG_20170218_123832489-X2.jpg


Route the ignition and kill switch wires in notch where starter cover allows them up to the upper half of saw. Install starter cover.

IMG_20170218_123842389-X2.jpg


Metal plate covring the oiler setup. The grommet that keeps the tensioner from falling out can be installed after the fact but takes a lot longer. Much quicker if done prior to installing metal cover and clutch and the like.

IMG_20170218_124531570-X2.jpg


Grease the new clutch needle bearing, drop that washer, bearing, and clutch drum with rim sprocket on. These saws are nice they come with factory rim sprocket not spur sprocket. Magnesium case no plastic too.

IMG_20170218_124840342-X2.jpg


Spin the clutch on reverse thread, use rope as piston stop and tighten the clutch with socket. Clutch spring in great shape no need to replace.

IMG_20170218_130821859-X2.jpg


Rear handle / tank on these you mate the plastic to where it goes on the case and then insert the rubber mounts to "pin" the handle/tank to the case. We thought the mounts went in first but much easier when you put it together the right way. The chain catch, starter cover, and plastic cover have pins that go in the centers of the mounts. Best to hold off on starter cover til the rear handle/tank goes on since cover has one of the AV mount pins. The rubber mounts were in mint condition so no need to replace.

Starting to look like a saw!

IMG_20170218_133417744-X2.jpg


Choke lever and throttle linkage are a bear. Need to hang throttle linkage and choke lever on the carb and then install carb to intake. This is because throttle linkage goes under filter holder in tiny slot and choke lever also has a tiny slot. Nice that I have the heli coil upgrade on the carb bolts because I had this on and off like 3 times because of course I forgot to install the top cover clip to the left of the H and L slots and filter holder had to come off one more time to get that clip installed. Only part of the saw that the frustration meter went up a bit.

IMG_20170218_133423416-X2.jpg


You can see the spot the choke lever comes through and the tiny slot the throttle linkage goes through under the filter mount. I refuse to talk further about the top cover clip on the right there that rat bastard.

IMG_20170218_141451761-X2.jpg


Forgot to take a picture with new mesh air filter installed. Top cover and handle bar and we have a completed powerhead.

Forgot to mention @huskyboy helped me thread the new fuel line through the tank. Re-used fuel screen inside tank it was in mint condition. Blew through it and flows no problem and it's clean. Fuel line routes easily through case grommet and install on carb any of the 3 times the carb was off to get the linkages set :)

IMG_20170218_141458718-X2.jpg


IMG_20170218_141503866-X2.jpg


Ditched spark arrestor screen (had to break the screw to get it off anyway. Dremeled out the baffles I don't have a before pic. Just cut the tabs and pull it out with pliers. I also cut out the bridge that creates two ports and made it one big hole there on the left -- dual port to big ass single port :) Also opened up the deflector just straightened the pieces that overhang and restrict flow.

IMG_20170218_142930377-X2.jpg


Completed powerhead.

IMG_20170218_142937612-X2.jpg


Installed the muffler and felling spike.
 
Last edited:

malk315

Running Saws for Therapy
Local time
5:52 AM
User ID
421
Joined
Jan 6, 2016
Messages
2,101
Reaction score
10,140
Location
Lancaster, MA
Country flag
IMG_20170218_142945394-X2.jpg


These have the muffler bracket like a 346 that helps keep the muffler from loosening like 350s can be plagued with. Muffler has studs on the jug with nuts on the outside. Used new exhaust gasket that came with the gasket kit.

IMG_20170218_143920331-X2.jpg


Brandy new Oregon Powermatch plus 0.325 pitch 0.058 gauge x 18" bar with 21LPX round ground full chisel chain.

IMG_20170218_143932537-X2.jpg


She's purdy for a '97 old girl. Dan had no shortage of carcasses of 50/51/55 saws he pulled from the pile in his basement when we needed to see as reference where something went. Who needs an IPL?
 

SOS Ridgerider

Muffler Modded Member
Staff member
GoldMember
Local time
5:52 AM
User ID
1222
Joined
Apr 30, 2016
Messages
2,483
Reaction score
14,759
Location
Central CT
Country flag
Some more fun from yesterday -- we had Daryl (Mason @huskyboy dad), Sondre, and @huskyboy came by since they are all from Connecticut and not too far from Dan's place.

IMG_20170218_153937259-X2.jpg


IMG_20170218_153924630-X2.jpg


IMG_20170218_165401909-X2.jpg


IMG_20170218_151925332-X2.jpg


IMG_20170218_151919225-X2.jpg


IMG_20170218_153931340-X2.jpg
Fixed my name for ya. I don't blame anyone for not knowing how it's spelled. Lol
 

paragonbuilder

Mastermind Approved!
Local time
5:52 AM
User ID
384
Joined
Jan 2, 2016
Messages
9,229
Reaction score
33,865
Location
Norwich, CT
Country flag
First tank Dan running it. Tuned it to about 13K and I backed it to 12800 for break in
This saw is a great example of fastest tune not always being best. If limbing sure, it's great on the edge. But it's obvious this saw has more power at like 12.5 than it does at 13 when bucking.
My 55 on the dyno showed this as well.
 

RI Chevy

Mastermind Approved!
Local time
5:52 AM
User ID
1254
Joined
May 7, 2016
Messages
27,002
Reaction score
67,761
Location
earth
Country flag
Nice. I learn something every day. ;)
 
Top