High Quality Chainsaw Bars Husqvarna Toys

First saw build 272xp

roadster27

Super OPE Member
Local time
9:25 PM
User ID
7665
Joined
Oct 25, 2018
Messages
120
Reaction score
501
Location
Vancouver, WA
The degree wheel was just zip tied on the the clutch to get the first reading it was centered pretty well but my starting #'s my have been a little off but that didn't matter as it was going to be ported anyway. I mounted it to a drill chuck when I did start my porting.

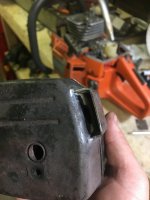
This is what it looked like after the base cut.
IMG_3235.JPG
The target #'s I decided on, 100-120-80 or there abouts, came from a thread on here by @Magic_Man. His 272xp build and port thread... I owe a lot of my inspiration and credit to that thread. It's what got me really fired up about starting this project.
 

roadster27

Super OPE Member
Local time
9:25 PM
User ID
7665
Joined
Oct 25, 2018
Messages
120
Reaction score
501
Location
Vancouver, WA
This is the first time I have ever carved on anything! But what better time than the present to try. I dug up an old flex shaft dremel that my brother gave me and started on the exhaust port first.

Here is before I started. It was nice being a used cylinder because you can see the skirt marks on the bore....
IMG_3248.JPG
The pencil lines on the sides are where I'm going to cut to.
IMG_3249.JPG
I stayed about 2mm from the skirt edge....
The carving went a lot better and faster than I expected. This is where a beginner needs to make sure they don't go to fast a f*** something up before they realized it.
IMG_3253.JPG IMG_3254.JPG
She looks a little wonky but once again this is where the beginning needs to realize that if you keep trying to "fix it" by taking out more material you will go waaaay out side your numbers! Put the tool down. It's good enough...
 

cus_deluxe

terms of service violator
Local time
12:25 AM
User ID
393
Joined
Jan 3, 2016
Messages
5,195
Reaction score
24,220
Location
Michigan
Country flag
No just the base. But now you have me thinking.... should I have?
I dont do any machine work, but i know its pretty typical procedure to take at least as much off the extension as off the base, though if it doesnt interfere with the cylinder sitting down all the way im sure youd be ok without it. Hopefully someone who actually knows wtf theyre talking about comes in here lol.
 

roadster27

Super OPE Member
Local time
9:25 PM
User ID
7665
Joined
Oct 25, 2018
Messages
120
Reaction score
501
Location
Vancouver, WA
I dont do any machine work, but i know its pretty typical procedure to take at least as much off the extension as off the base, though if it doesnt interfere with the cylinder sitting down all the way im sure youd be ok without it. Hopefully someone who actually knows wtf theyre talking about comes in here lol.
Thanks for the heads up. It didn't even cross my mind until you asked. Then my wheels started turning and that is same thing I was thinking. There is no interference I would think at this point. But I'm glad you brought that up. Something to look out for and do on future builds.
 

srcarr52

Shop rat, backyard slice cutter.
GoldMember
Local time
12:25 AM
User ID
522
Joined
Jan 12, 2016
Messages
3,937
Reaction score
25,982
Location
Iowa City
Country flag
Thanks for the heads up. It didn't even cross my mind until you asked. Then my wheels started turning and that is same thing I was thinking. There is no interference I would think at this point. But I'm glad you brought that up. Something to look out for and do on future builds.

I'd check it without a gasket to make sure, I know of at least one person who blew up a saw because the skirt extension was contacting the case and collapsed the bore.
 

roadster27

Super OPE Member
Local time
9:25 PM
User ID
7665
Joined
Oct 25, 2018
Messages
120
Reaction score
501
Location
Vancouver, WA
I'd check it without a gasket to make sure, I know of at least one person who blew up a saw because the skirt extension was contacting the case and collapsed the bore.
Thanks for the heads up. I am running a base gasket and the saw is running now. If she was going to have a problem I'm sure it would have happened by now.... this is why I chose to join this place. Lots of helpful people with eyes for thing you may have over looked. I will definitely watch out for that on all the next builds. I'm to lazy to take this one back apart as she is running real well now. I took .017" off the base which isn't much but still enough to reck stuff. Once I have some time I may double check on it....
 

roadster27

Super OPE Member
Local time
9:25 PM
User ID
7665
Joined
Oct 25, 2018
Messages
120
Reaction score
501
Location
Vancouver, WA
Here's a real fun one. When it can time to do the intake I chose to lower the floor instead of the whole jug and cutting the band, aiming for around 78*-80*. On the next build (288) I will be trying the band cut. Looking back there are a few advantages to that over lowering the floor, but hey gotta start somewhere. I made a few fun mistakes here. First I read some where that you want a nice flat port and curved on the opposite. So I did that. Just on the wrong side I made that roof nice and flat. :facepalm:
I did widen the port as well leaving about 2mm of skirt coverage. Match up to the carb manifold or what ever it's called and left it a little rough.
IMG_3251.PNG IMG_3246.JPG IMG_3247.JPG
It ended up a little lopsided but once again what it's a first build and there comes a point where it's time to put the grinder down.... ps the factory port isn't the most symmetrical to begin with.
 

roadster27

Super OPE Member
Local time
9:25 PM
User ID
7665
Joined
Oct 25, 2018
Messages
120
Reaction score
501
Location
Vancouver, WA
Once all the porting was done I used a Dimound ball bit and beveled the edges of all the ports. I put the cylinder on it with the new meteor piston ring and old c clips and used a base gasket.

Final #'s can out to 102*-124*-78*. With .023" squish. I didn't want a saw that had to high and narrow of a power band. I like things I can lean on a little. I'm a real believer in "let the tool do the work" but I still like to feel like I'm doing something....lol

What do you guys think of those #'s?

I know that #'s are only a small part of porting, shap, size, angle... are just as or more important.

I think that amount of blow down is a little much but I don't know much about how they react with changes. If I were to go back in, I think I would shot for 20* of BD. What do you all think?

Anyway, here's a pic of the top end all buttoned up.
IMG_3263.JPG
IMG_3264.JPG
 

drf256

Dr. Richard Cranium
GoldMember
Local time
12:25 AM
User ID
319
Joined
Dec 29, 2015
Messages
9,357
Reaction score
61,535
Location
Strong Island NY
Country flag
Excellent work. Your ex port really looks great to me.

As mentioned, be careful with that extension, I’ve been burned before by it. Sometimes, the design of the saw/case makes the case volume flow around the extension, and dropping the base without taking some off the extension will impede flow. Other times, it bottoms out on the case and causes the base to not fully seat. I can’t recall your model off the top of my head.

Numbers sound great to me except for the uppers. Where you go depends on the use of the saw a bit. 100 ex will feel zippier and be faster with a short bar, but a big cut and 102 should give you more lean on. I like low ex roofs for worksaws.

Round intake ports cause less piston skirt wear. Look at the Venturi of your carb, measure, and then take some intake port measurements. I used to go big and square with my intake ports, but not anymore. All your doing is decreasing throttle response and increasing skirt wear. That’s the thrust surface on a piston, the intake skirt. Sometimes dropping the center of a port to 80* and not the entire floor to 76* will make a better running saw.

I’d personally raise your uppers to 120-122. If you don’t have a reliable way to do so, I’d leave them alone. Your more apt to make the saw run worse.

Again, excellent work and thanks for sharing.
 

XP_Slinger

They’re Just Saws
Local time
12:25 AM
User ID
845
Joined
Feb 9, 2016
Messages
6,089
Reaction score
27,522
Location
Central NY
Country flag
@roadster27 Excellent work! Your 2100 story made me blow coffee out muh nose lol!

Another thing to look out for on these 2 series huskies after a base cut is interference between the intake partition and the lip of the crank case it rests on. This can prevent your cylinder from sitting flat on the case prior to tightening. Here’s the kicker though, you can usually tighten the cylinder down and get it to seal but there will be a lot of stress on the intake block which will eventually cause it to crack....just FYSA. Easy to check, simply install the intake block, partition and carb on your cylinder then set it in place on the crank case and check that it’s sitting flat. If it’s being held up just grind down the lip the partition rests on until it no longer holds the cylinder off its mating surface. One of those little things to look out for that can make or break a 2-series build.

I’m really enjoying your thread, looking forward to your 254, 262, 268, 281 and 288 builds. Yes that’s my prediction for your CAD acquisitions...lmao!!!
 

roadster27

Super OPE Member
Local time
9:25 PM
User ID
7665
Joined
Oct 25, 2018
Messages
120
Reaction score
501
Location
Vancouver, WA
Excellent work. Your ex port really looks great to me.

As mentioned, be careful with that extension, I’ve been burned before by it. Sometimes, the design of the saw/case makes the case volume flow around the extension, and dropping the base without taking some off the extension will impede flow. Other times, it bottoms out on the case and causes the base to not fully seat. I can’t recall your model off the top of my head.

Numbers sound great to me except for the uppers. Where you go depends on the use of the saw a bit. 100 ex will feel zippier and be faster with a short bar, but a big cut and 102 should give you more lean on. I like low ex roofs for worksaws.

Round intake ports cause less piston skirt wear. Look at the Venturi of your carb, measure, and then take some intake port measurements. I used to go big and square with my intake ports, but not anymore. All your doing is decreasing throttle response and increasing skirt wear. That’s the thrust surface on a piston, the intake skirt. Sometimes dropping the center of a port to 80* and not the entire floor to 76* will make a better running saw.

I’d personally raise your uppers to 120-122. If you don’t have a reliable way to do so, I’d leave them alone. Your more apt to make the saw run worse.

Again, excellent work and thanks for sharing.
Thanks for all the info. I really appreciate all the people here willing to share. It makes a lot of sense about the intake skirt being the thrust on these things. That explains why I see wear on the skirt and plating Worn off around the intake port on some of the other saws I have started to take apart.
I will probably also leave the port size a little smaller on the next one. I'm not building race saws here...

I will probably go in and do the upper once I get my confidence up in that department. This saw will be the first when I chose to do so.
 

roadster27

Super OPE Member
Local time
9:25 PM
User ID
7665
Joined
Oct 25, 2018
Messages
120
Reaction score
501
Location
Vancouver, WA
@XP_Slinger thanks for the info on the partition. I remember this being an issue for a lot of build and guys having air leaks, but I'm pretty sure I overlooked it on this one. I will check. Thanks

I think when I get some time I will be taking off the cylinder to check the extension length, Height of partition between the cylinder and carb, and might try my hand at raising the transfers.

I have read about guys stacking wheels on there flex shaft. I can picture it in my head but is there any threads that show some pics or how to's.....?

I plan on getting a proper flex drive and 90* head at some point. I Believe in "there is the right tool for everything". At the same time most of my childhood was spent under the shade of a tree using a screwdriver for a punch and a 12 inch crescent wrench as the motivating force. Things of changed a lot since then. But I still remember how to make do with very little tool. Still know how to make chicken soap from chicken s***. Lol

Like I said, this saw is one to learn on. If I turn the cylinder into a paper when I'm done I will start over with the new meteor p/c kit I have sitting on the shelf. I bought it for a just in case....
 

roadster27

Super OPE Member
Local time
9:25 PM
User ID
7665
Joined
Oct 25, 2018
Messages
120
Reaction score
501
Location
Vancouver, WA
The timing was another fun one. I first timed it stock at right about 22* btdc. How I did this was to first color one of the flywheel fins all black, then use the degree wheel to find tdc and mark that along with 20*25*&30* btdc on the cover thing (sure it has a better name than cover thing lol).
image.jpg
I have read that the 272's like timing advance and somewhere around 30* really wakes them up. I found this to be true. How there are a few thing to keep in mind.
*First remember to alway reset your timing marks that you put on the saw as everytime you reclock the flywheel on the crank the flywheel now changes in relation to the crank and Tdc.
* second, and this is a big one, trust me! When you file down the key (this saw has it cast into the flywheel) make sure you pay attention to WHAT SIDE YOU ARE FILING!!!! And the "left side" or "right side" is not it! Because that goes completely out the window when you go to put the flywheel in the vise to hold it and pay no attention to which direction it is pointing. i.e. You are filing what the front of the flywheel facing you or the back of the flywheel facing you.... slow down pay attention!!!!
It's a 50/50. But get it wrong, put the saw back together and you end up with an absolute turd for power. Lol. You will scratch you head for a min trying to figure out what you did and when it hits you you feel like a completely idiot... now you are around say 14*btdc!
If it were a key you just turn it around but not on this one. Lucky there is enough key to file the other side. I may see a new flywheel in my future though.
*third make sure you clock the flywheel thight to the correct side of the key.
Once I had it all done up right the timing is right at 30* and running strong. No real kick back on start up or anything else.
He's my 2 year old helping me us the wife's '54 ford battery to time it...
IMG_3268.JPG
 

roadster27

Super OPE Member
Local time
9:25 PM
User ID
7665
Joined
Oct 25, 2018
Messages
120
Reaction score
501
Location
Vancouver, WA
Last thing I did for this build was the all mighty muffler mod.... there's a million ways to skin a cat and 2 mil. ways to do a mm....

I came across a thread on the 346xp by @Mastermind on the other site and really liked the way he made his own deflector (p.s. That thread lead me to tracking down and buying a 346xp to build. It's a real good running and looking OE saw. Stock for now, Later build to come...).
I wanted a dual port, but I don't really like the look some of the round "bike frame" dual ports. Just my preference. I like the more "stock" looking jobs. So I made a quick and dirty deflector with a hammer and a bench vise.
IMG_3278.JPG
I ended up cutting the teeth off the original deflector and drilling a 5/8" hole in the other side. I wish I went a little bigger but I can alway go back and change the original side or grind out the 5/8" hole. Not sure if it really matters at this point though. Once I had the layout of the deflector and the hole drilled I welded it on (I have never brazed before).
IMG_3294.JPG
IMG_3292.JPG
IMG_3295.JPG
 

Attachments

  • IMG_3295.JPG
    IMG_3295.JPG
    100.9 KB · Views: 8
Top