High Quality Chainsaw Bars Husqvarna Toys

Aftermarket decomps........making them work.

Chainsaw Jim

Con Artist LLC
Local time
6:04 AM
User ID
836
Joined
Feb 8, 2016
Messages
4,014
Reaction score
79
Location
Springfield Oregon
Even the US pricing of decomps, whether German or Swede has always baffled me.
I’d rather just put a $4 plug in its place and not have to worry about it ever leaking. I realize some saws however, do require them on a cold start.
You should check the price on one for an 076.
 

Terry Syd

Pinnacle OPE Member
Local time
11:04 PM
User ID
575
Joined
Jan 18, 2016
Messages
1,589
Reaction score
5,973
Location
Comboyne, NSW Australia
Country flag
So you cut another groove with a steeper shoulder for the ball bearings to ride up and over, is that correct? If so, why not just cut a steeper shoulder on the existing groove.

Thanks for the information, I've got some Chinese decomps coming in the mail and I'm going to try modding a few.
 

traffic903

Pinnacle OPE Member
Local time
11:04 PM
User ID
3911
Joined
Aug 28, 2017
Messages
343
Reaction score
1,390
Location
Australia
Country flag
So you cut another groove with a steeper shoulder for the ball bearings to ride up and over, is that correct? If so, why not just cut a steeper shoulder on the existing groove.

Thanks for the information, I've got some Chinese decomps coming in the mail and I'm going to try modding a few.
No steep shoulder required. Just a shallow groove with a file edge or a reinforced Dremel cutoff wheel. You know the thicker kind.

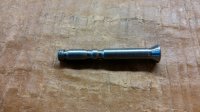
The problem with these decomps is that there IS a groove for the ball bearings when the valve is closed, but NO groove for when it is open. The shaft in that position is just smooth. Therefore the ball bearings have no "notch" to fall into and provide resistance to closing. It doesn't have to be deep. Check the photos. That is enough. Mod one and test the difference. You will see what I mean. It provides just enough resistance that the valve will "lock" open until the engine fires. I have done 5 now and they all work really well and they feel just like the OEM version.
 

traffic903

Pinnacle OPE Member
Local time
11:04 PM
User ID
3911
Joined
Aug 28, 2017
Messages
343
Reaction score
1,390
Location
Australia
Country flag
I’d rather just put a $4 plug in its place and not have to worry about it ever leaking.
Yeah mate me too. I wouldn't have worried except that Mai-Mai busts starters now and so I've been reduced to using the decomp to minimise the pressure some on the cheap plastic parts. But I couldn't handle the fact that the Chinese decomp didn't work right. I just "needed" to fix it.
 

Terry Syd

Pinnacle OPE Member
Local time
11:04 PM
User ID
575
Joined
Jan 18, 2016
Messages
1,589
Reaction score
5,973
Location
Comboyne, NSW Australia
Country flag
When I get these Chinese de-comps I'll put in a second groove. I also intend to 'lap' the valve with some 'fine grit' valve grinding paste. The valve seat looks like it is just machined and not lapped to seal.
 

Terry Syd

Pinnacle OPE Member
Local time
11:04 PM
User ID
575
Joined
Jan 18, 2016
Messages
1,589
Reaction score
5,973
Location
Comboyne, NSW Australia
Country flag
Pretty bizarre manufacturing, I wonder how much money they saved by eliminating the second groove? LOL!

Maybe they designed them to be a universal 'tune-able' decomp - you get to put in the second groove any way you want - shallow, deep, your call. Someone should call Marketing and try to spin it.
 

traffic903

Pinnacle OPE Member
Local time
11:04 PM
User ID
3911
Joined
Aug 28, 2017
Messages
343
Reaction score
1,390
Location
Australia
Country flag
A 3/16" chain file works perfect with the valve chucked up in a drill. But what's the trick to getting the springs and bearings back in? They sure came out easy enough!

Yes they do!! Just position the shaft back in the body with the top end sitting just slightly below the holes for the springs. Now drop one of the springs down into the body and it will sit on the end of the shaft at the right level to line up with a spring hole. Use a pick or some other pointy object to position the spring flat and then slide it into its hole. Now drop down a bearing a push it in hard. It should kind of stay there. Do the same for the other 2 holes. Once all the springs and bearings are in, put some light upward pressure on the shaft and at the same time use a small flat blade screwdriver, or similar, to push the balls in their holes. Go slowly and carefully here or you will pop them out and have to start again! Once you get the hang of it, it goes pretty smoothly. Hope this helps.
 
Top